Make Huawei and Google do business again 🤝
Implementing Build Variants to join two worlds.
Table of contents
- 🌃 Do business again in your App!
- 🚦But first, What is the need for this?
- 🌎 Building The Mapy App
- 🧘🏻♂️ Final thoughts
🌃 Do business again in your App!
Maybe would be really difficult to reconcile the USA and Huawei relationships but, there is no excuse to make Huawei and Google technologies the best friends for your App!
In this post, you will learn a way of managing how to build an app with the Huawei Mobile Services and the Google Mobile Services so, you can have two different variants of your app in the same project without the need for a separate repository or any dark magic.
🚦But first, What is the need for this?
Firstly, to understand why do you would consider integrating the HMS and the GMS in the same app, let's know what is the GMS:
Google Mobile Services (GMS) is a collection of proprietary applications and application programming interfaces (APIs) services from Google that are typically pre-installed on Android devices, such as smartphones, tablets, and smart TVs. Definition from Wikipedia.
The above allows any compatible smartphone to have access to using Google Products and Services with ease, but not only that; developers have access to a large variety of that benefits by using popular APIs like Maps, Monetization, Analytics, ML, etc.
But, problems for Huawei started in August 2018 when the NDAA signed into law a provision that banned Hauwei and ZTE equipment from being used by the US government. But the strong hit comes in May 2019 when the Department of Commerce added Hauwei to its Entity List which cause a strong limitation on to supply of goods, technology, and services. For its smartphones, Google was prohibited from working with Huawei, which means that Huawei phones cannot use Google's apps (Gmail, Maps, Youtube, etc). Also, in August 2020 the ban includes semiconductor trading with Huawei.

Since then, Huawei started rethinking its commercial strategy and technology application to its products. Huawei Mobile Services were born in 2018, so, one of those strategies consisted of power-up this technology ecosystem for users and developers. Now, developers can integrate features like payments, ads, maps, search, AR, and so many other awesome capabilities into their apps that run on devices with HMS. Usually, the apps that use HMS are available for download from the official Huawei app store called AppGallery.
According to Wikipedia, HMS are:
Huawei Mobile Services (HMS) is a collection of proprietary services and application programming interfaces (APIs) developed by Huawei Technologies Co., Ltd. It is typically installed on Huawei devices running the Android operating system including devices already distributed with Google Mobile Services. Definition from Wikipedia.
👩🏻💻 How does this affect developers?
This situation makes the developer have to take new architectural software decisions when you want to launch an App on AppGallery and at the same time in Google Play. But then you find a series of obstacles when you integrate it into an App. An app with HMS needs a device with the HMS Core APK installed, this APK is always installed in Huawei devices, but not always in other brands. A lot of functionalities only work this way. So you need to separate from your code the Huawei dependencies and your Google dependencies.
🧩 What options do you have?
- The most obvious is to copy-paste a project and delete all Google Mobile Services code and introduce Huawei dependencies and build it around it.
- Create a monster that includes Google and Huawei dependencies and hope it does not crash on build or runtime because of incompatibility or inconsistencies of libraries and requirements.
- Use Build Variants! It allows you to separate code, resources, and configuration.
So, let's move on to the third option and learn how to create an App that takes the benefit of both worlds.
🌎 Building The Mapy App
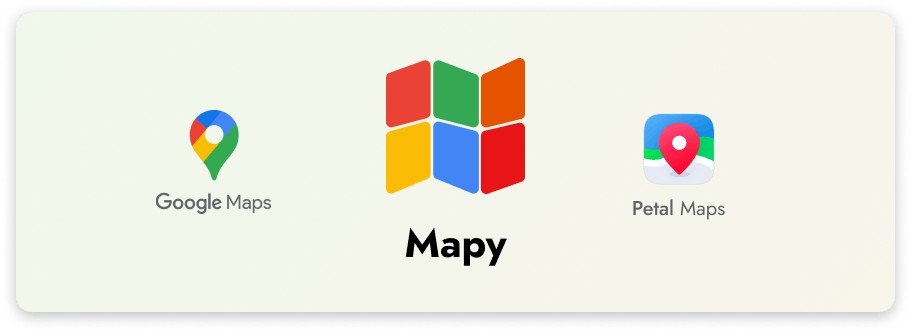
The app we will build consists on load a Map and one marker. This way we need to separate to use of Google Maps and Petal Maps to their specific implementation and platform.
But first, What is a Build Variant?
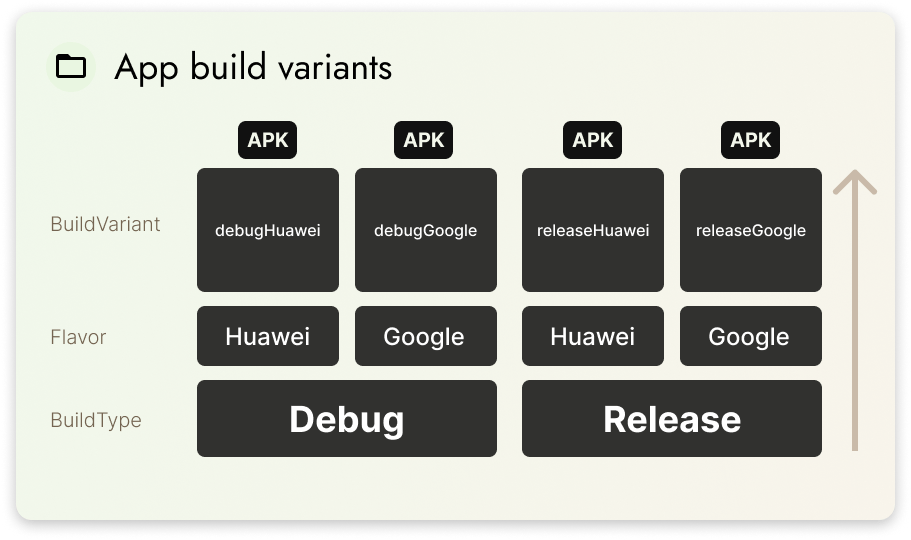
A Build Variant is the resulting combination of a set of Build Types and Flavors.
When we talk about a Build Type, it means that we can have a series of ways to configure the building of the APK using specific settings for the signing configuration, code obfuscation, app id, etc. Usually "release" and "debug" are the default build types you use in a project.
Otherwise, a Flavor allows us to define different resources to take when the app is building, you can define code, layouts, drawables, and dependencies for a specific case but only for that flavor. Usually, flavors are used for "free" and "premium" versions of your app.
So, for example, a Build Variant can result in a combination of a "release" Build Type and a "free" Flavor or a "release" Build Type and a "premium" Flavor.
The image below shows how you can structure your Build Variants for an app that wants to separate the Huawei and Google implementation.
🧰 Requirements:
- You need to have an account as a Huawei Developer, if you don't have one, please go to developer.huawei.com, click on sign-up, and complete the process.
- A Google Cloud Account with a free plan is enough to try this tutorial.
- A device compatible with Google Mobile Services.
- A device compatible with Huawei Mobile Services.
- Naturally, Android Studio 3.x.
🏂🏻 Let's build the app!
Basically, to code the app needs to follow the next 5 steps:

- 🤖 Create the project in Android Studio
- 🛠 Configuring the Huawei Developer Account
- ⚙️ Configuring the Google Cloud Account
- ⌨️ Build the Android App
- 📲 Run the code
🤖 1. Create the project in Android Studio
If you want to use a previously created project you can skip this step.
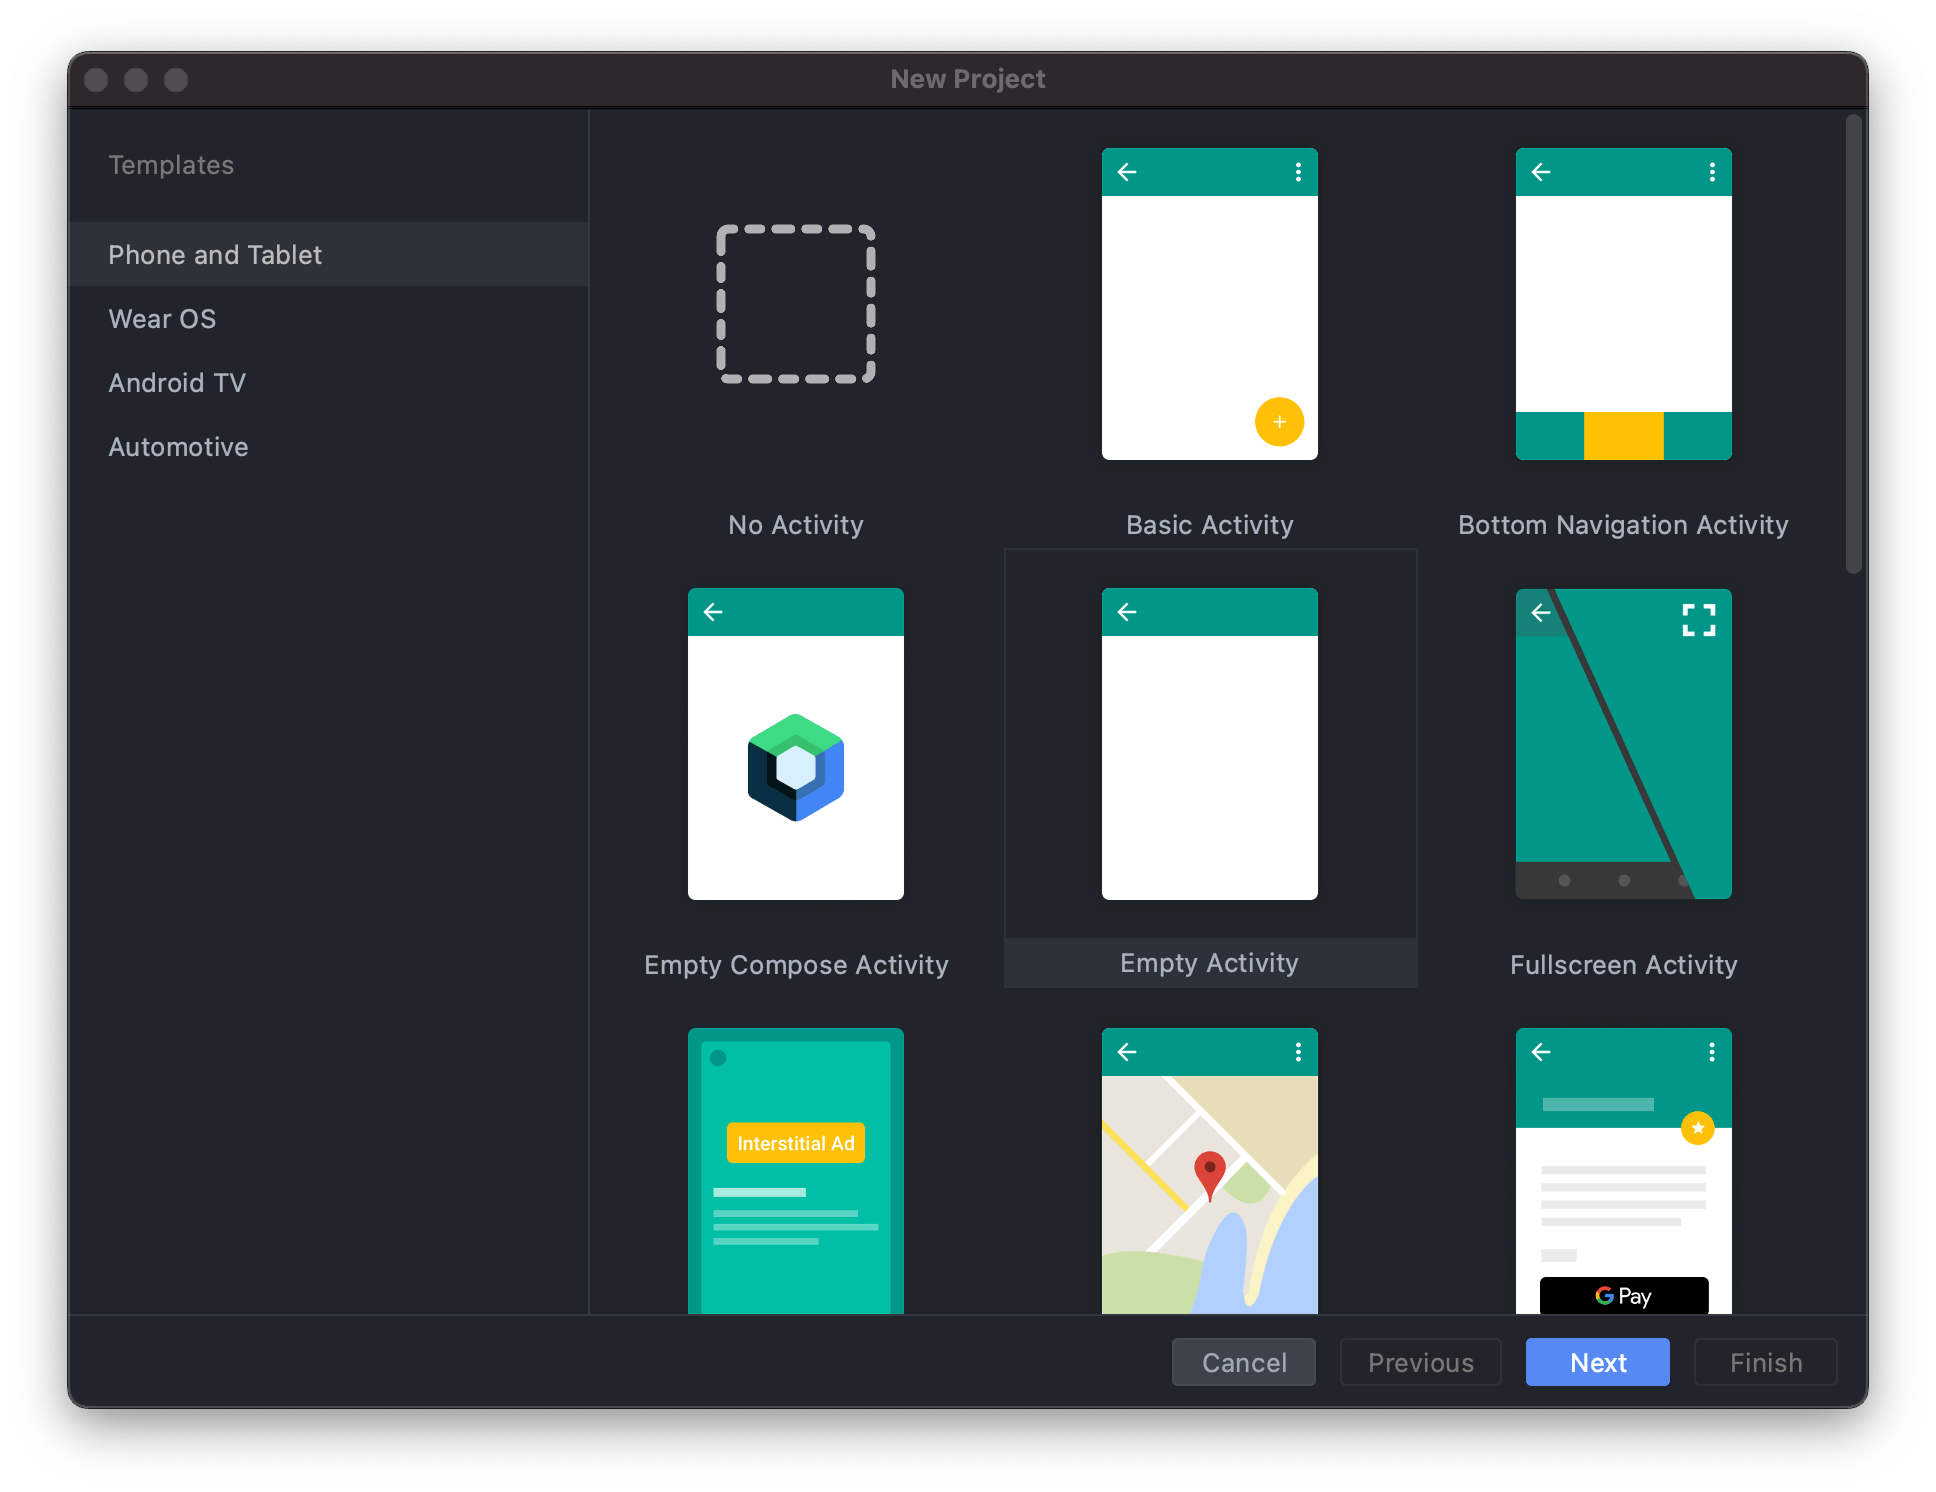
Open Android Studio and go to File > New > New Project. Select an Empty Activity and click Next.
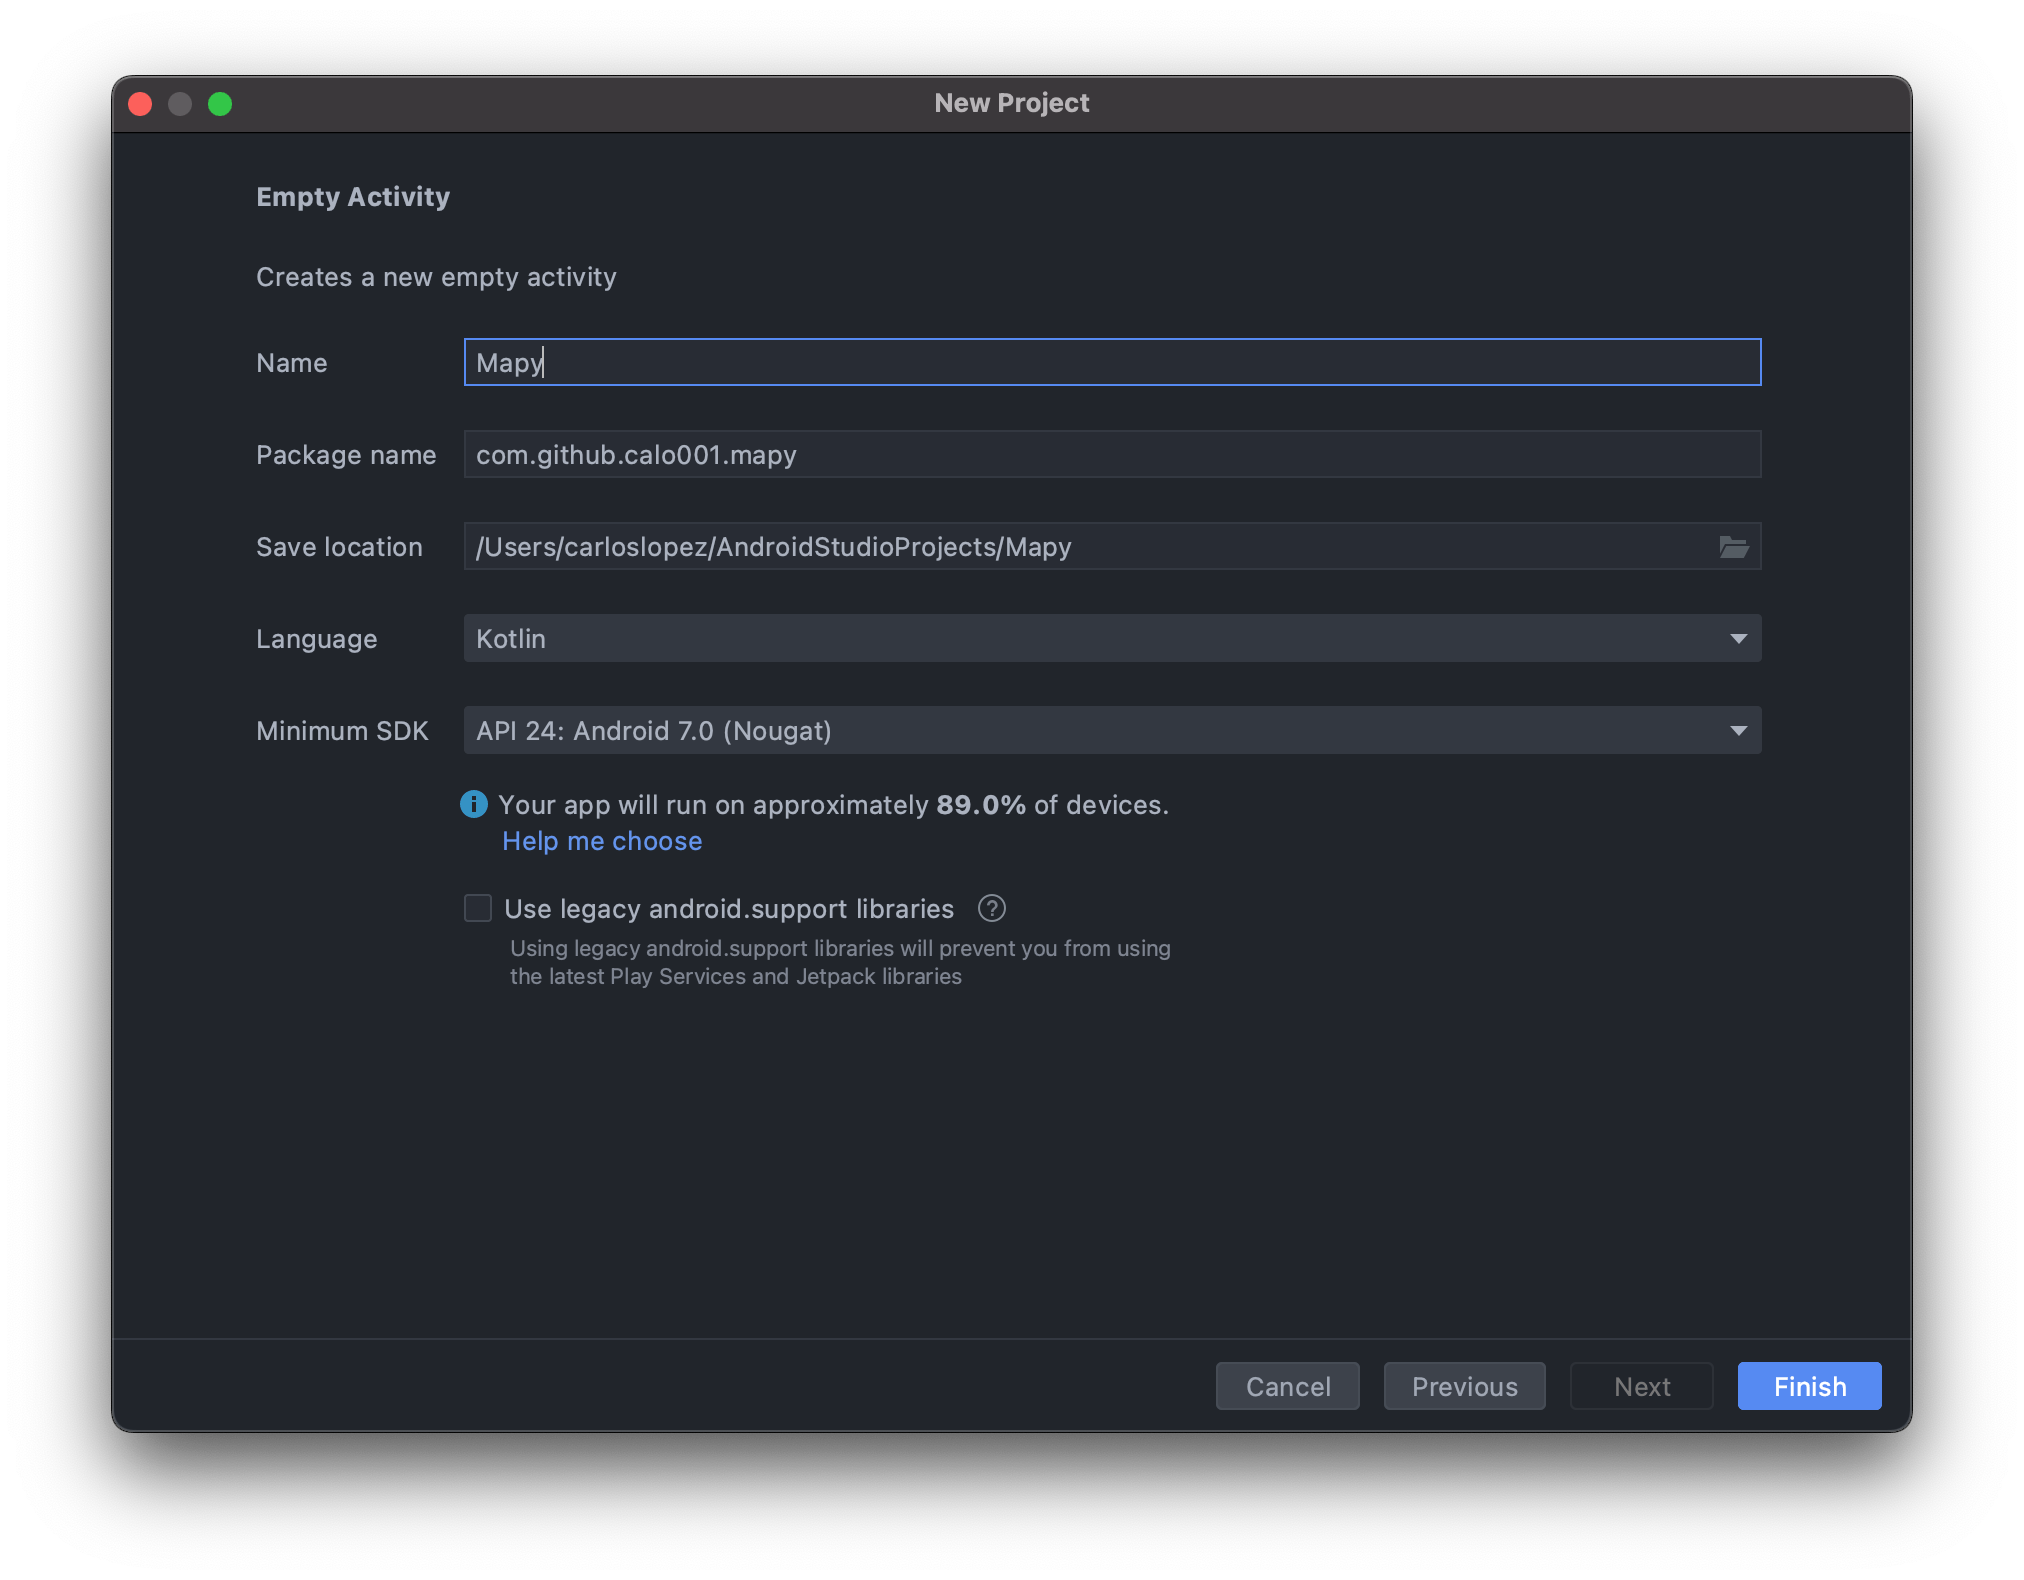
Change the name of the application to "Mapy" (or the project name you need to use) and add your unique package name. I'm using "com.github.calo001.mapy" but remember not to use the same because you need to register your app in the corresponding developer consoles. Then click Finish.
🛠 2. Configuring the Huawei Developer Account
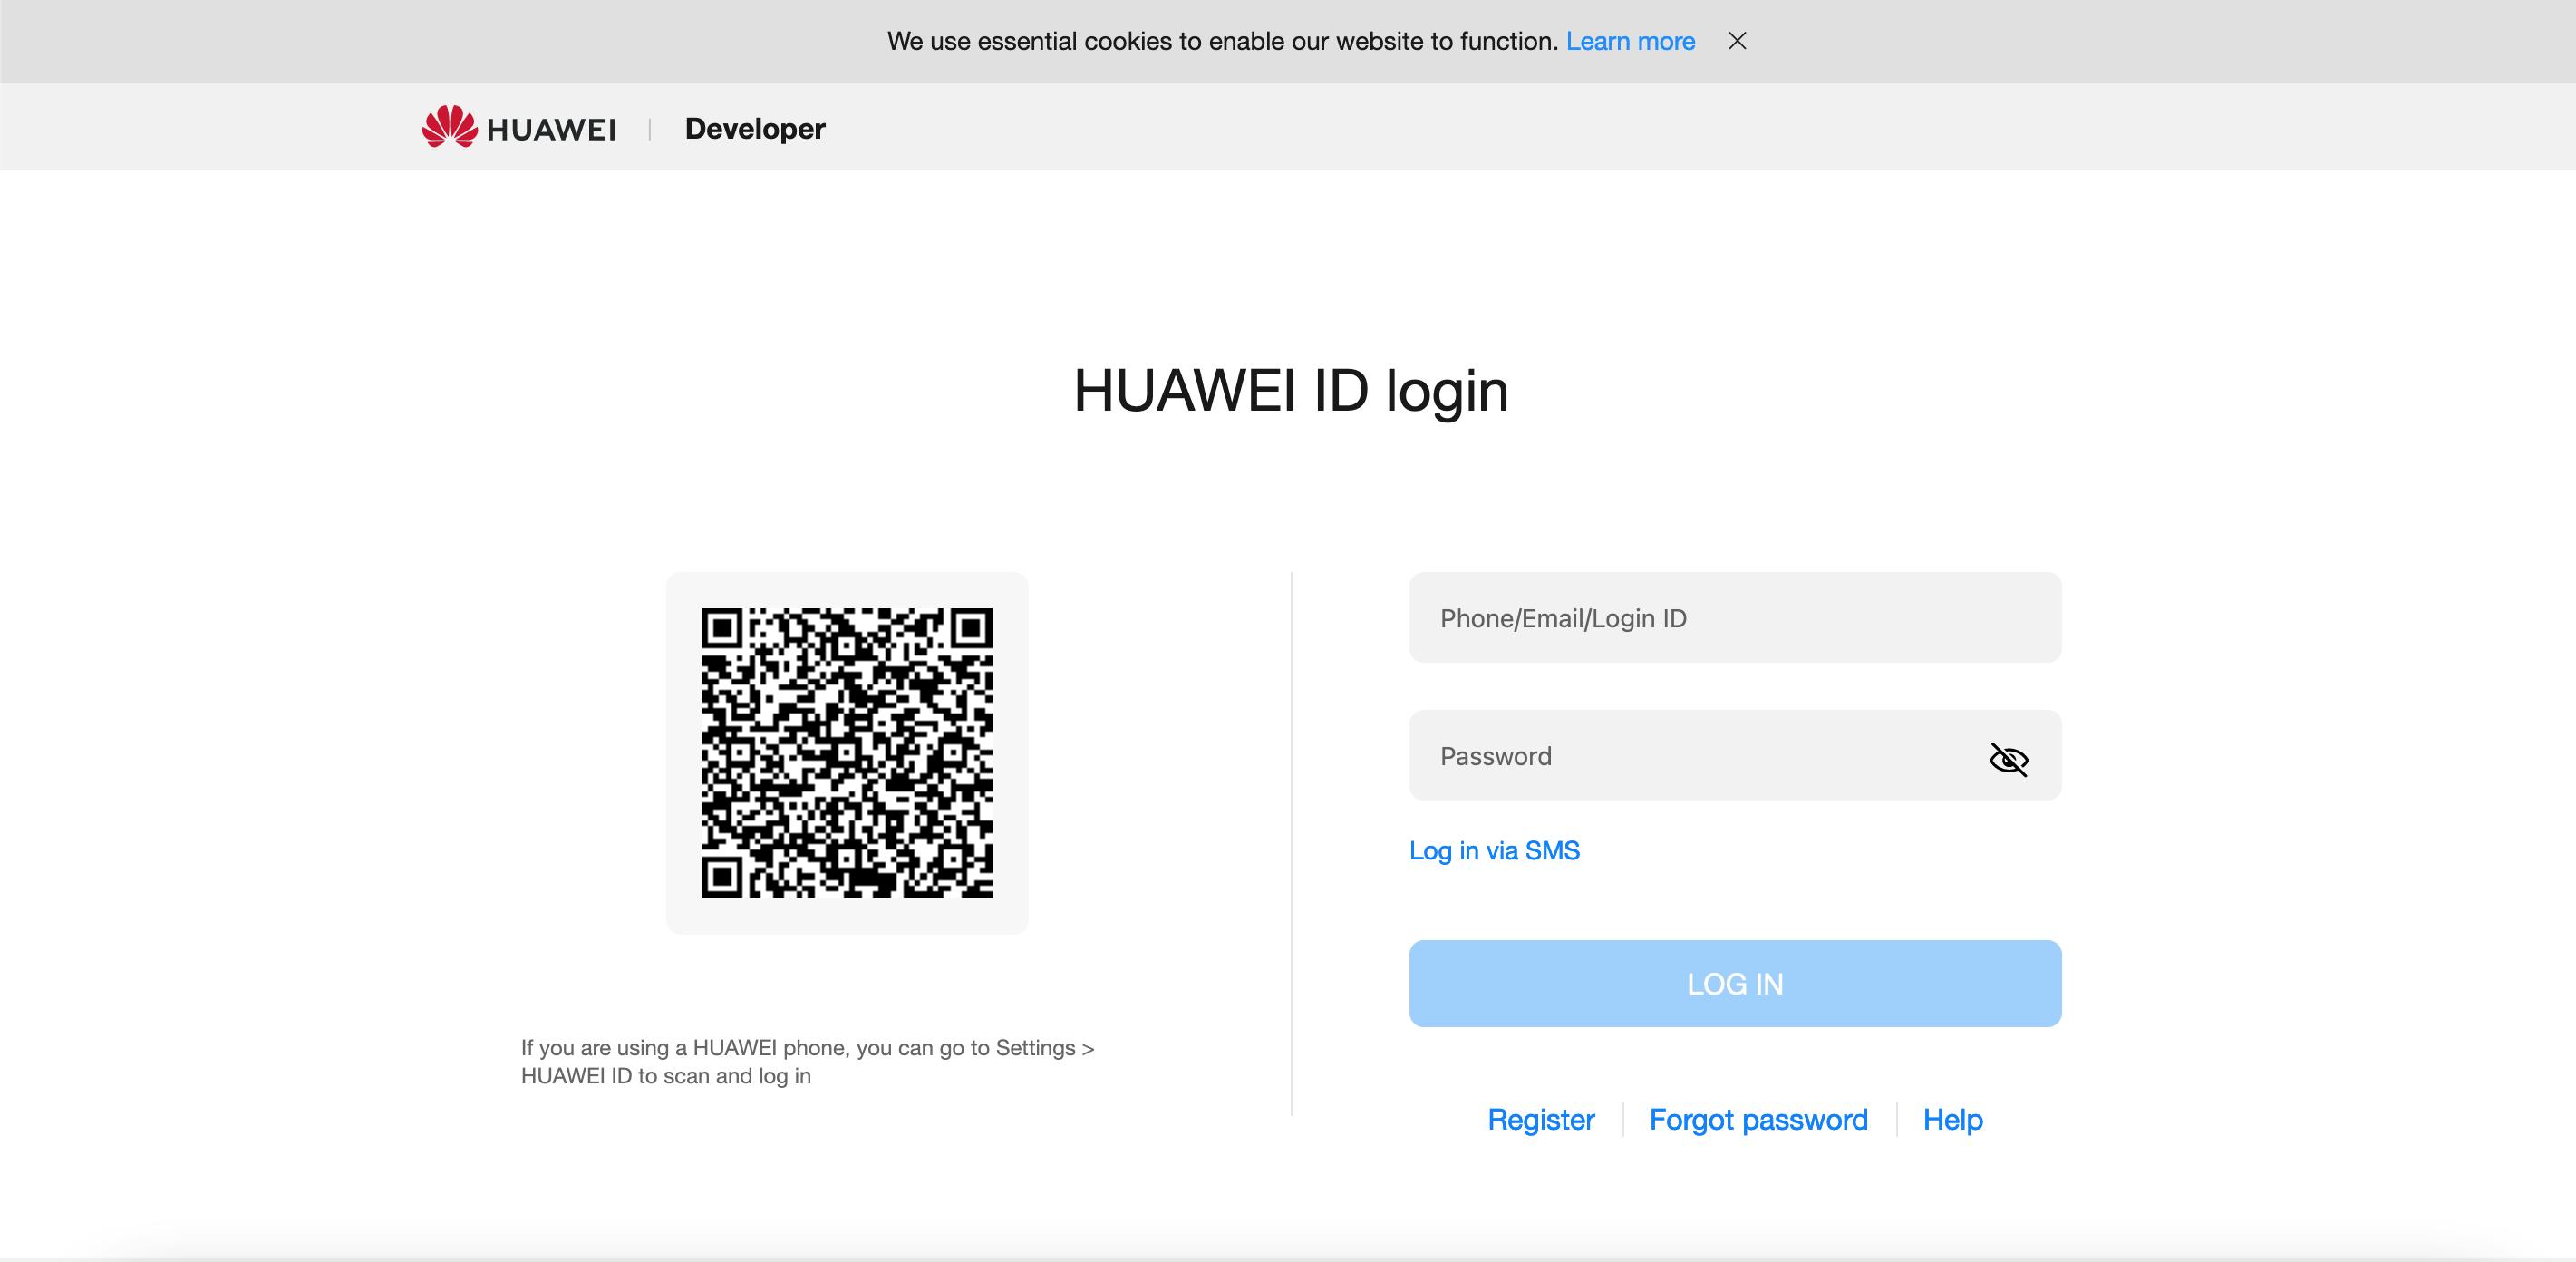
The first step is to visit the Huawei Developer Console and sign in with your credentials.
Then click on "AppGallery Connect."
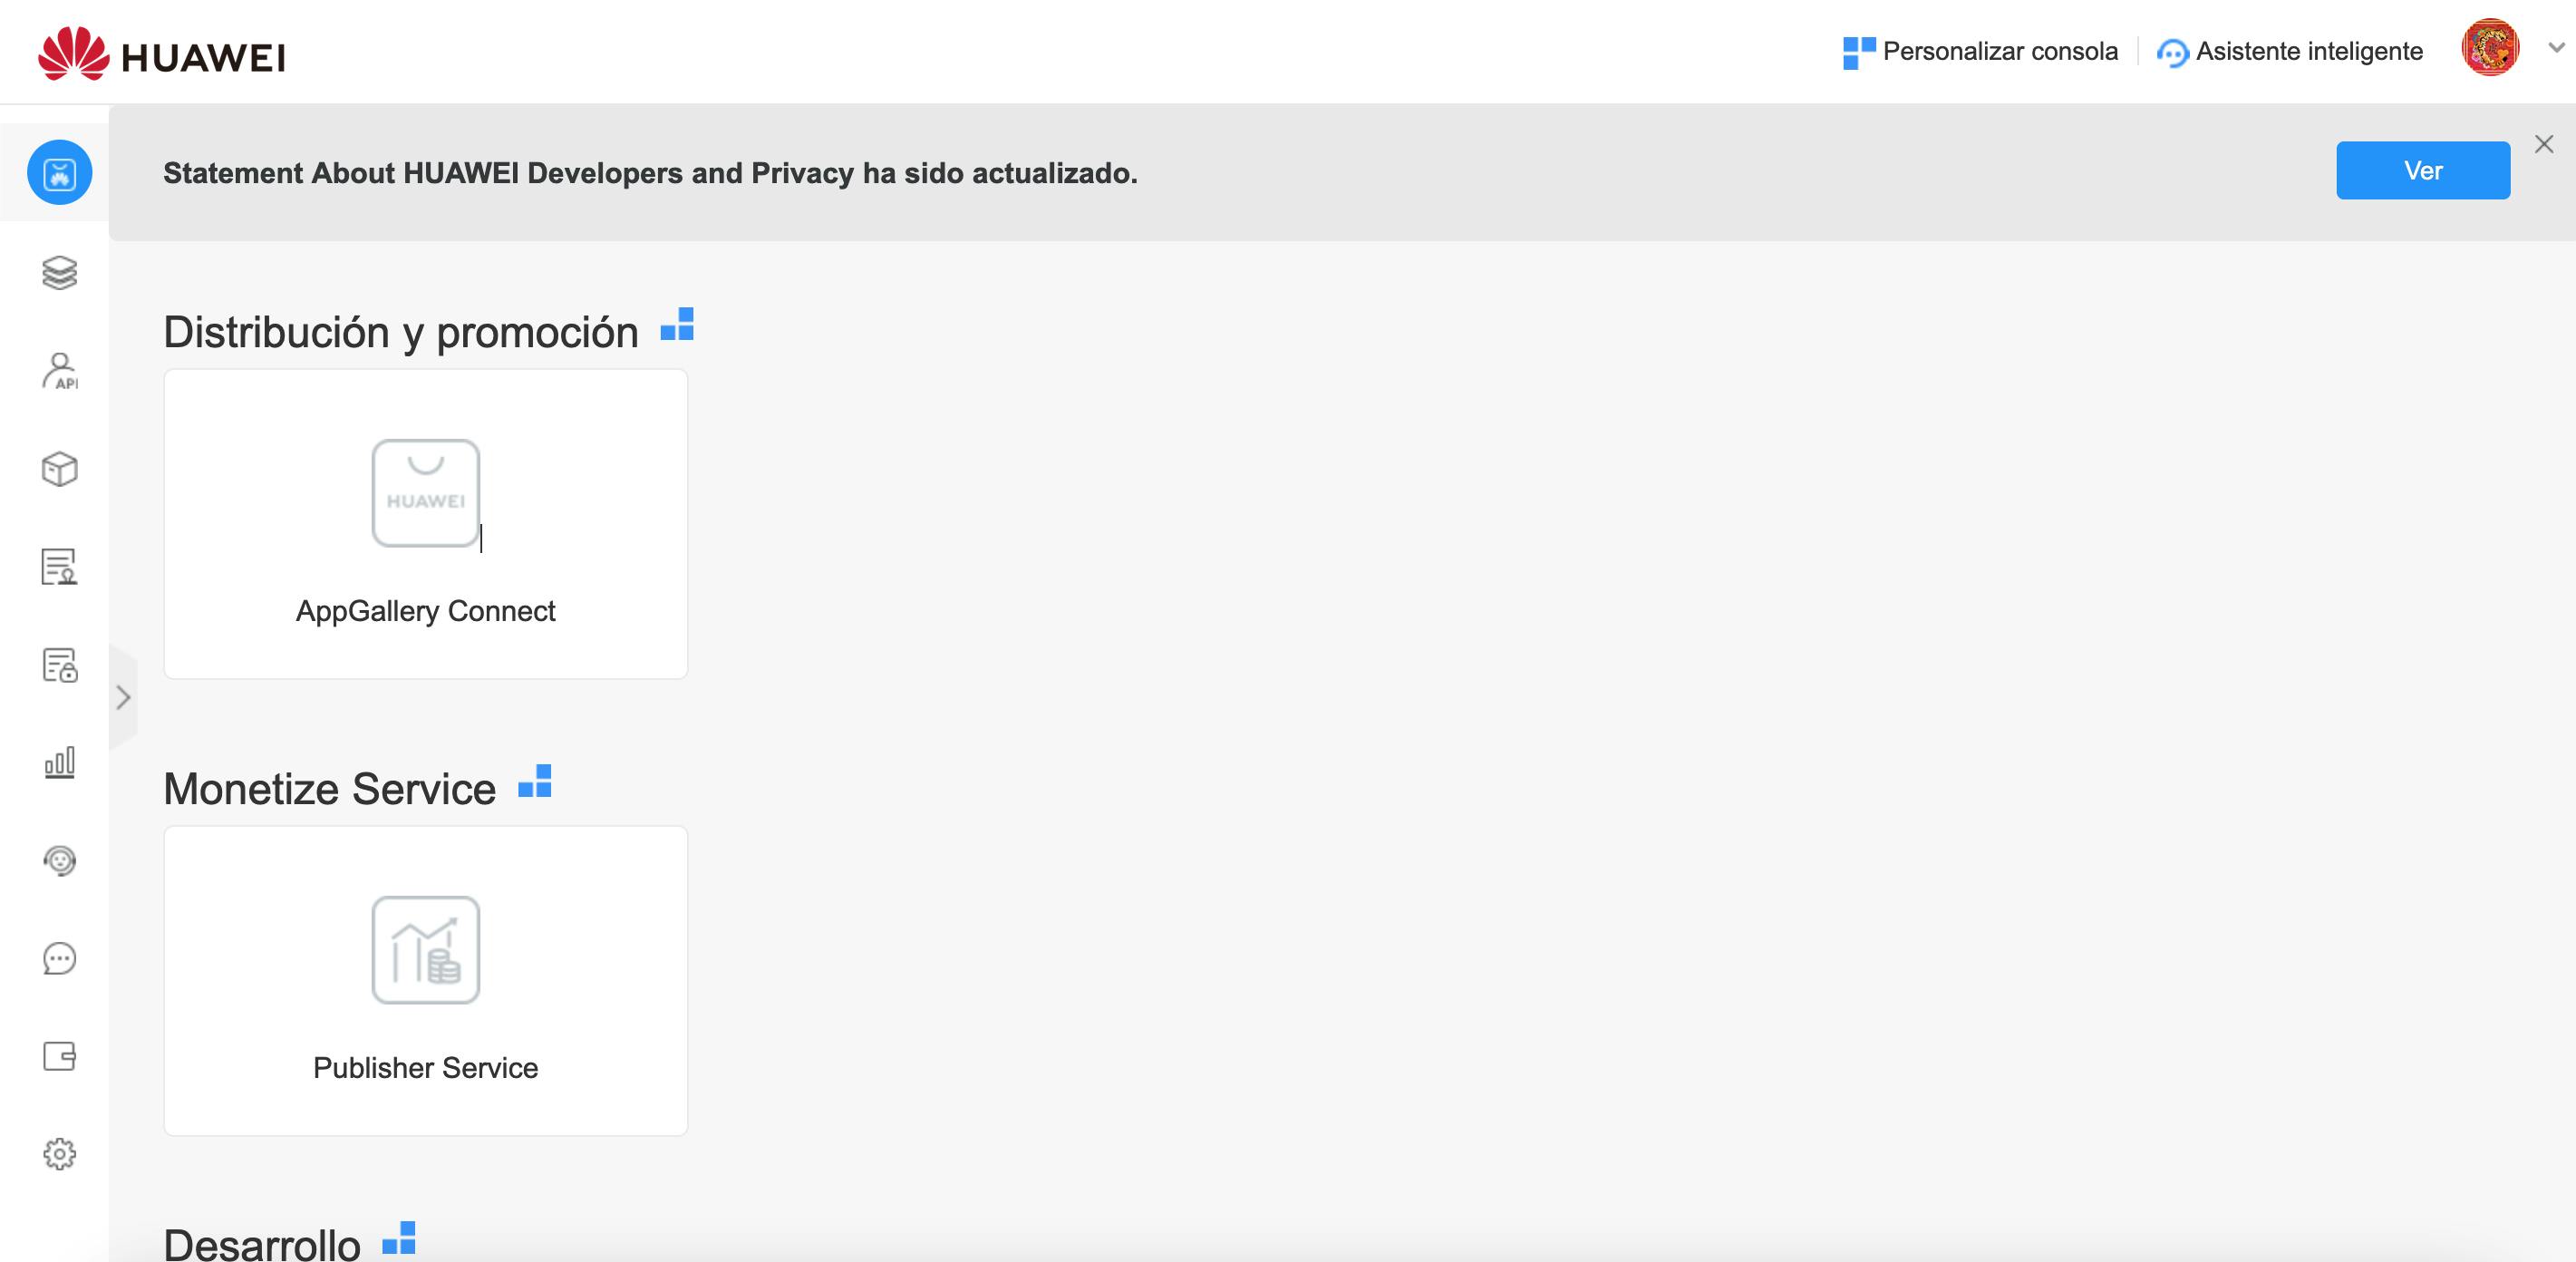
On the top menu, find "My projects" and click on it.
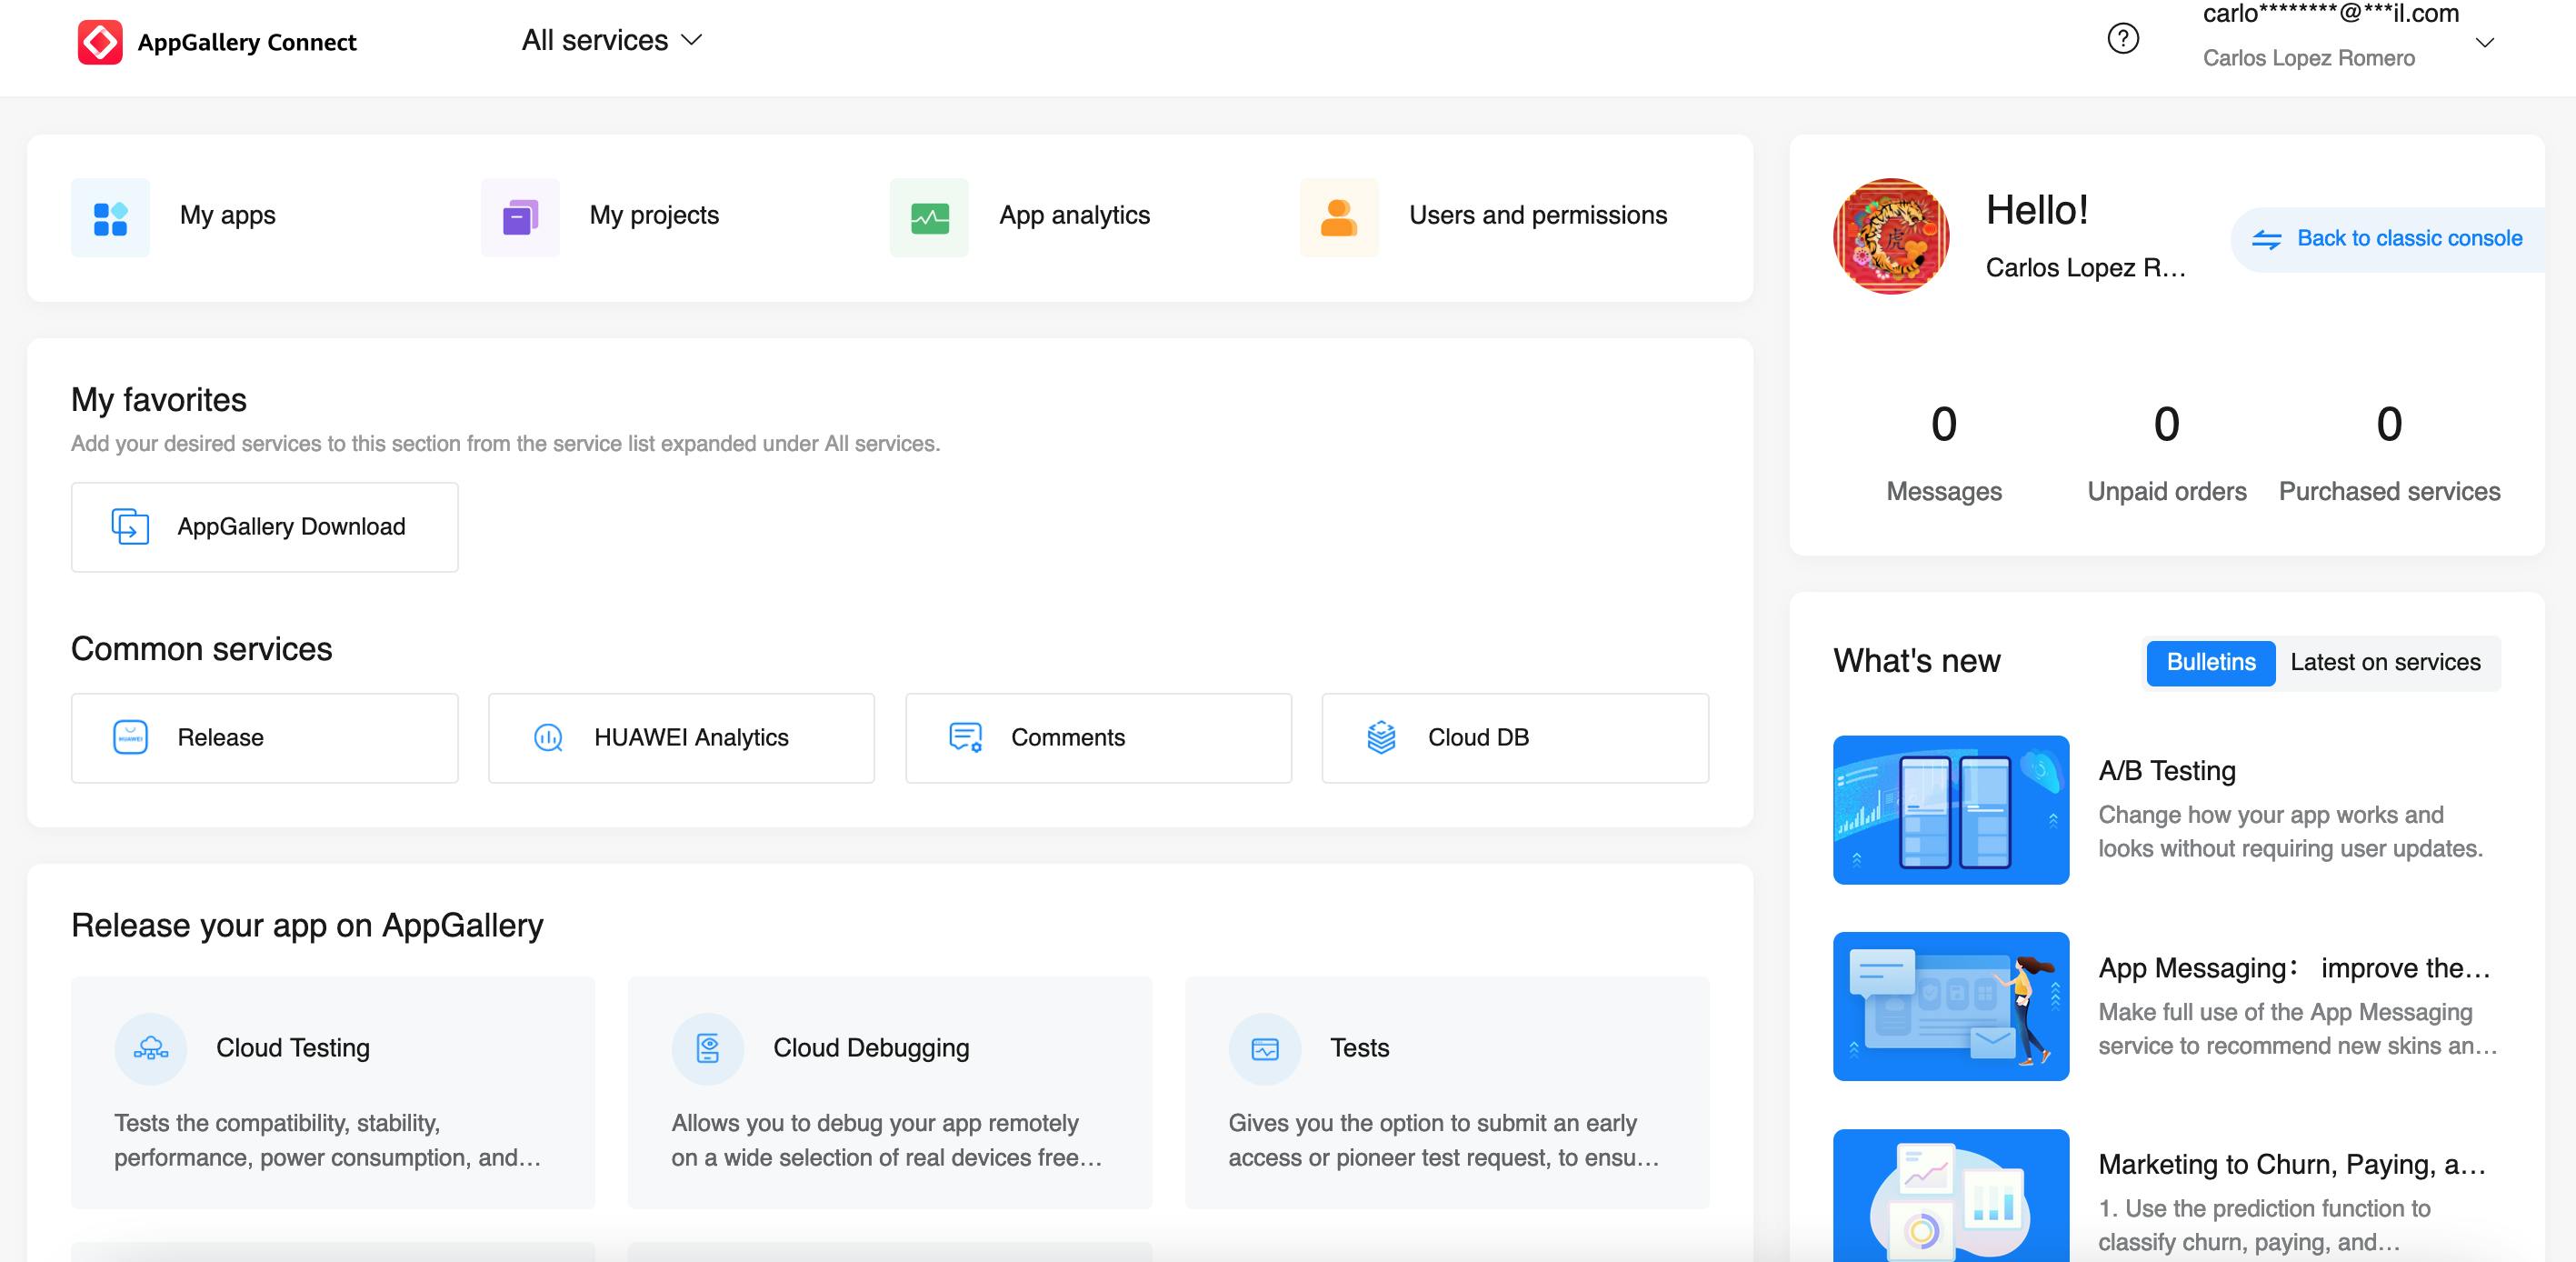
Now, click on "Add Project".
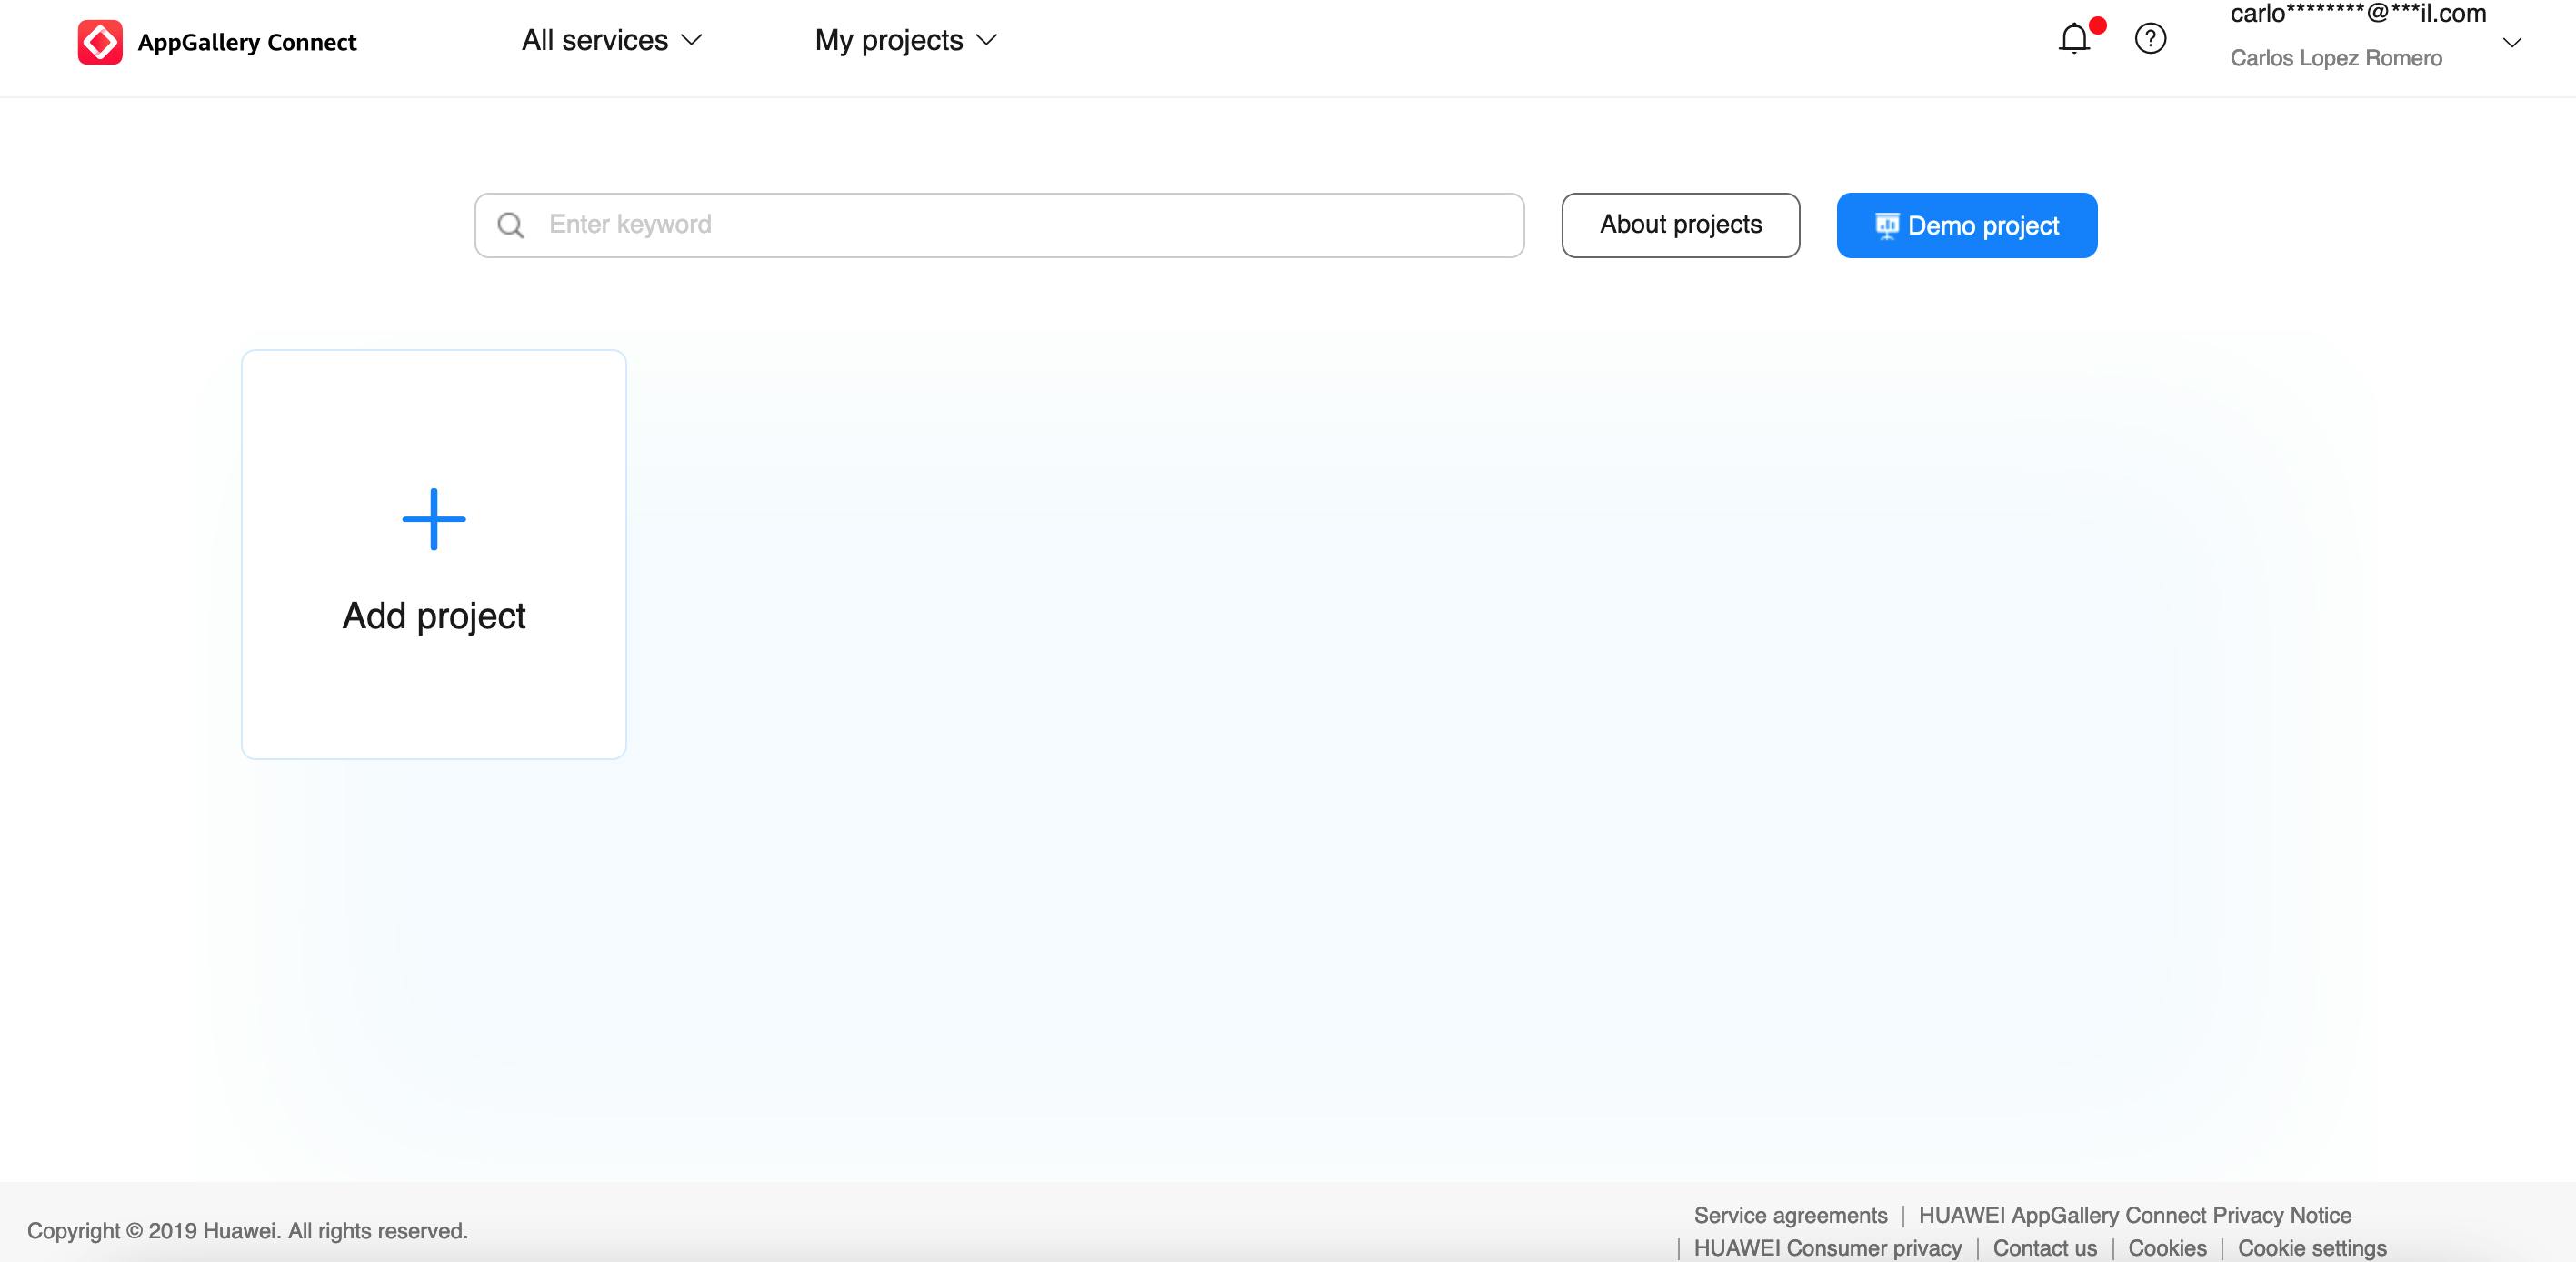
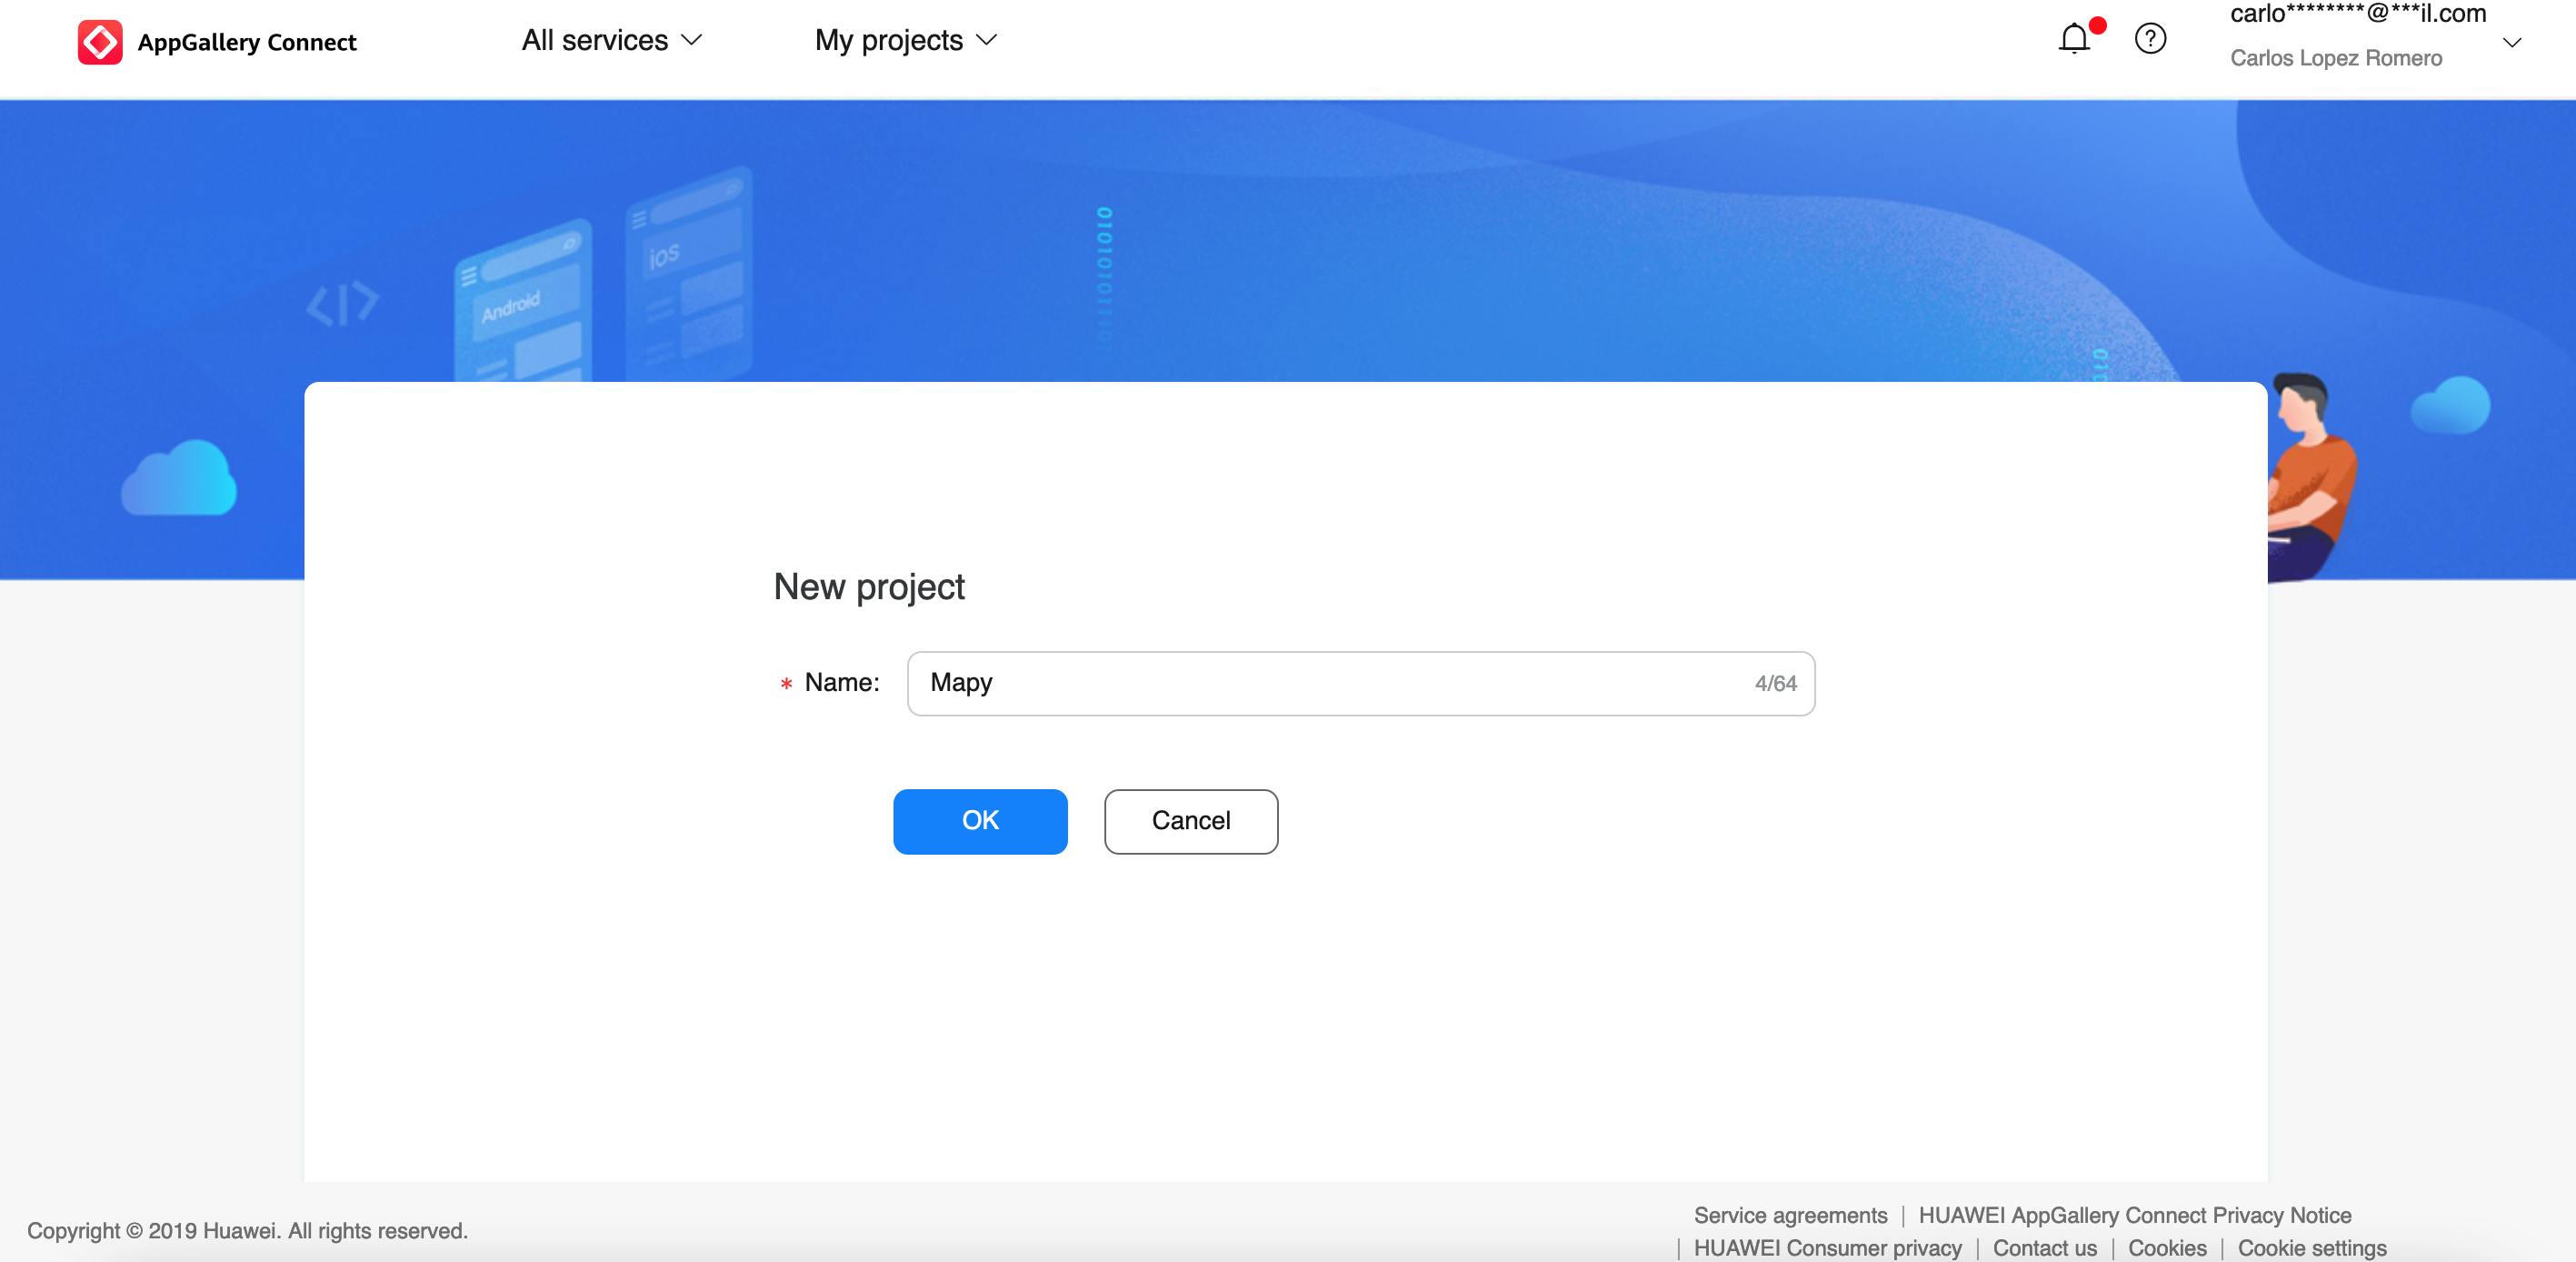
Now write down "Mapy" on the Project name input (or any other name you need or want to use). And next click "Ok".
Consequently, your project dashboard will appear, then find in the lateral panel the section of "Map Kit" and make a click.
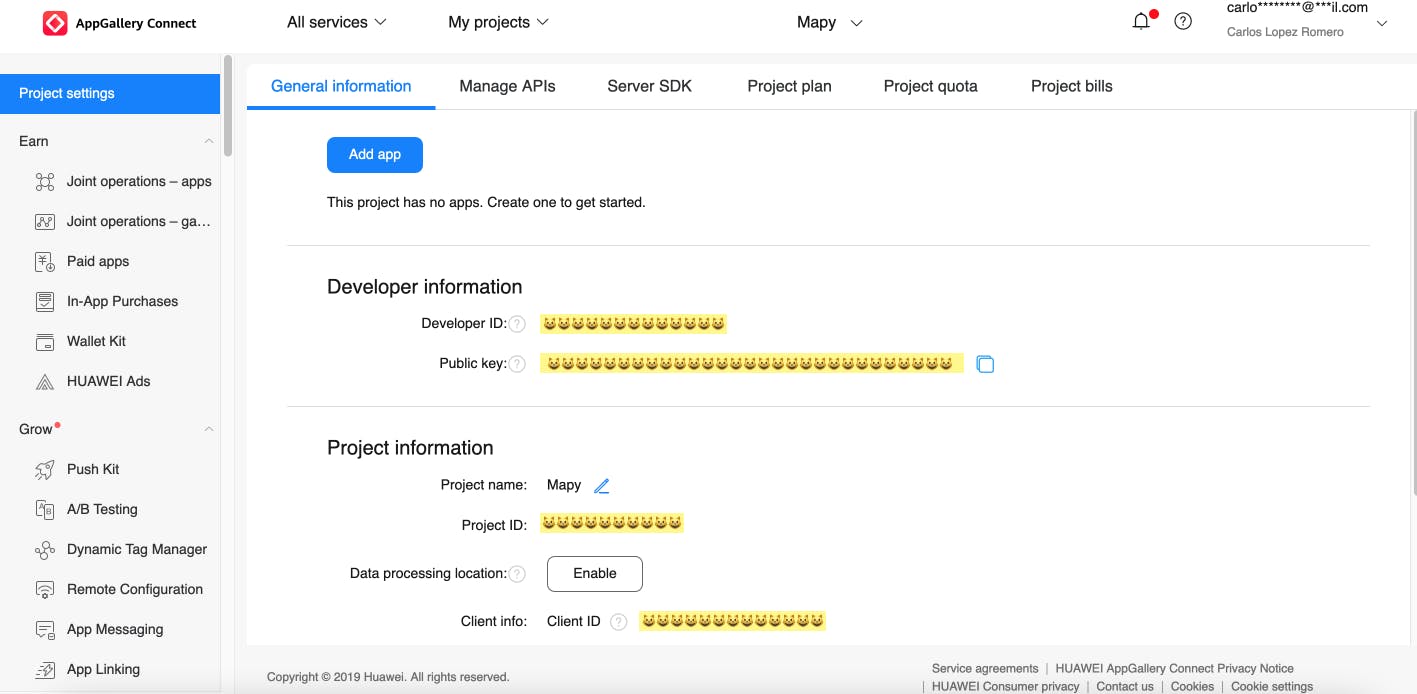
Click on the button "Android".
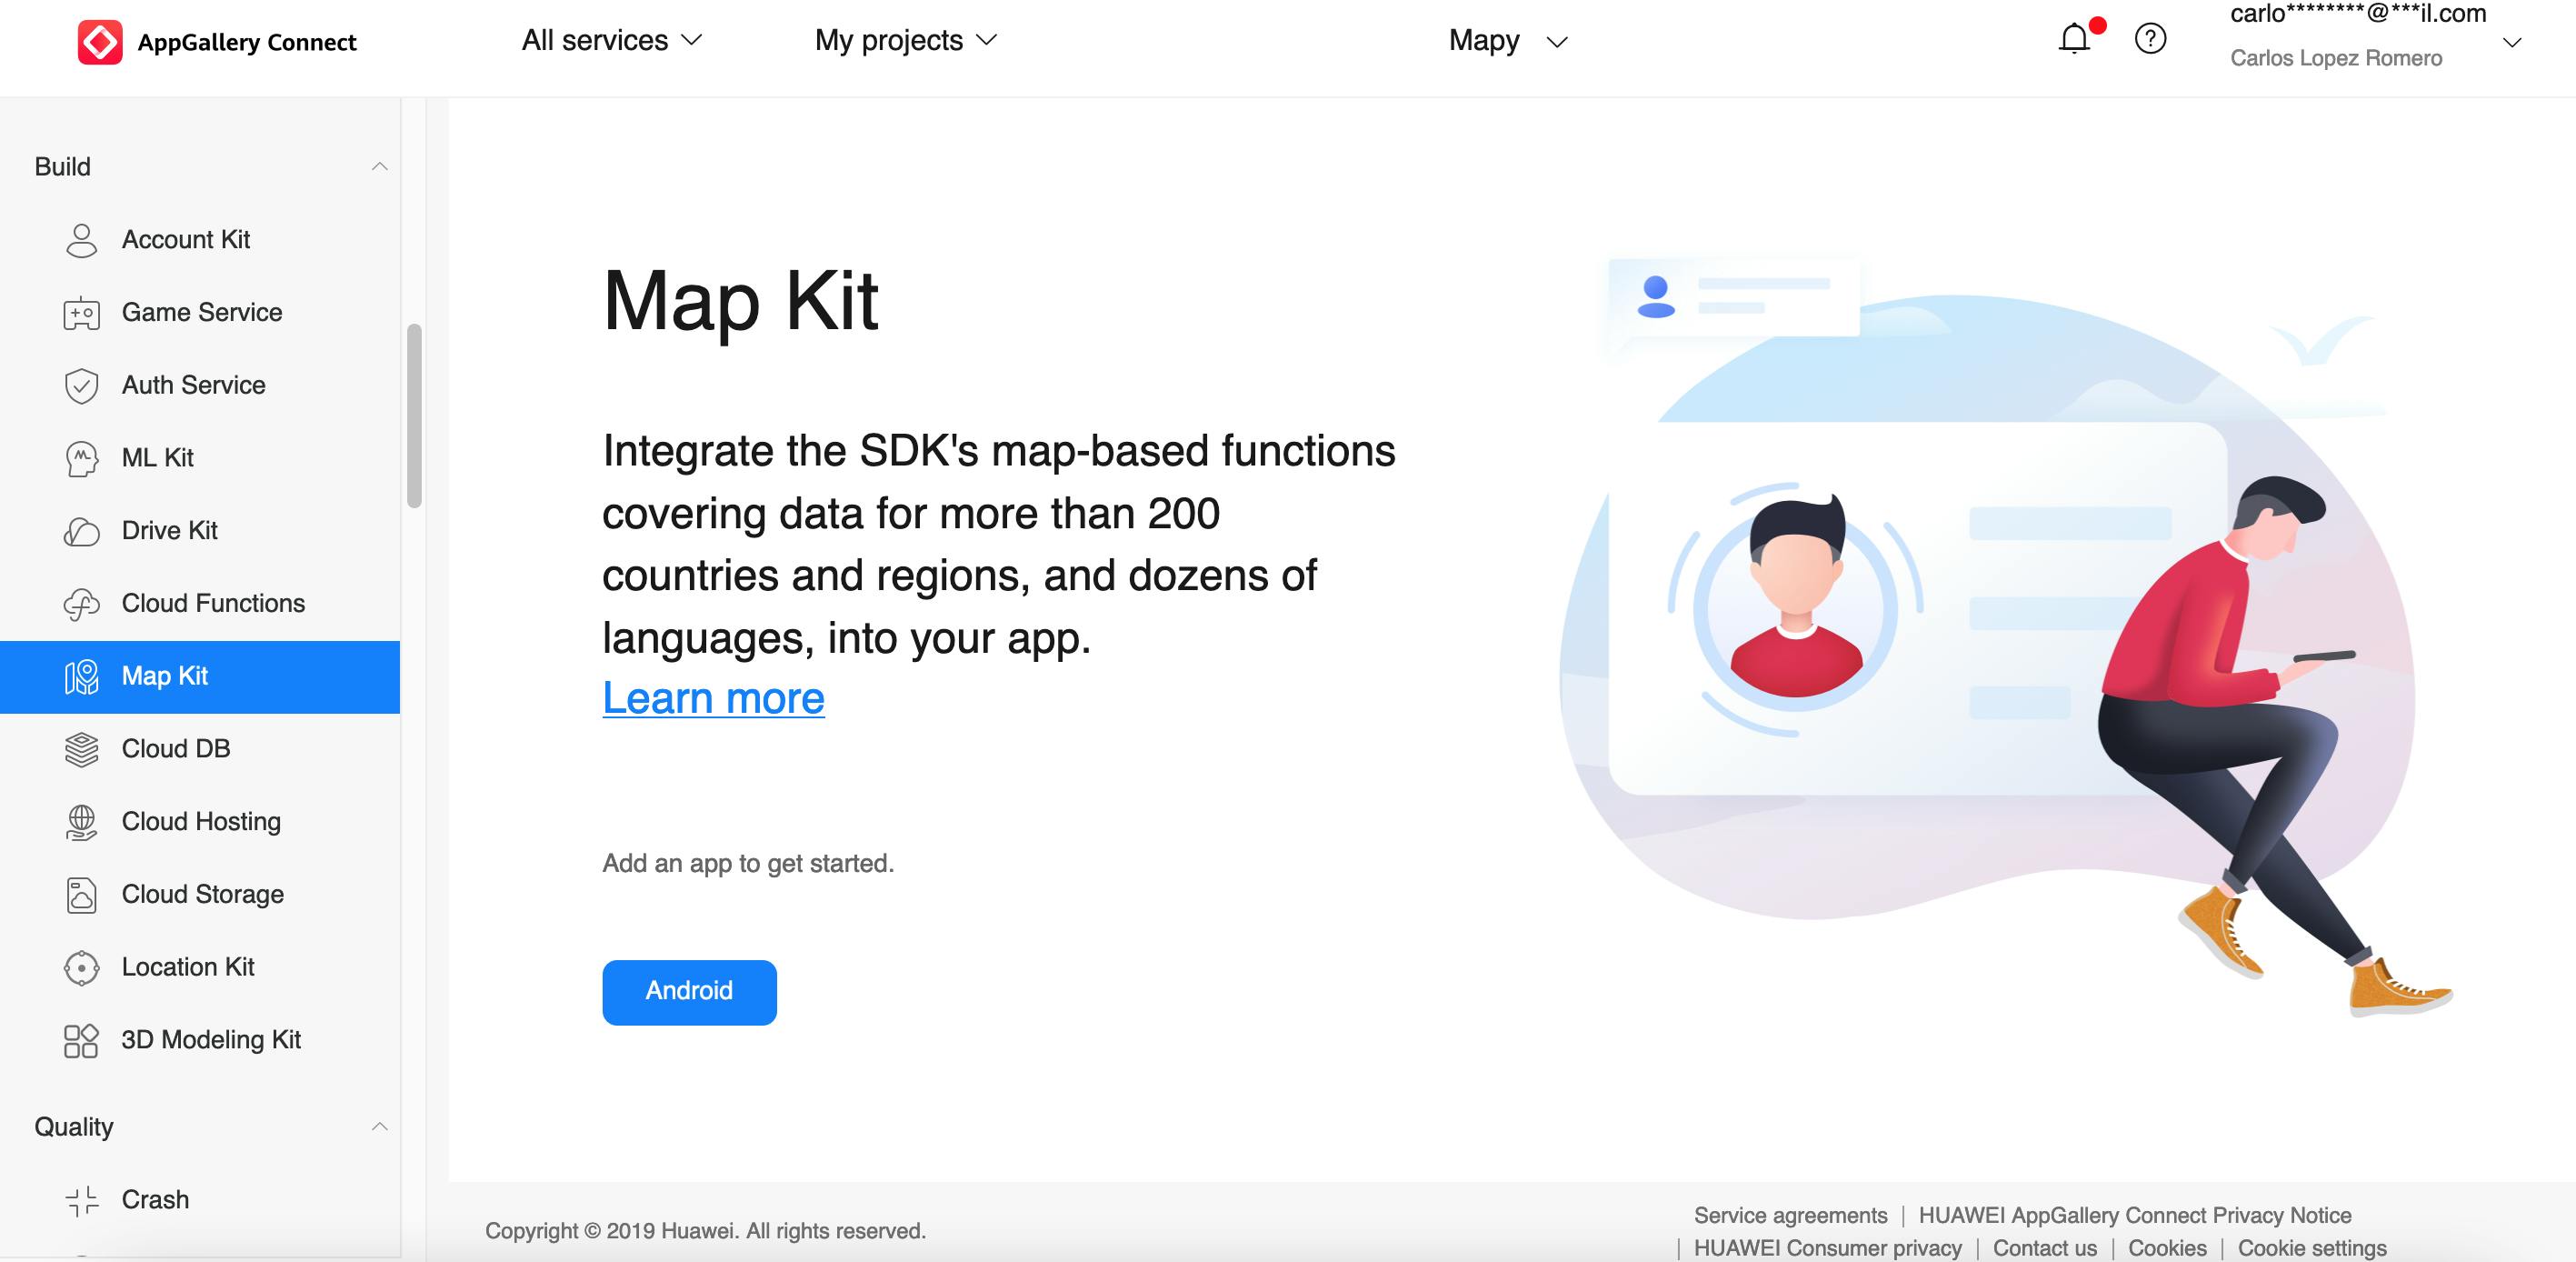
Add the project configuration data, Platform as "Android", Device as "Mobile phone", App name as "Mapy", Package name as "com.github.calo001.mapy", App category as "App" and Default language as "English (US)". Remember to adjust this form with your project data.
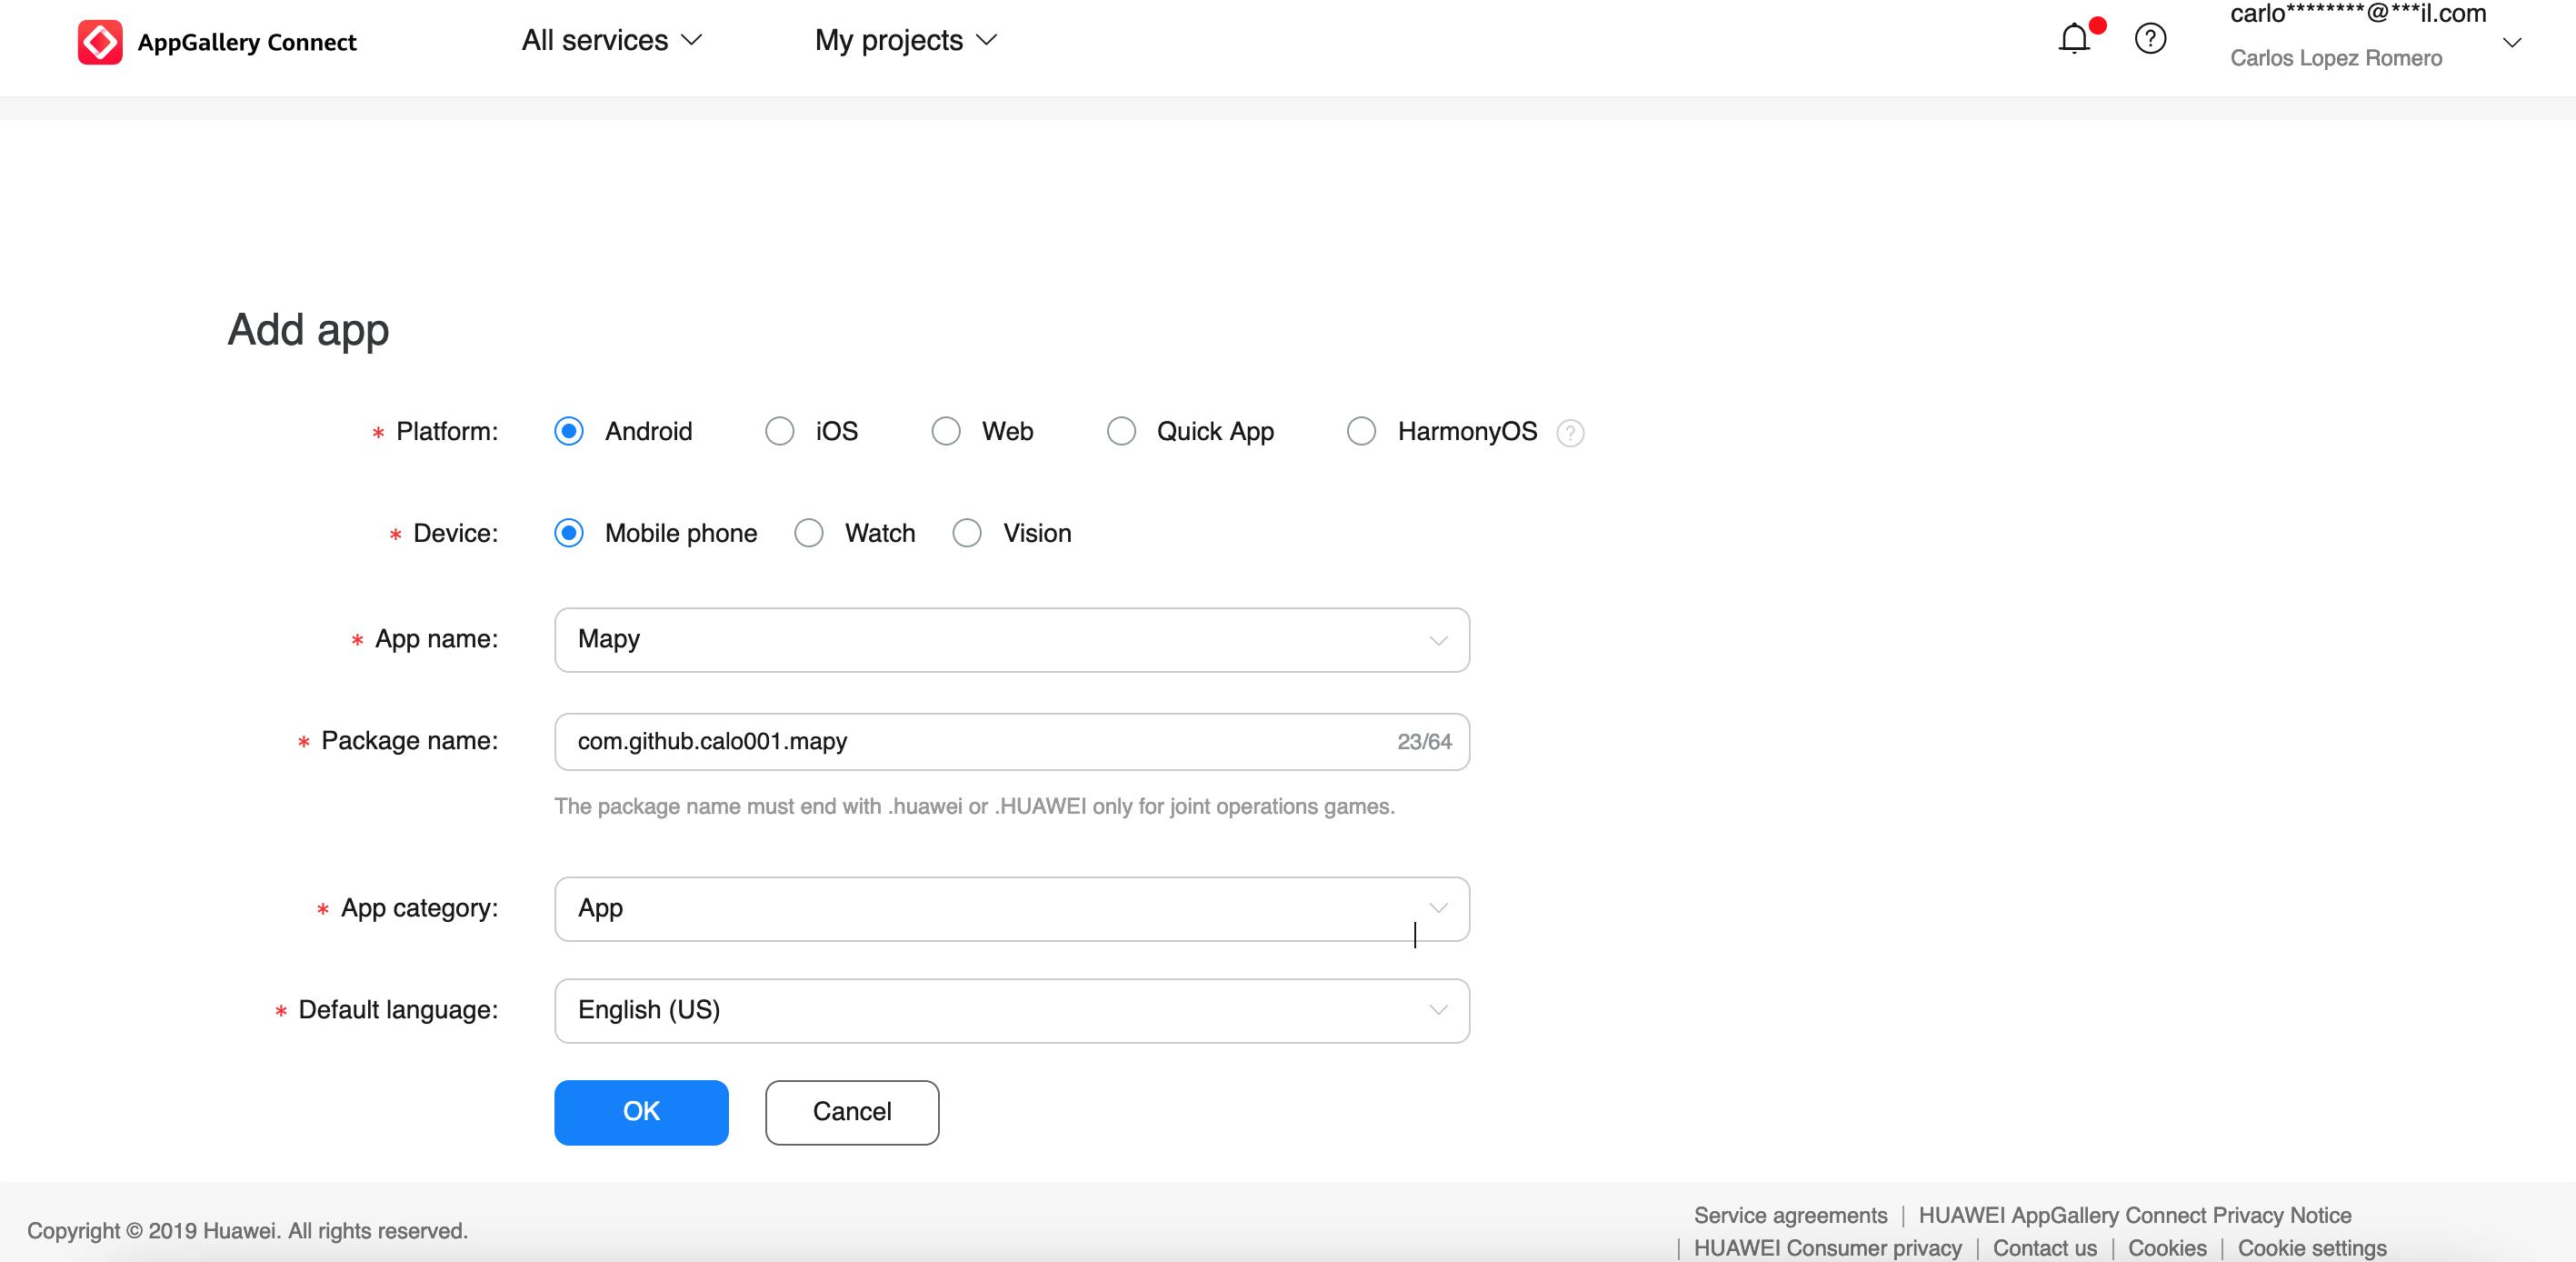
Now download the agconnect-services.json file and follow the instructions below. Basically, you need to copy-paste the downloaded file to your "app" folder inside your project directory.
This is very important because without the agconnect-services.json the map won't work for the Huawei Flavor.
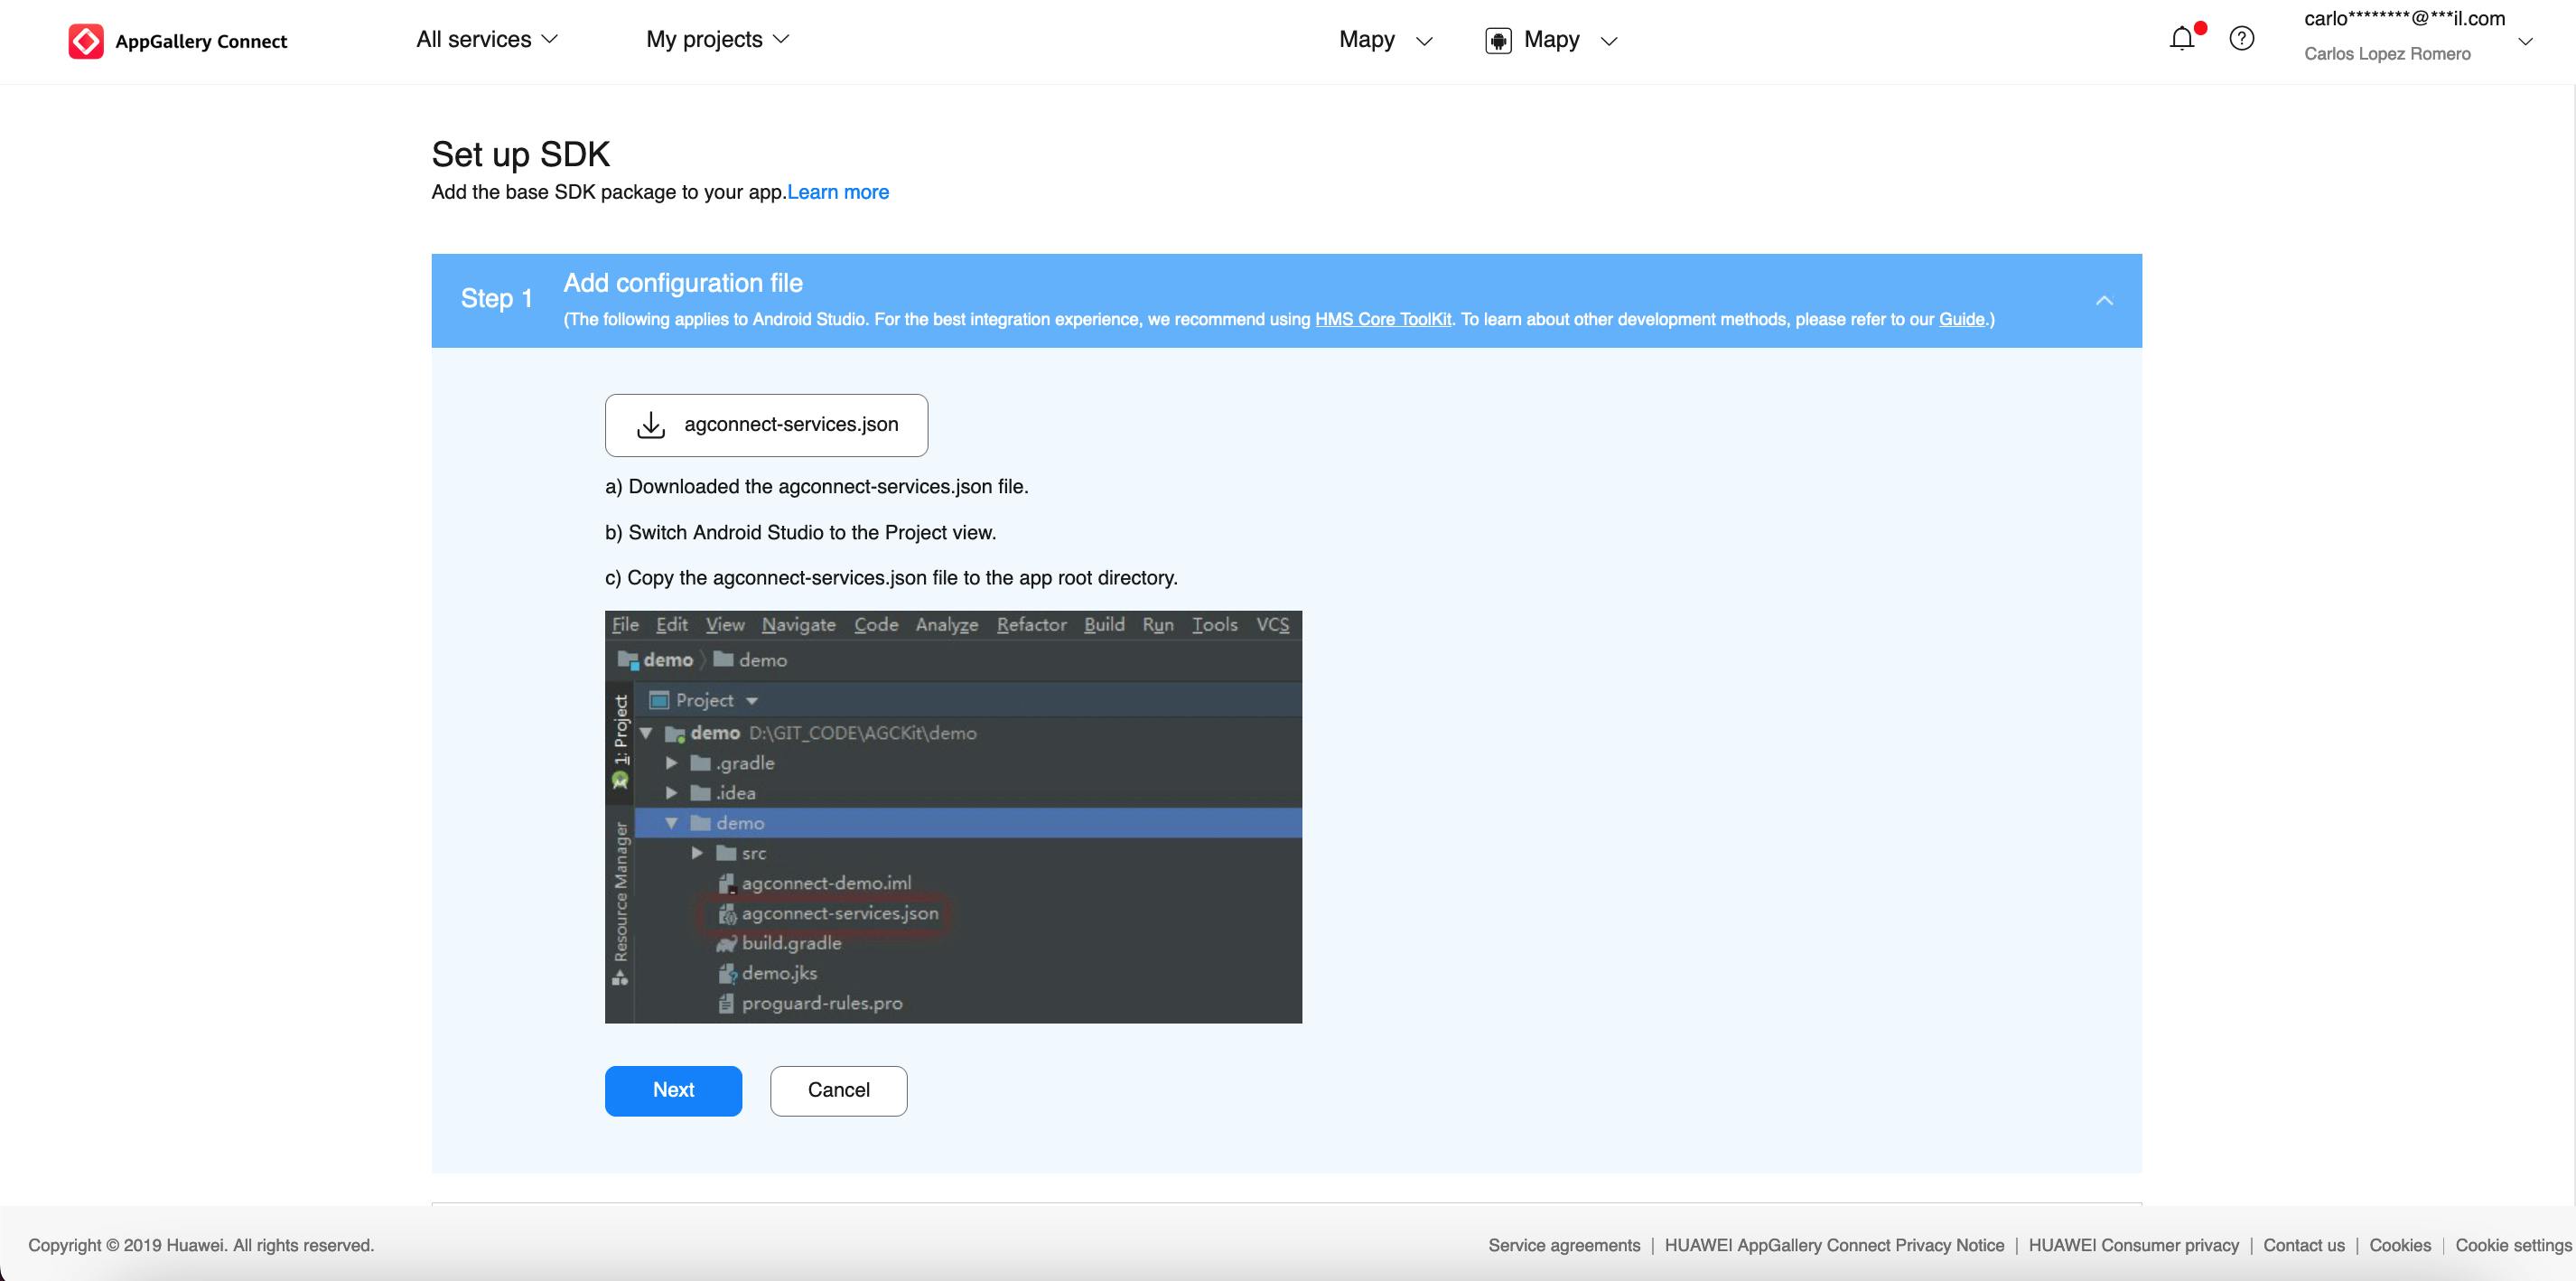
When you click next, these instructions will appear. for the moment you can skip this step and continue with the tutorial.
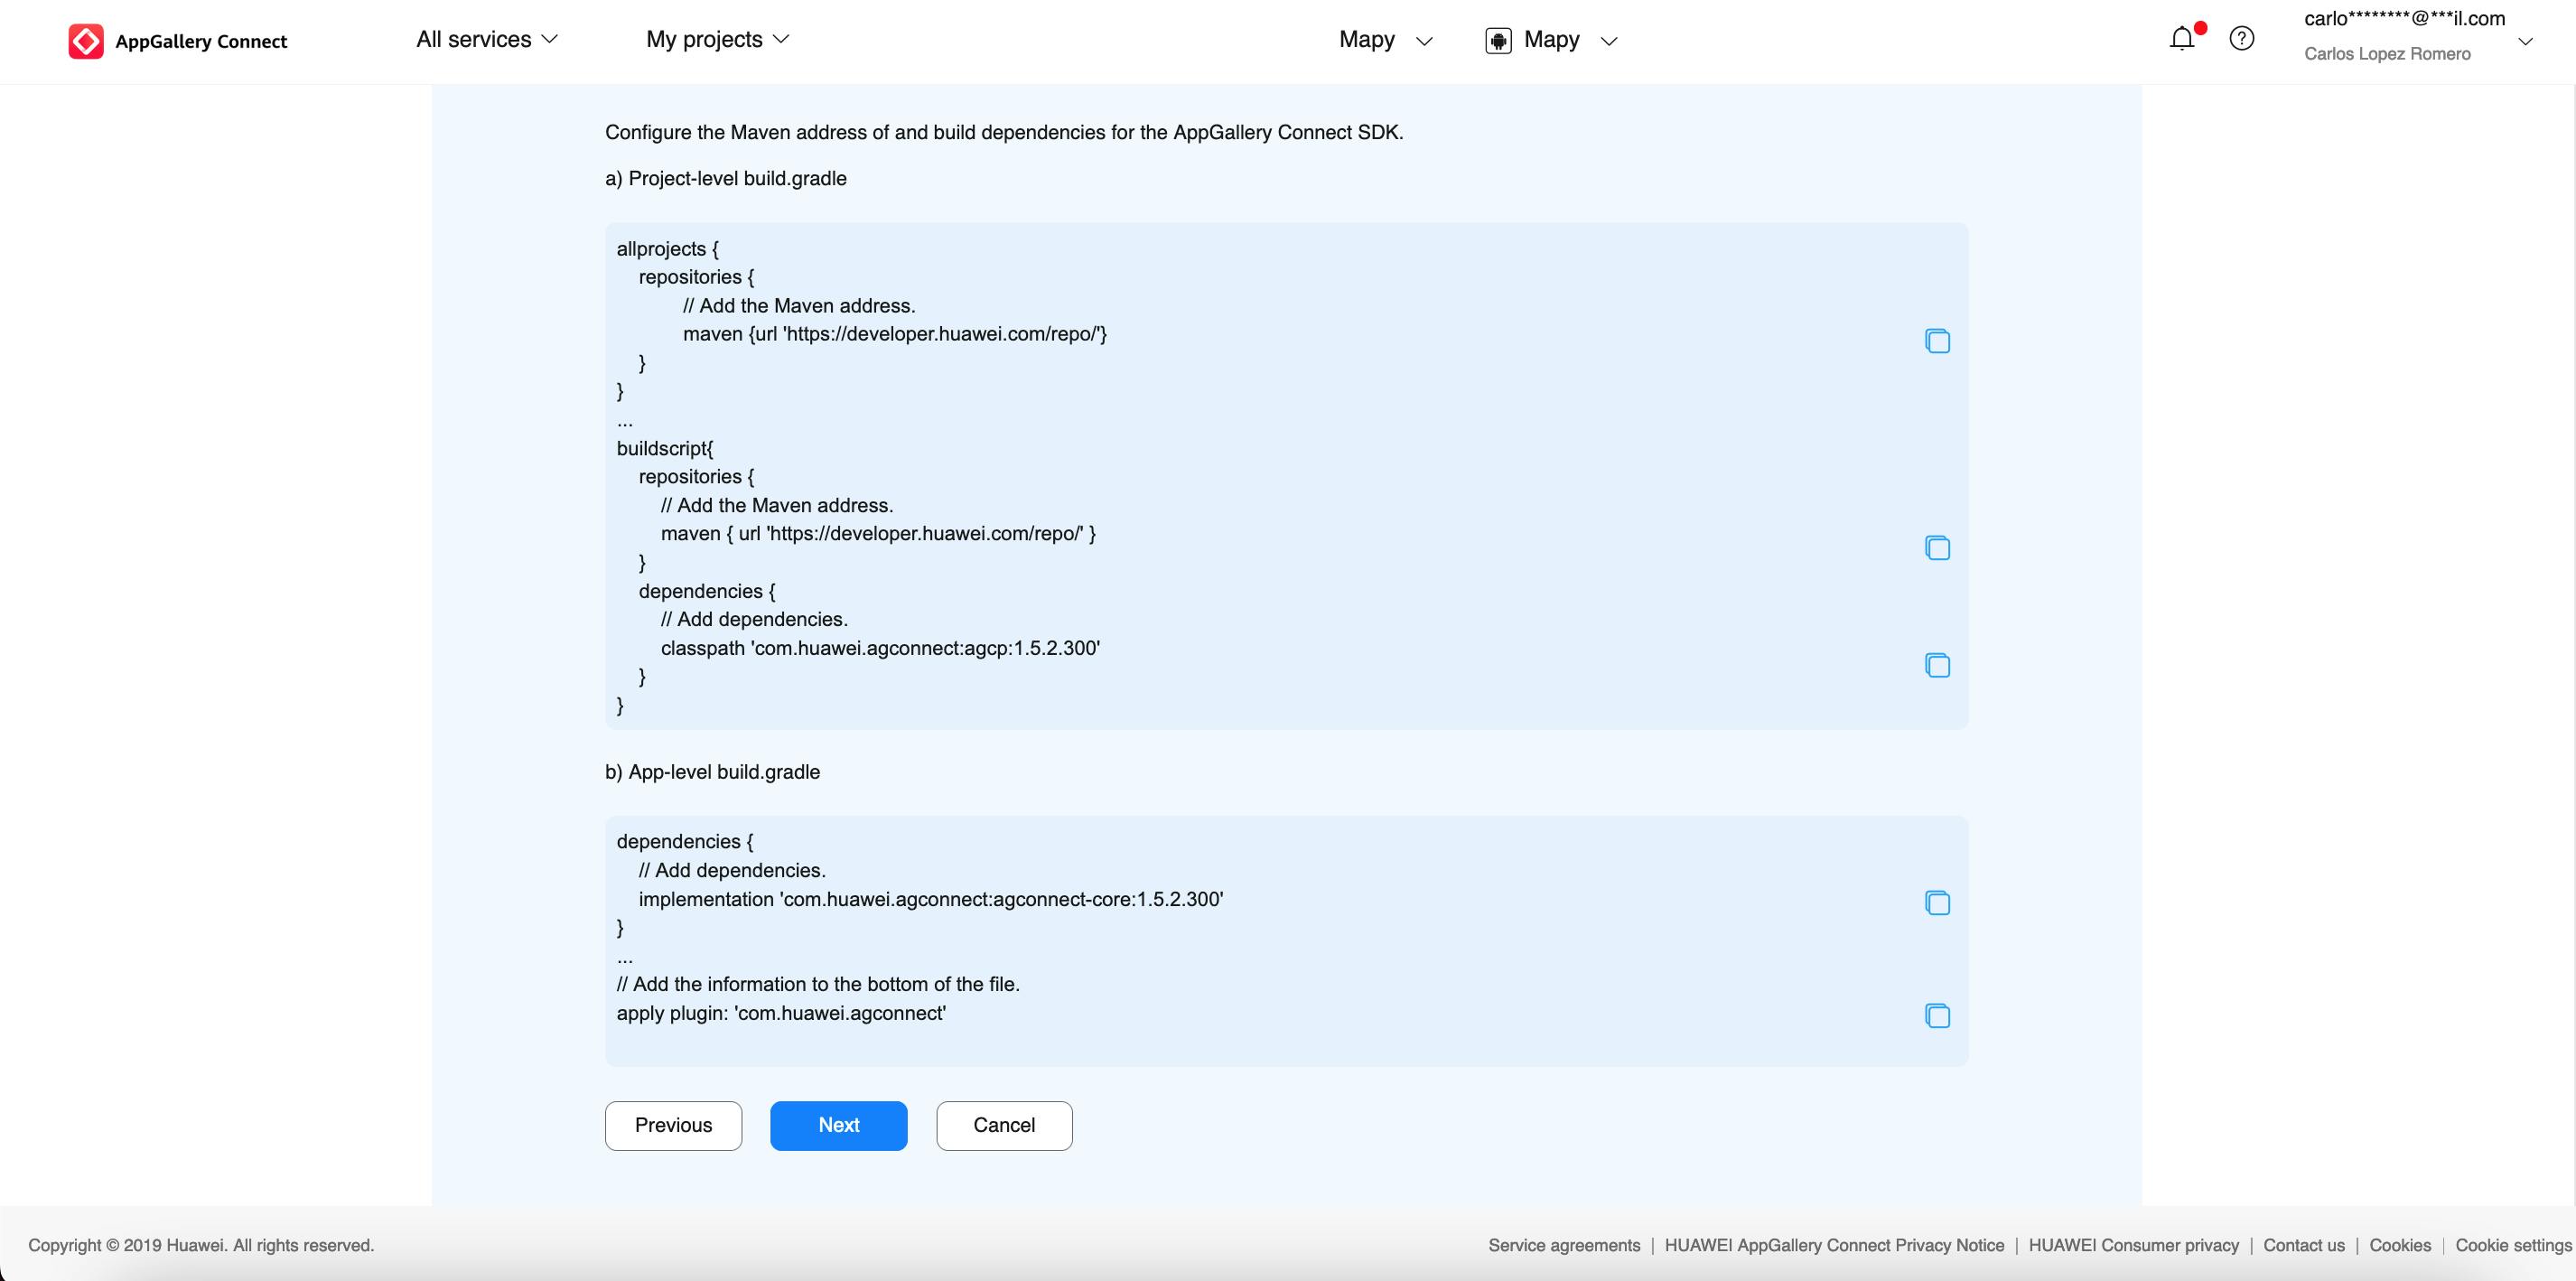
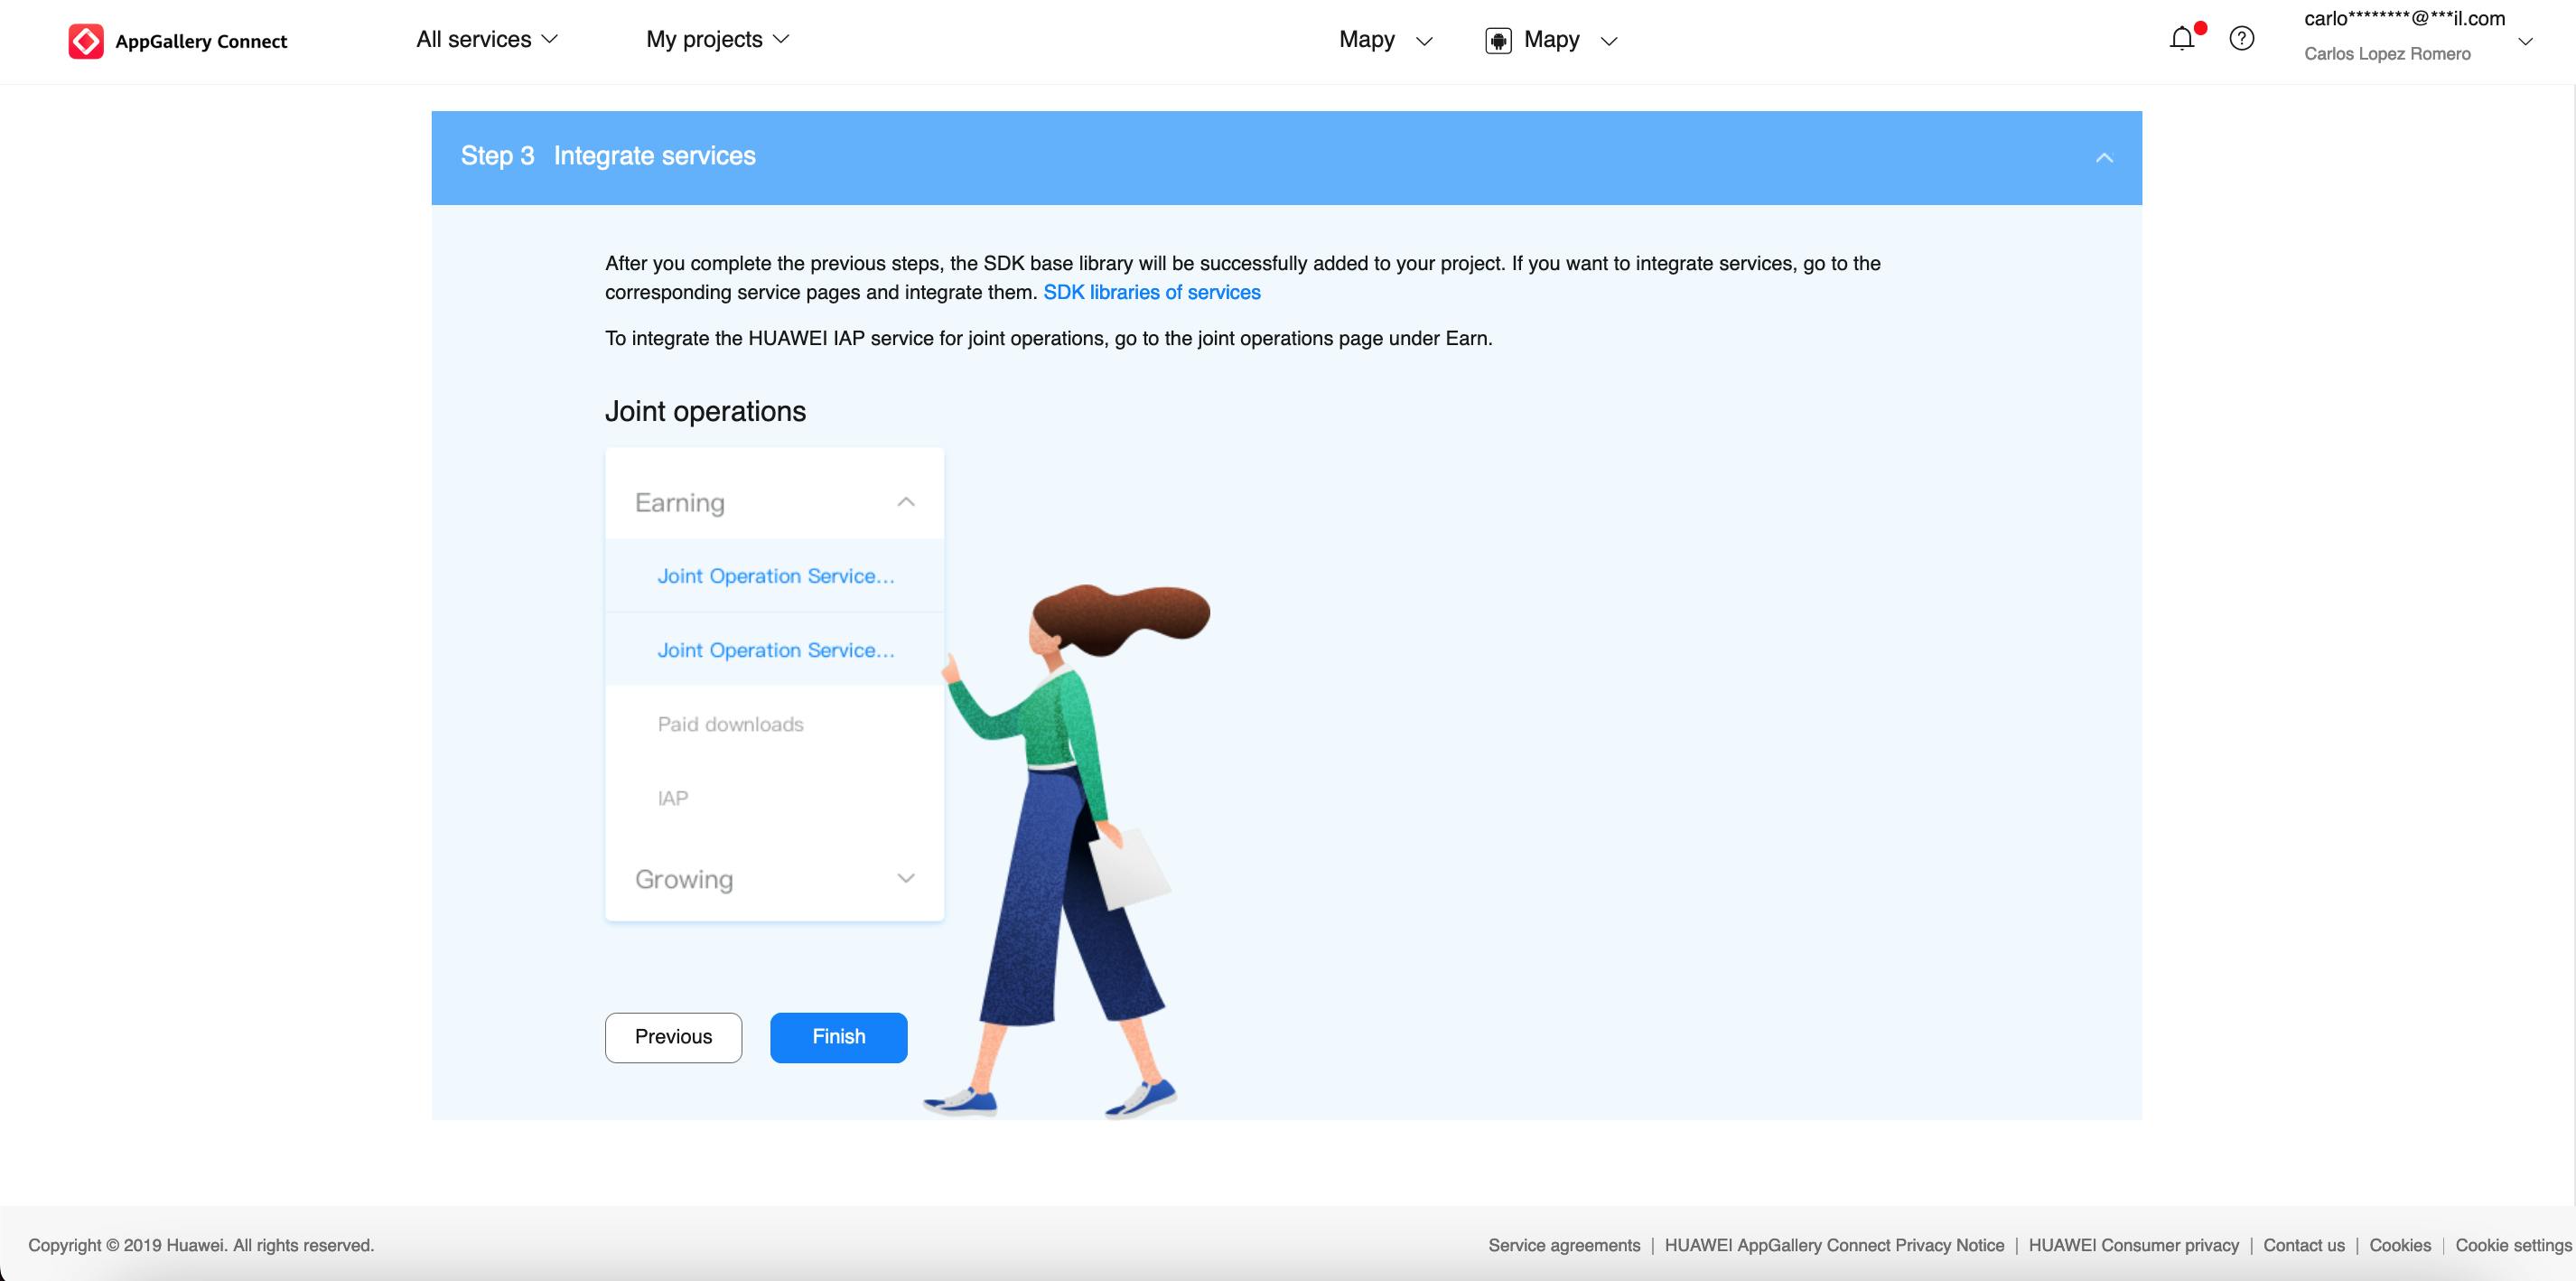
Click on "Finish".
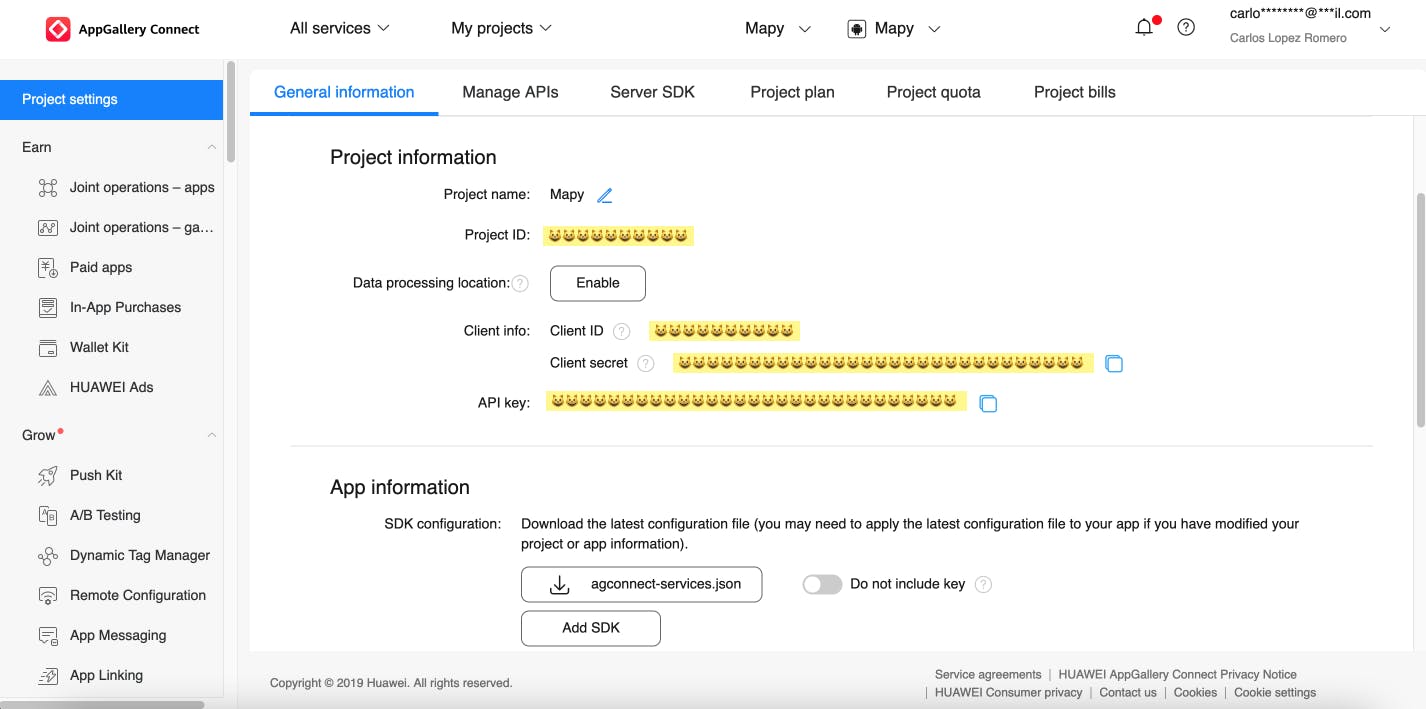
Back to the project dashboard and look for Project Information and click on "Edit" in the section Data Processing Location.
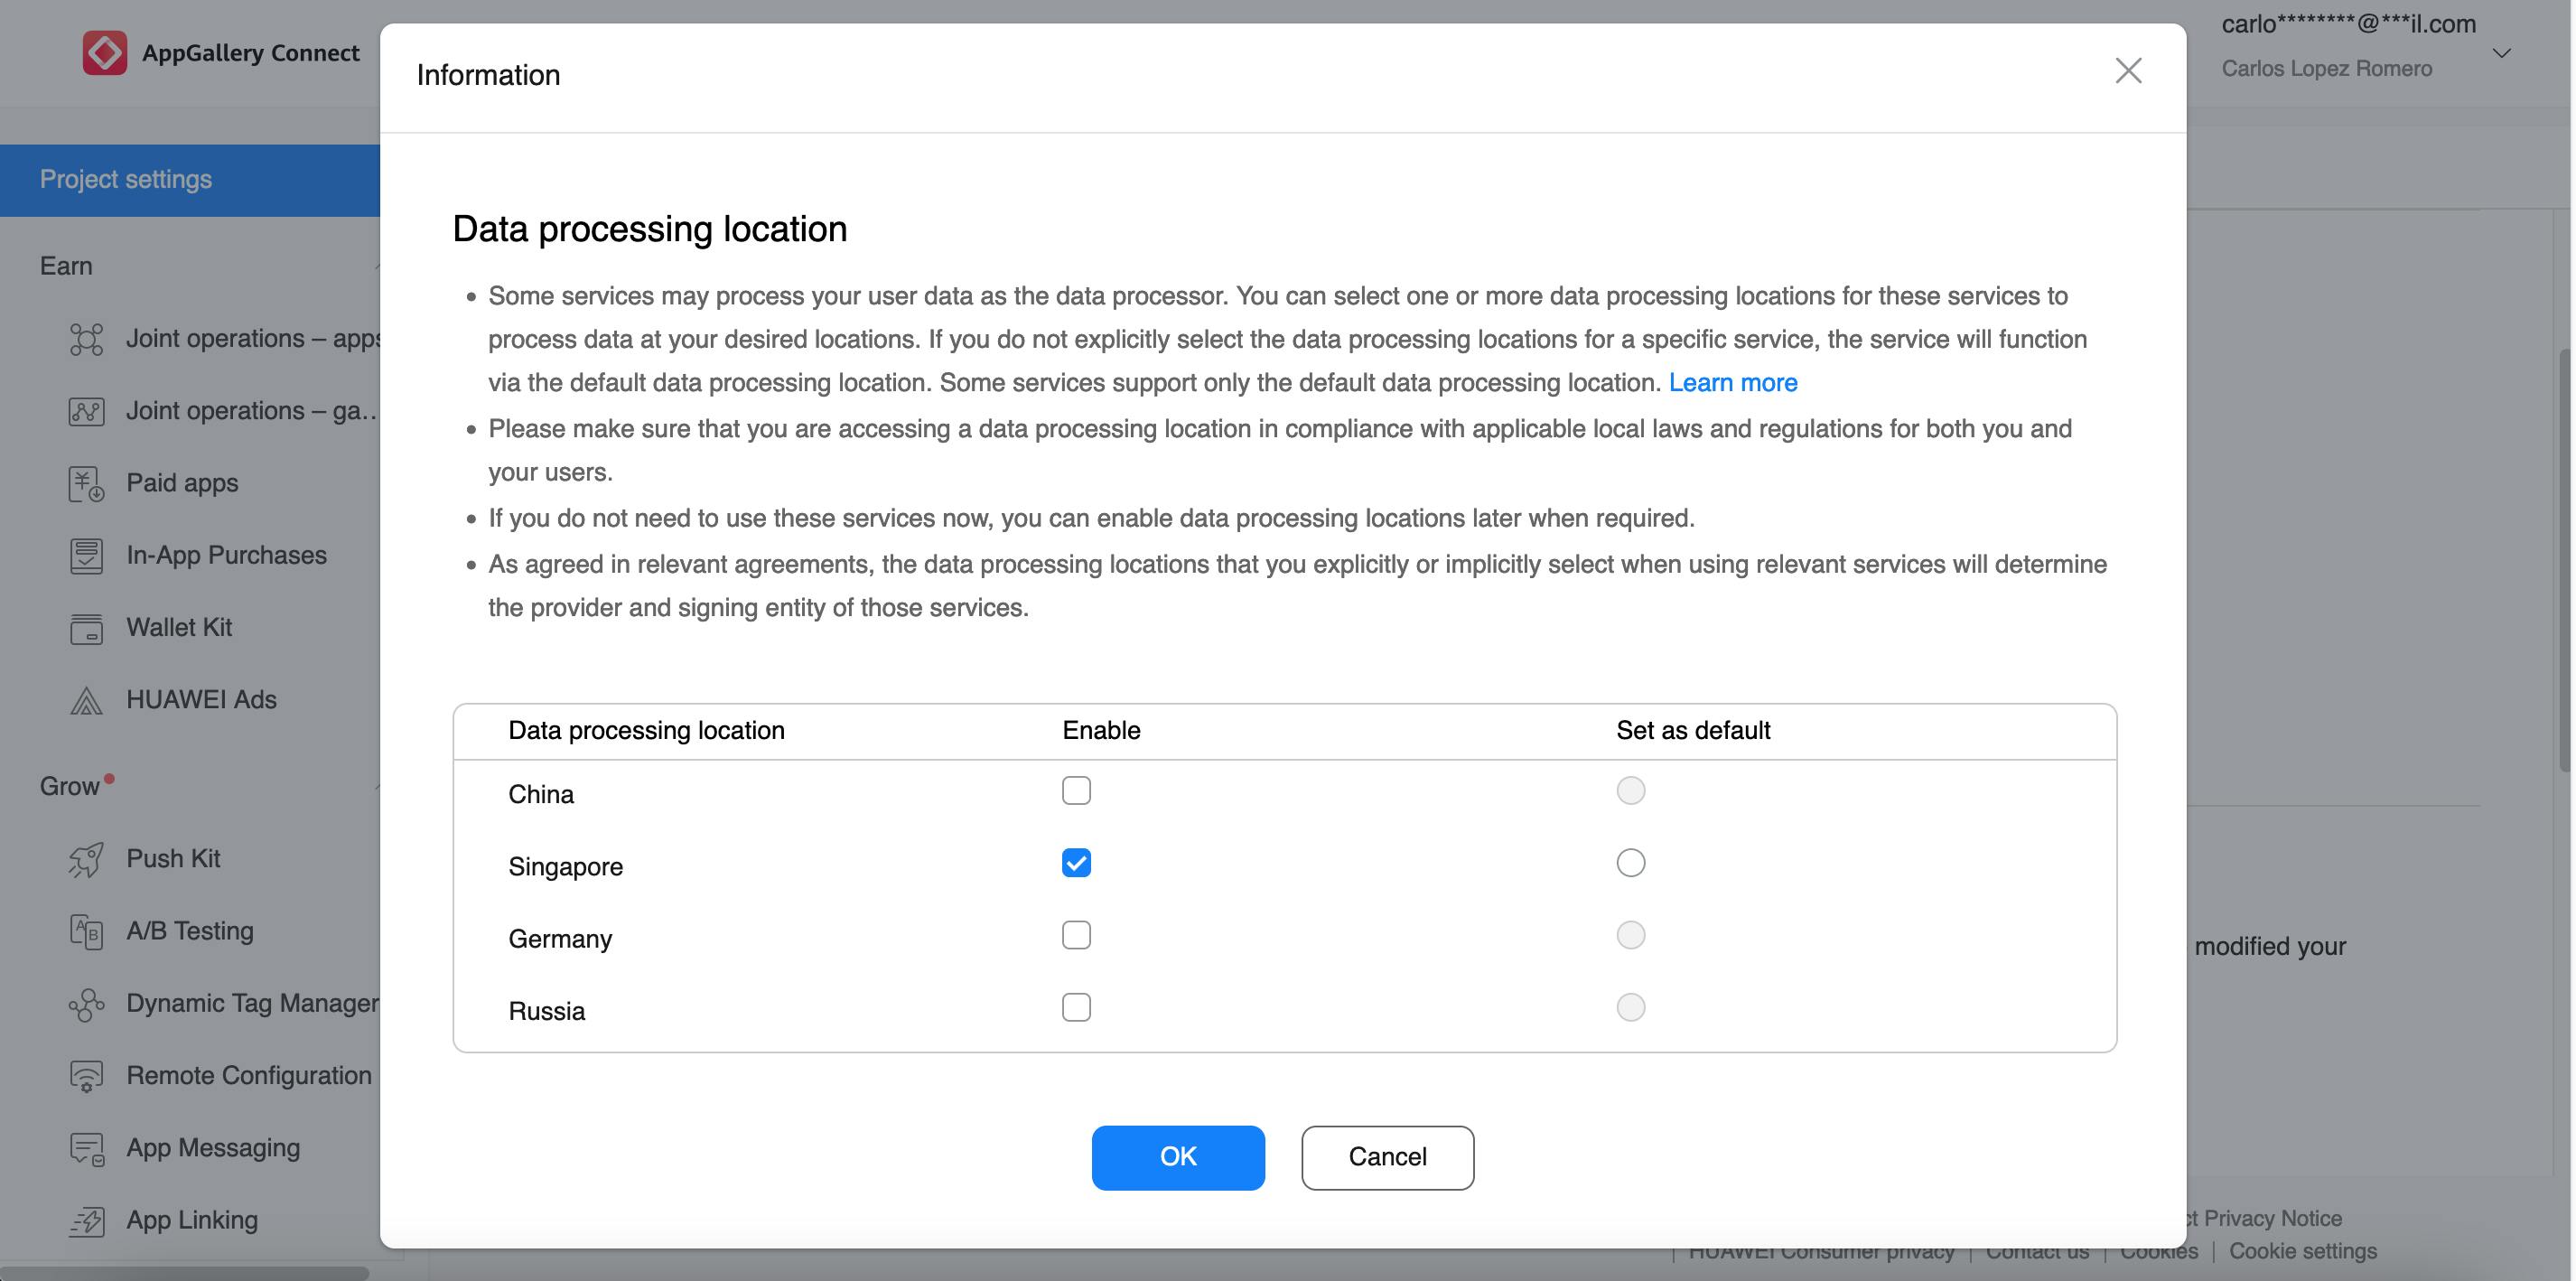
Select a region (in my case I selected Singapore), and click "OK".
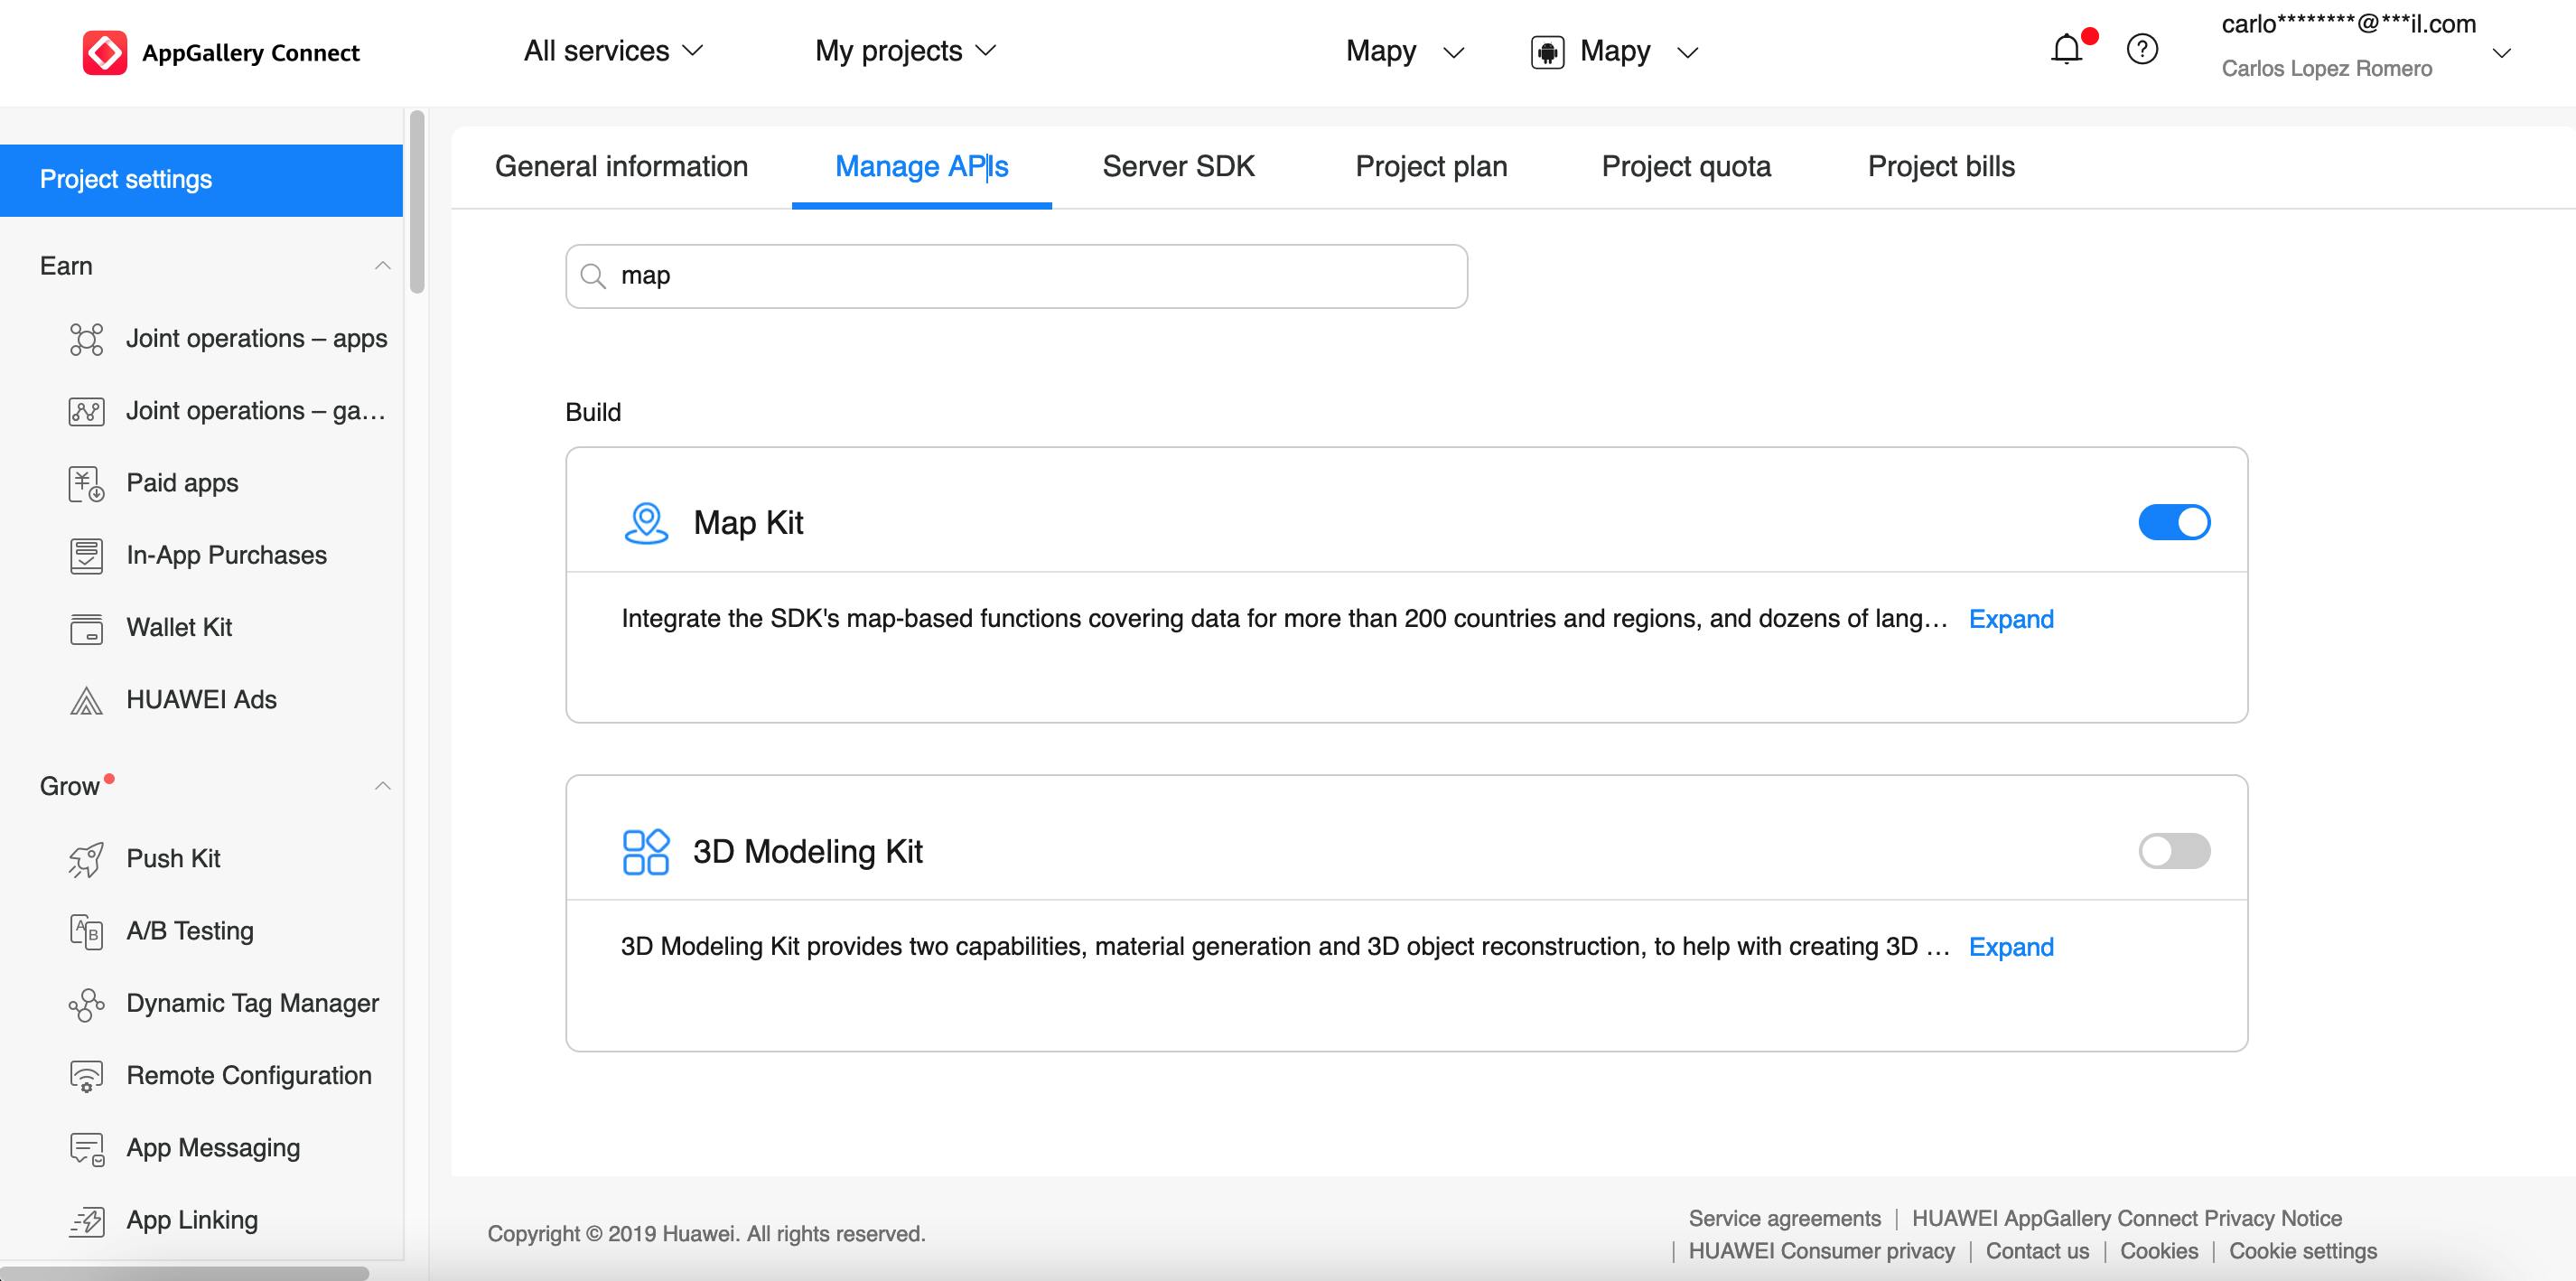
Furthermore, search in the Manage APIs tab for the Maps kit option and enable it by clicking on the switch button.
⚙️ 3. Configuring the Google Cloud Account
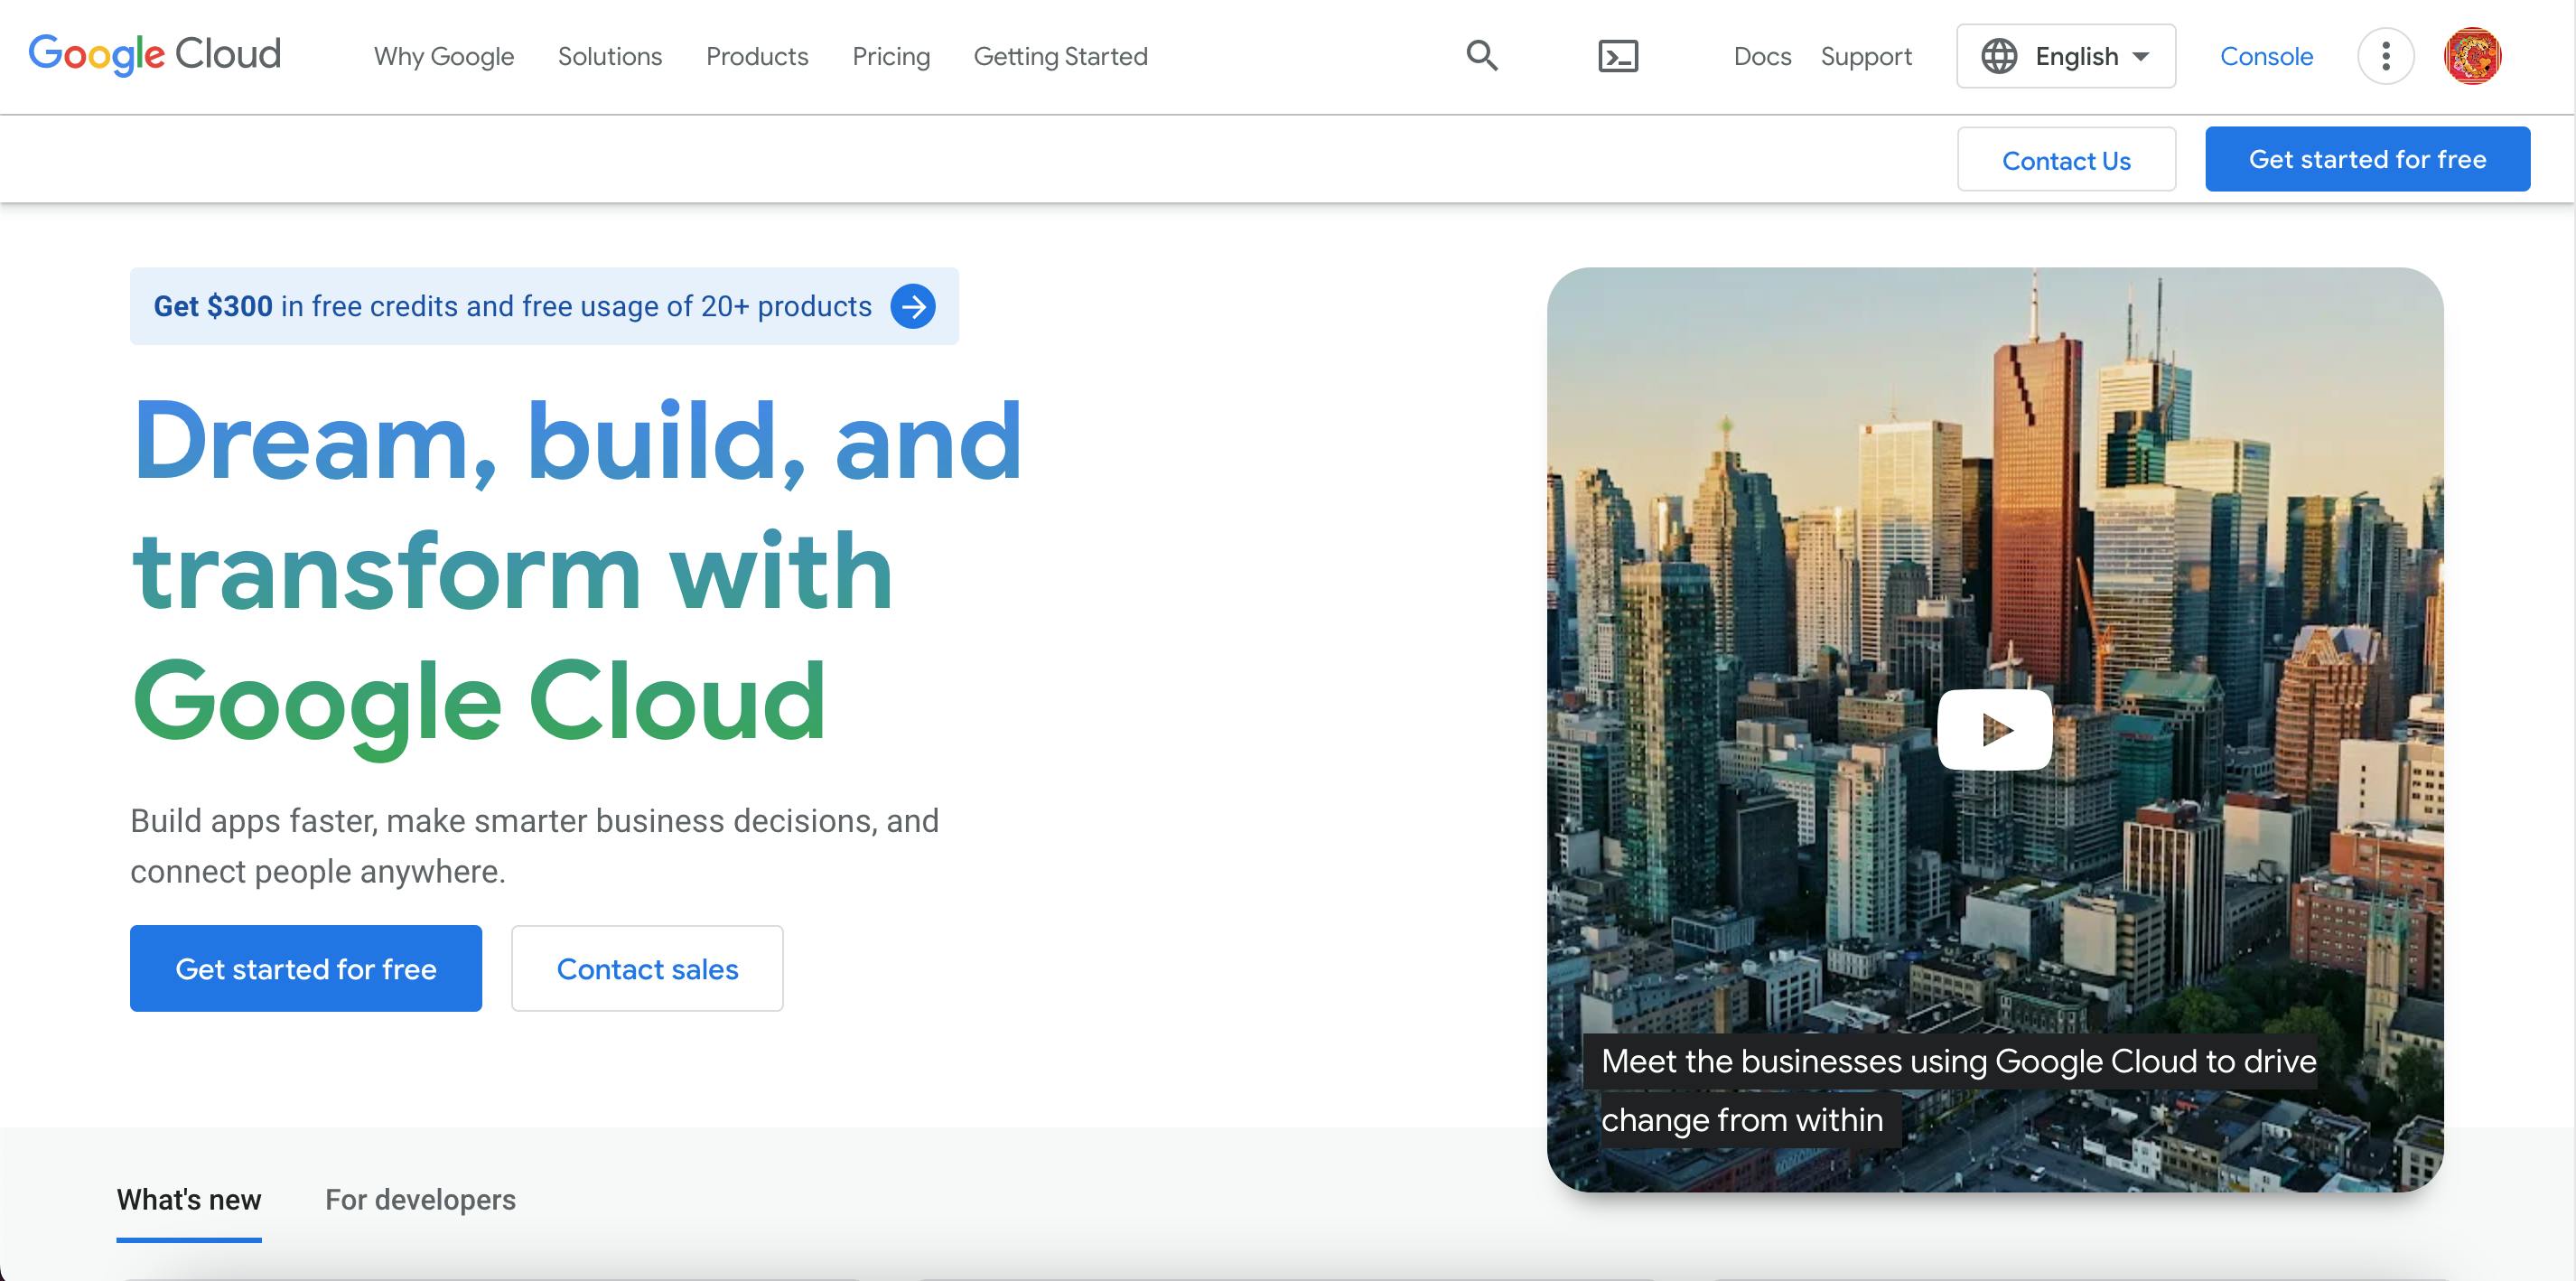
The first step is to visit cloud.google.com. Click on "Console"
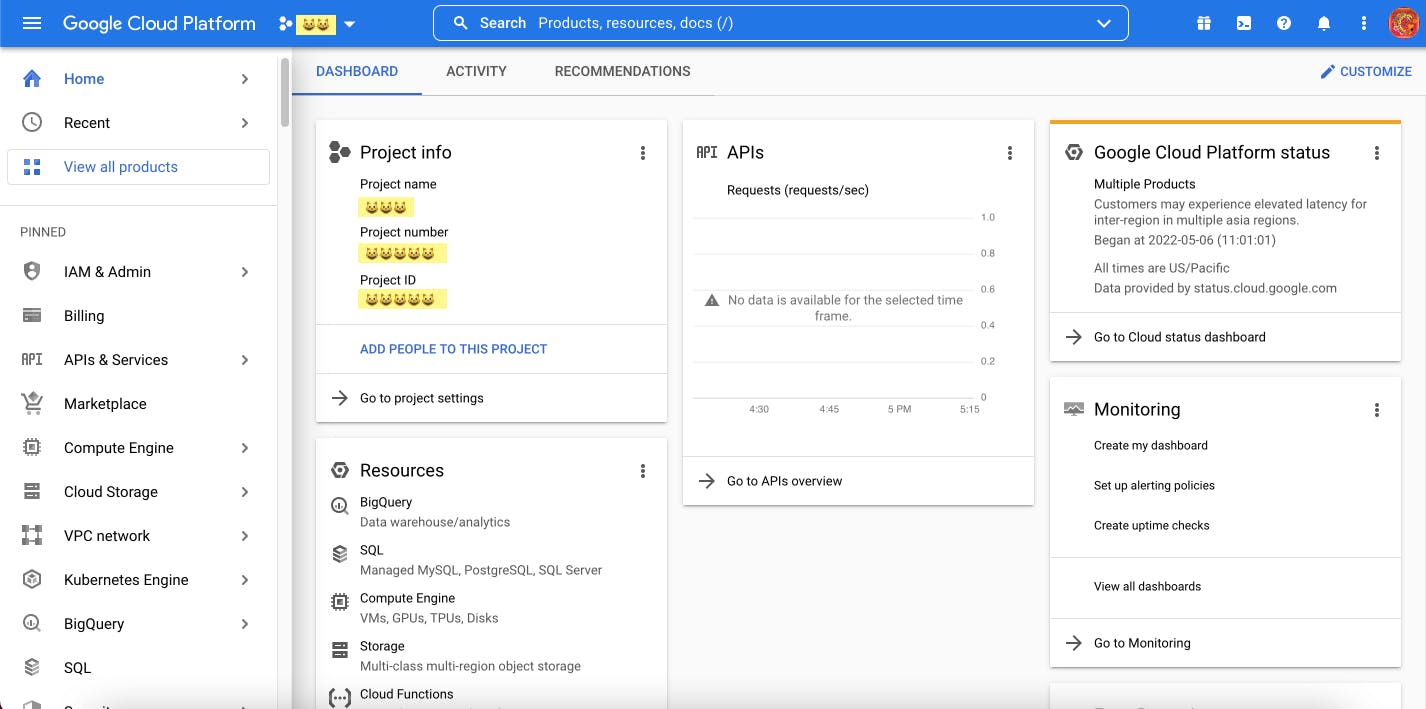
If you already had an opened project, it's possible that like me the dashboard shows that project by default. Otherwise, a suggestion to create a new project will be shown to you.
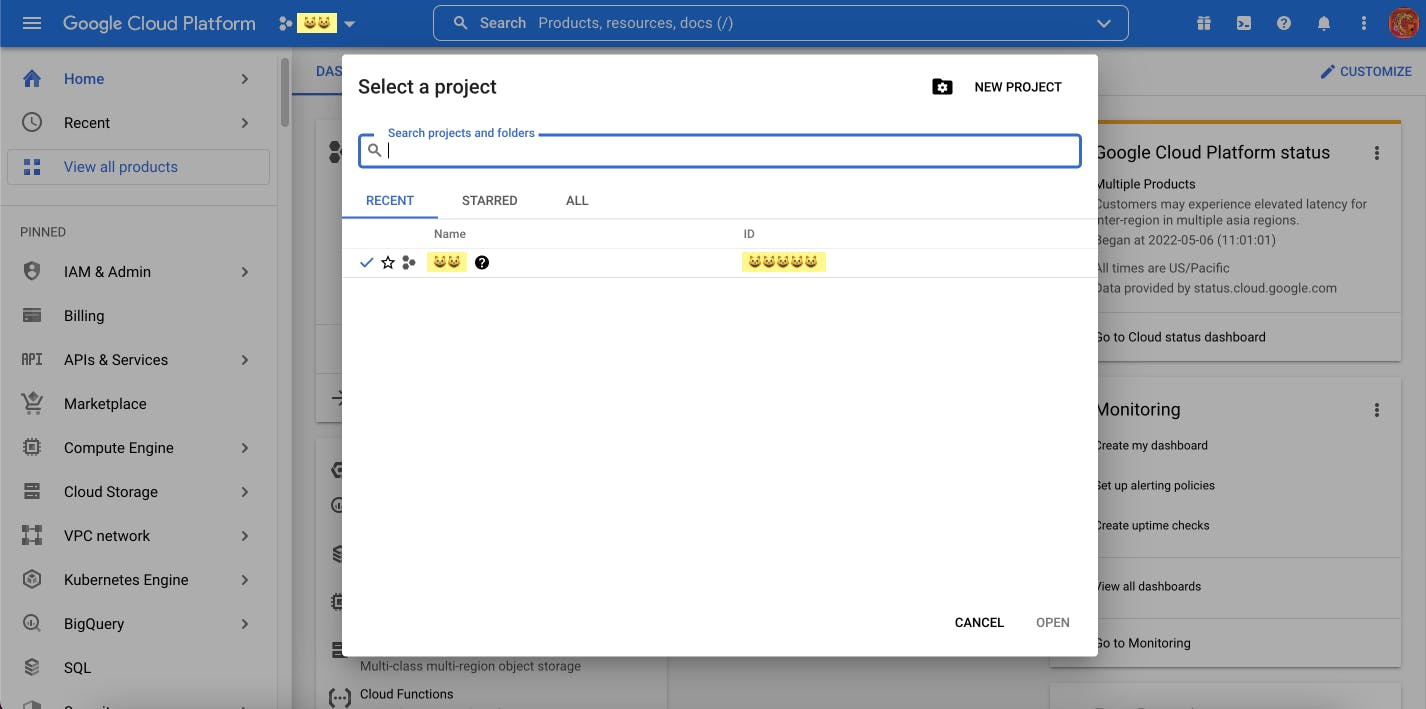
If the dashboard of a different project appears to you, the next step is to click on the arrow next to the project name. Click on "New Project".
Write down your project name and if you have a valid location parameter you can fill that field, otherwise continue clicking on "Create".
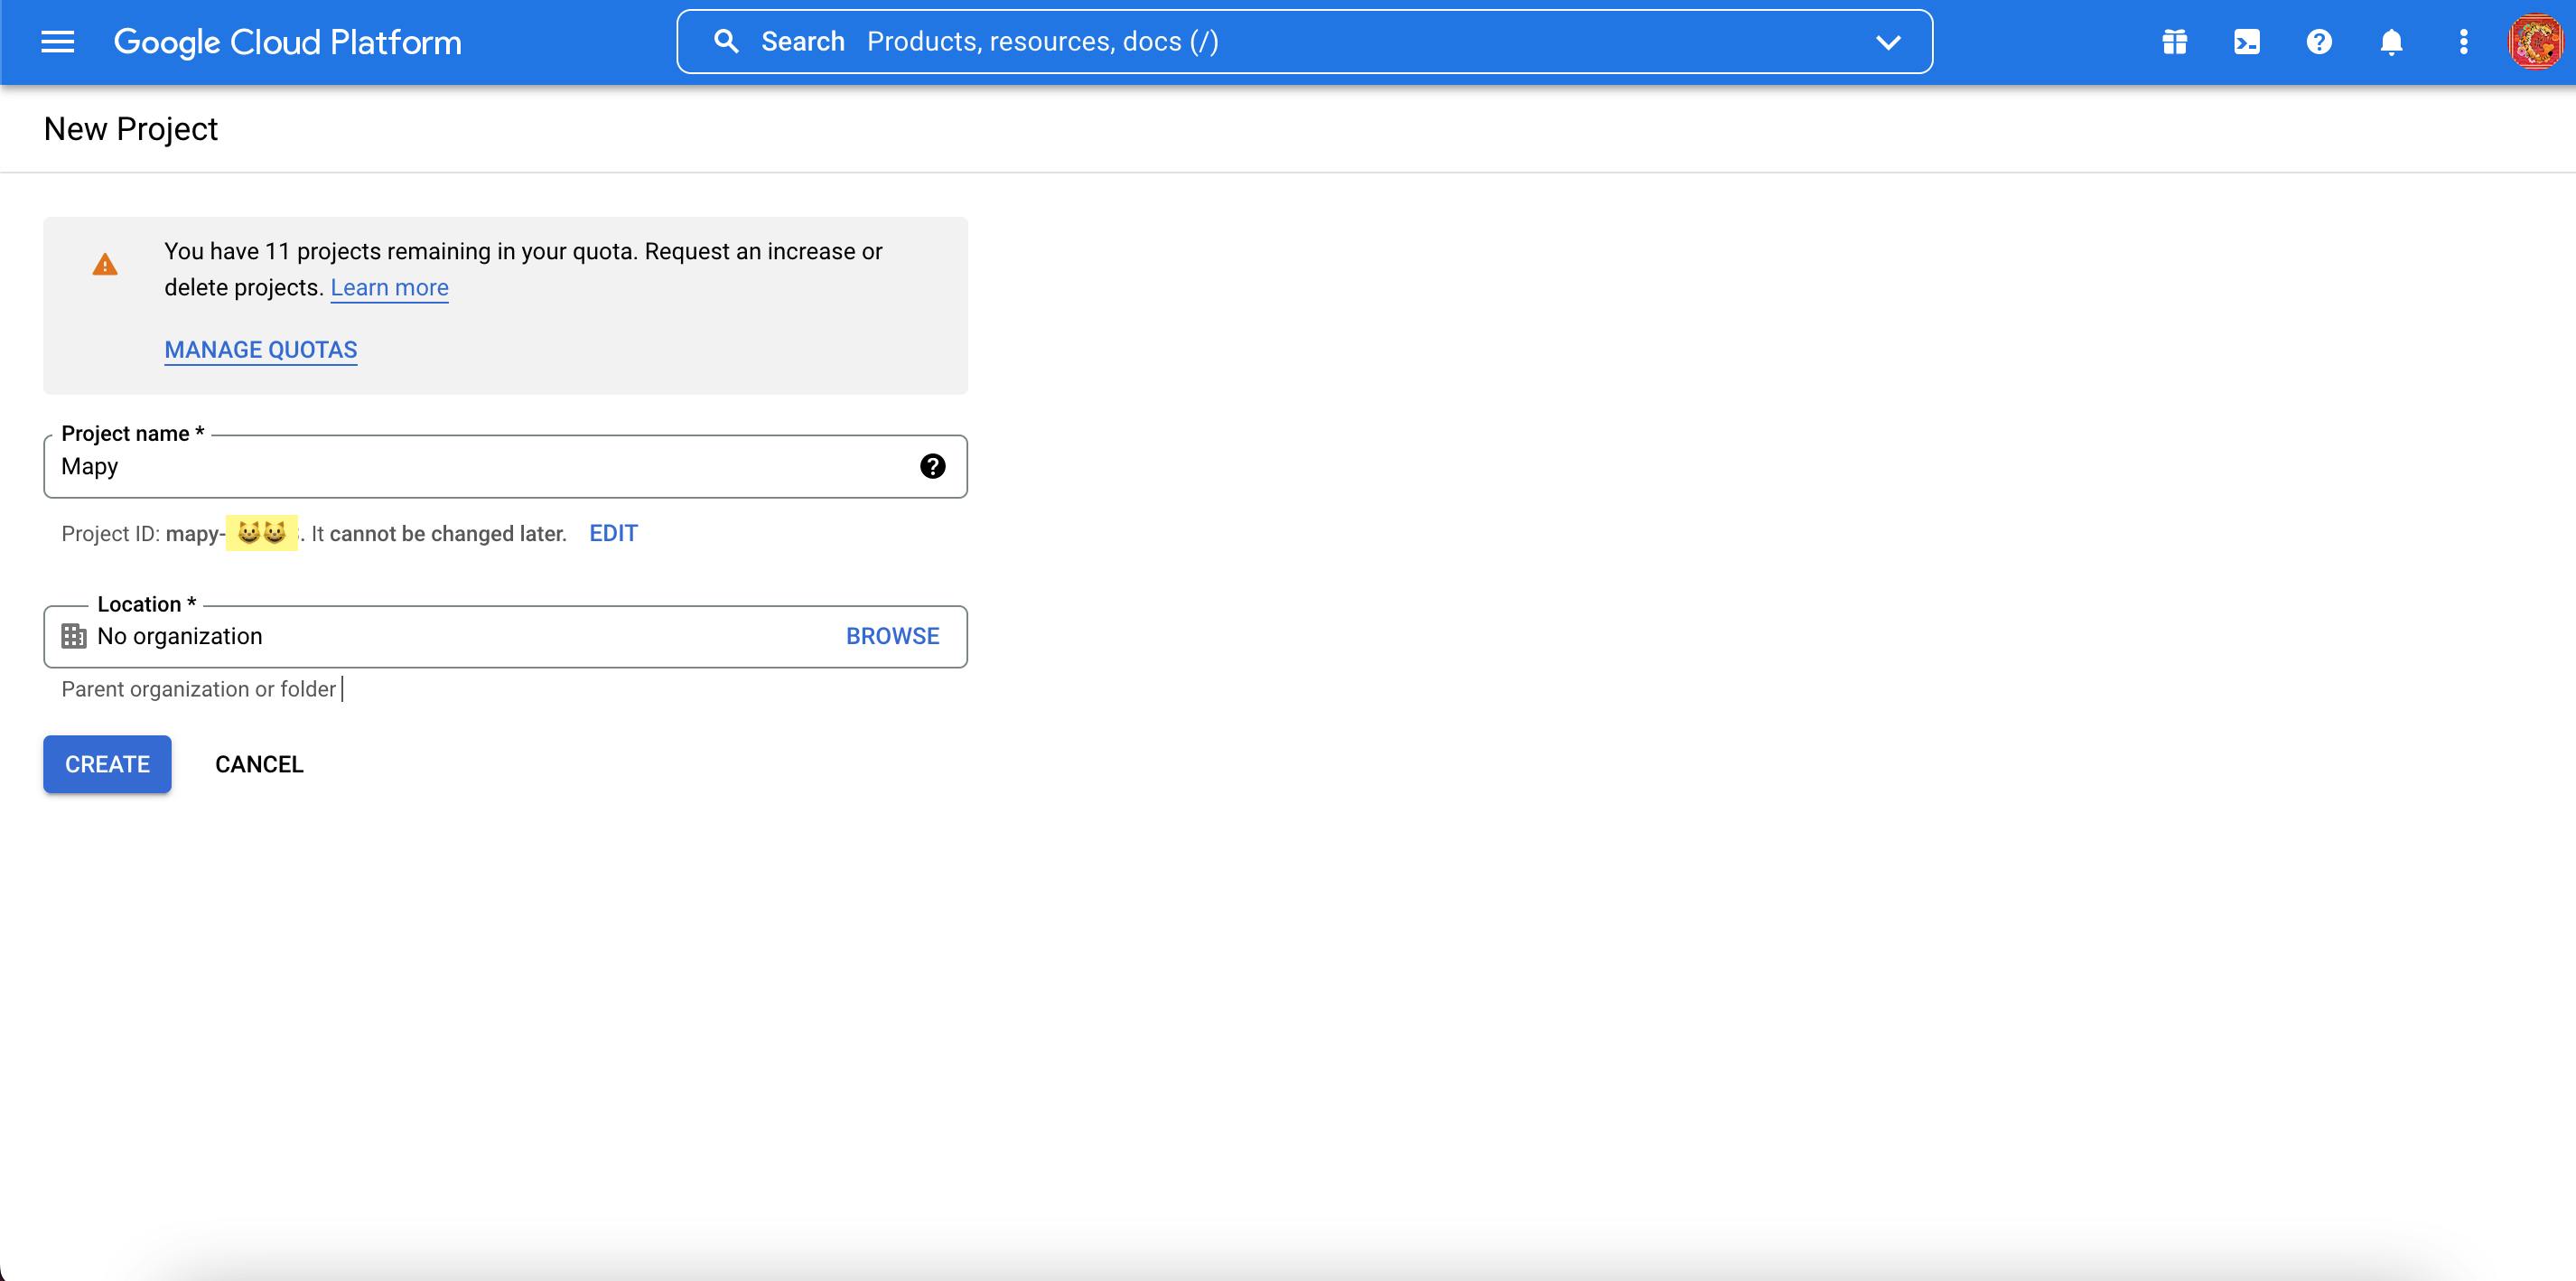
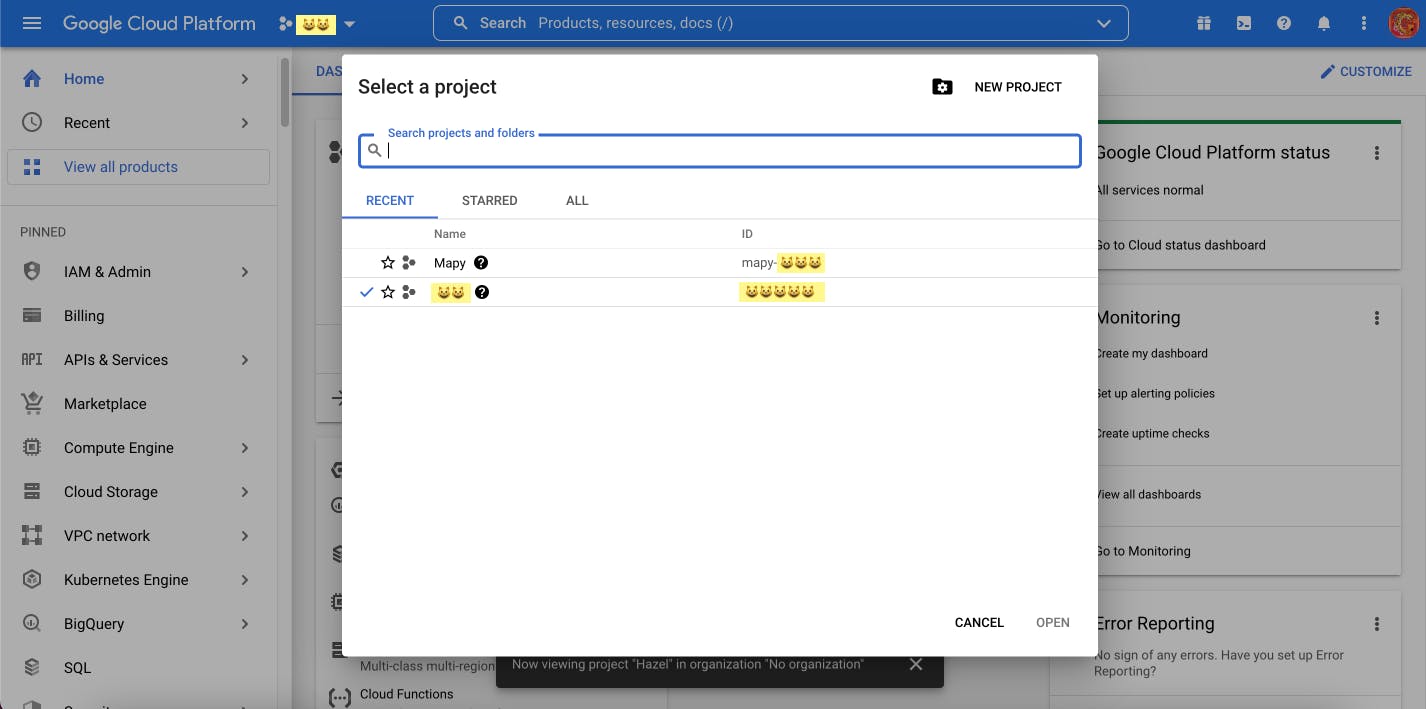
If like me, after the project was created the site returns to the dashboard of the default project, you should make click on the project's name and select the new project you just created and click on "Open".
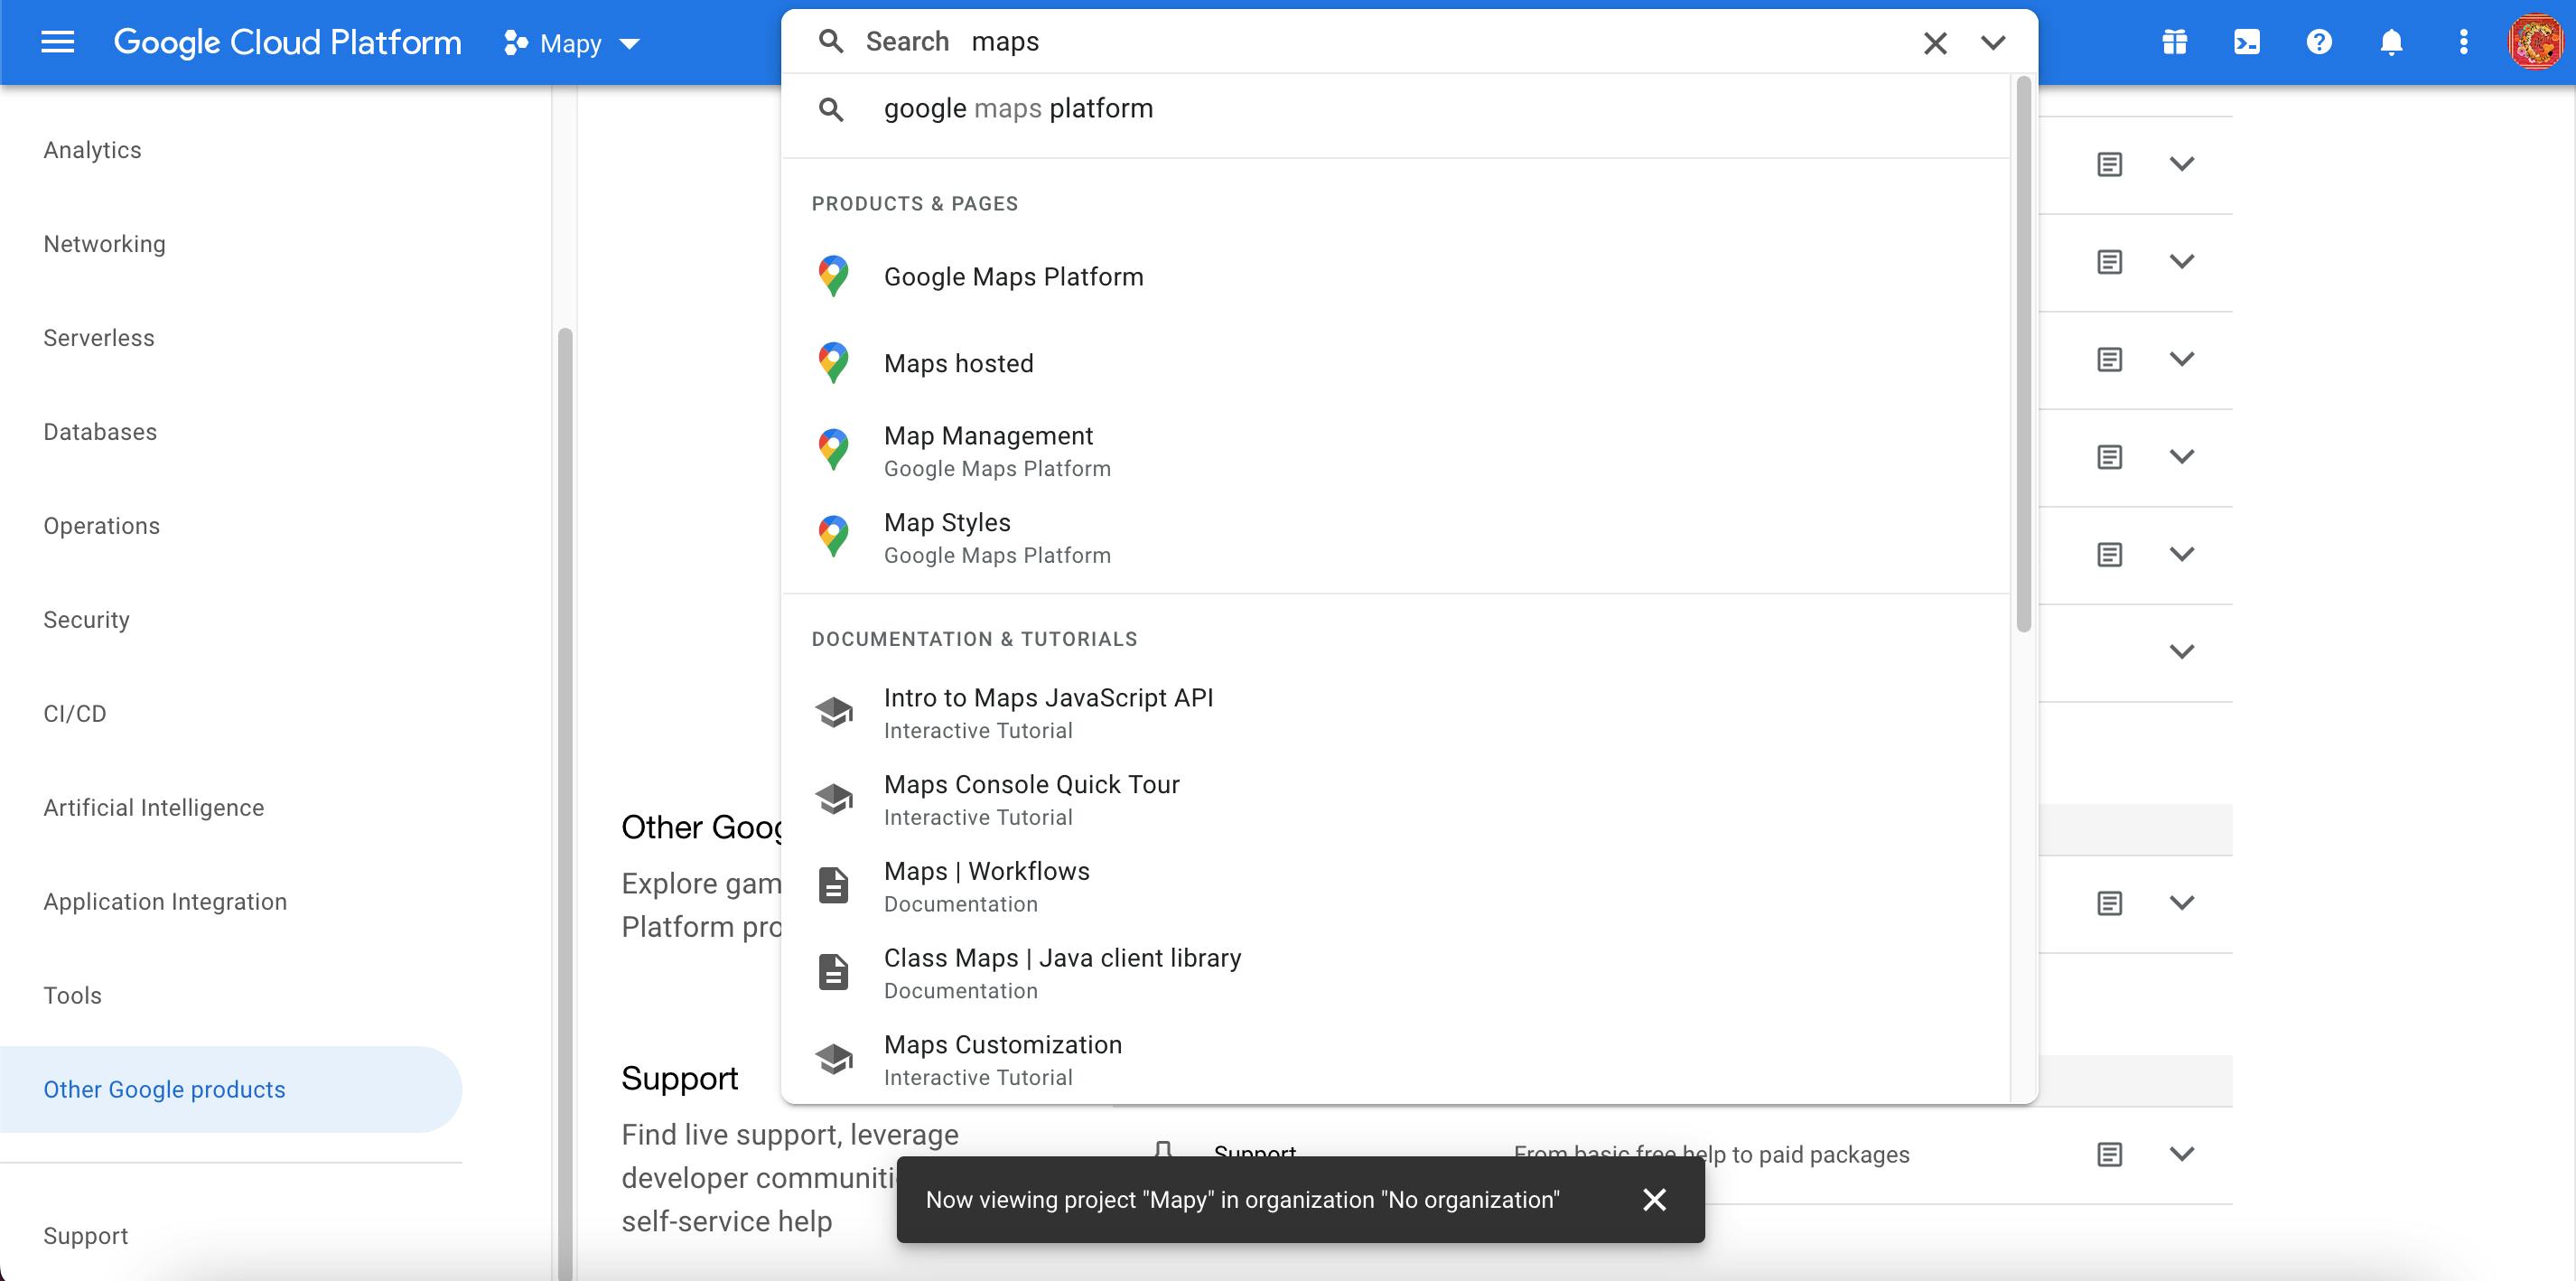
Now, type in the search bar "maps" and click on Google Maps Platform.
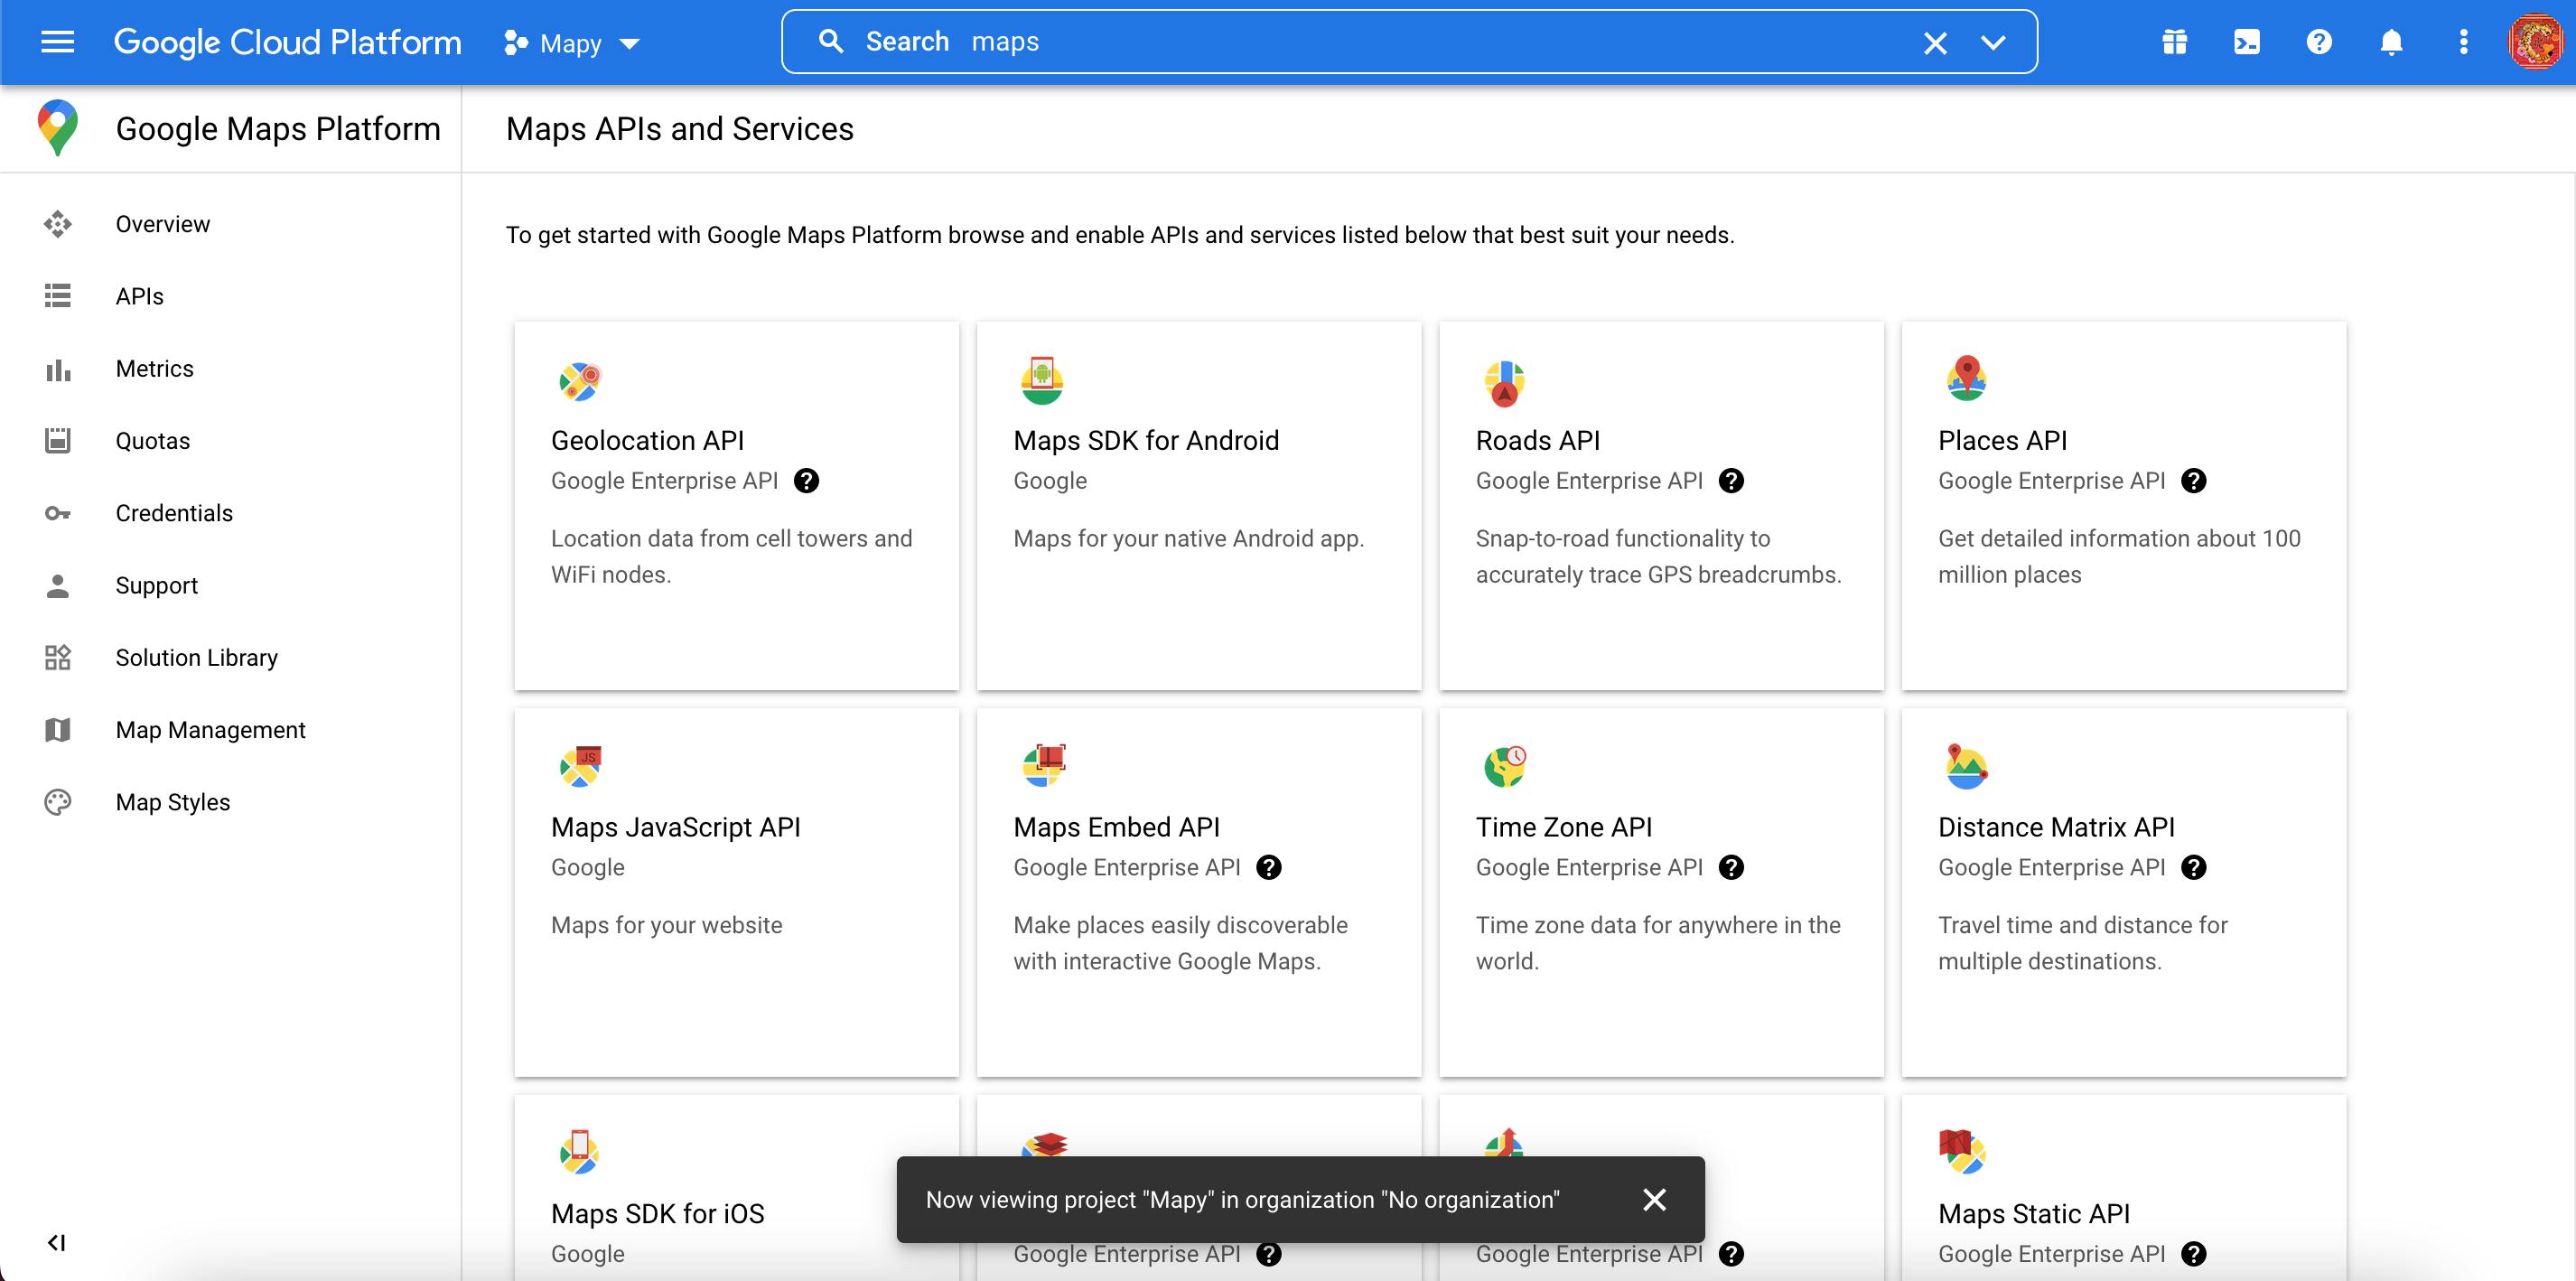
Next, click on "Maps SDK for Android".
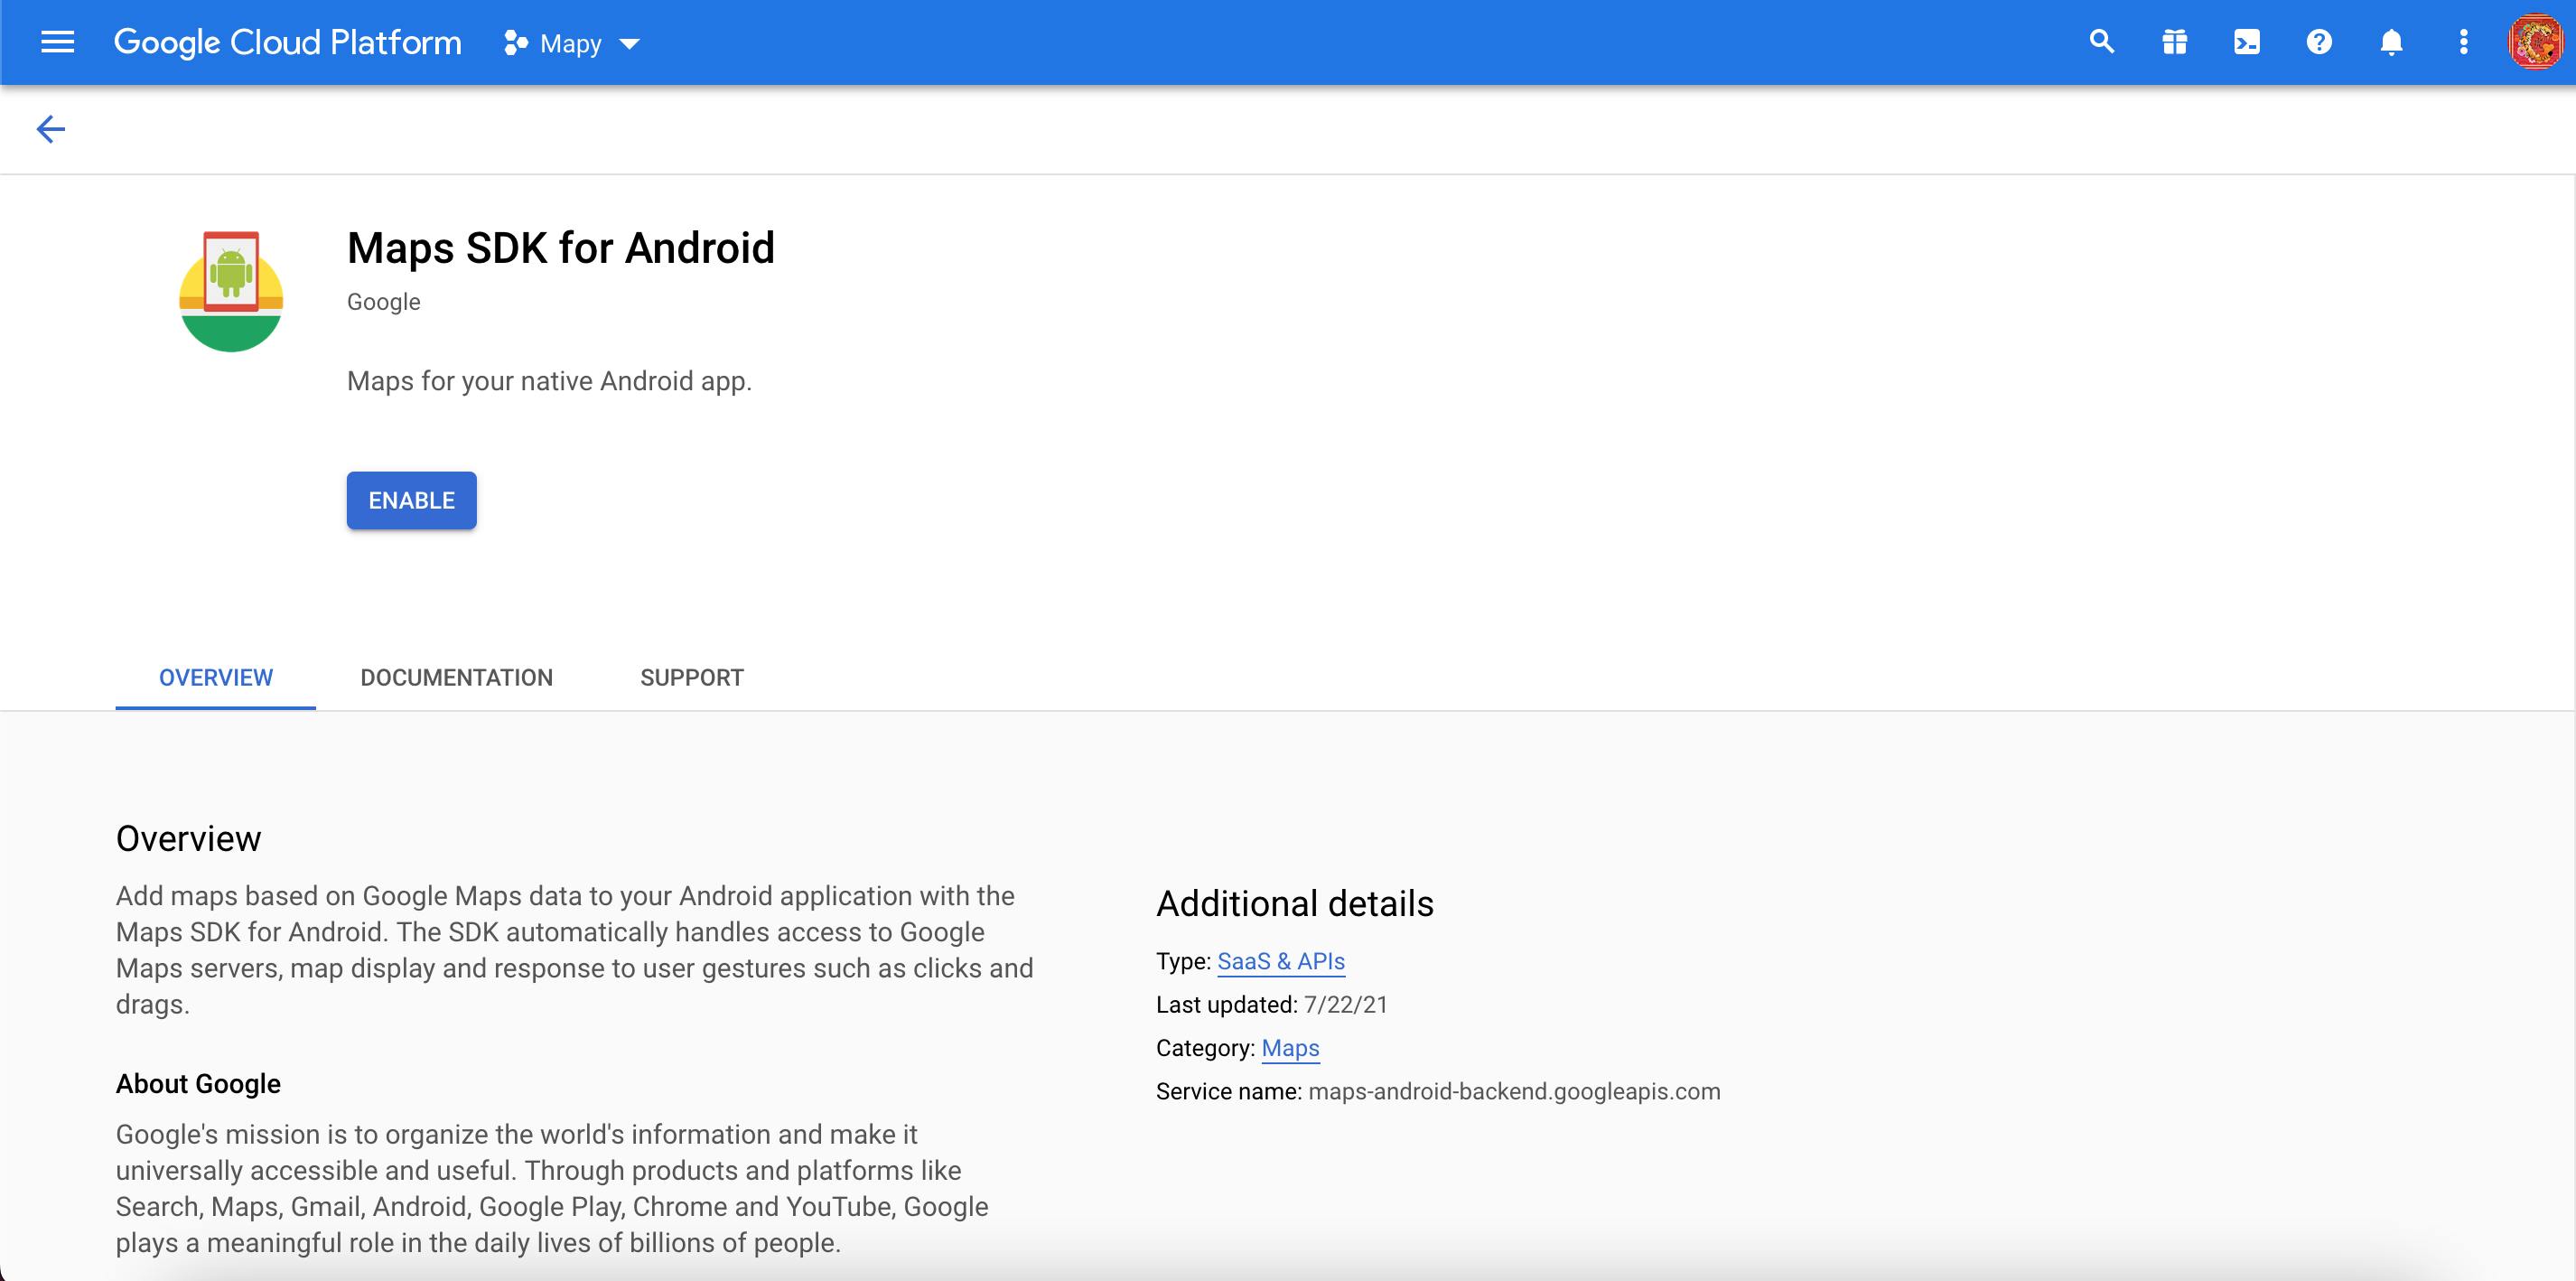
Click on the "Enable" button.
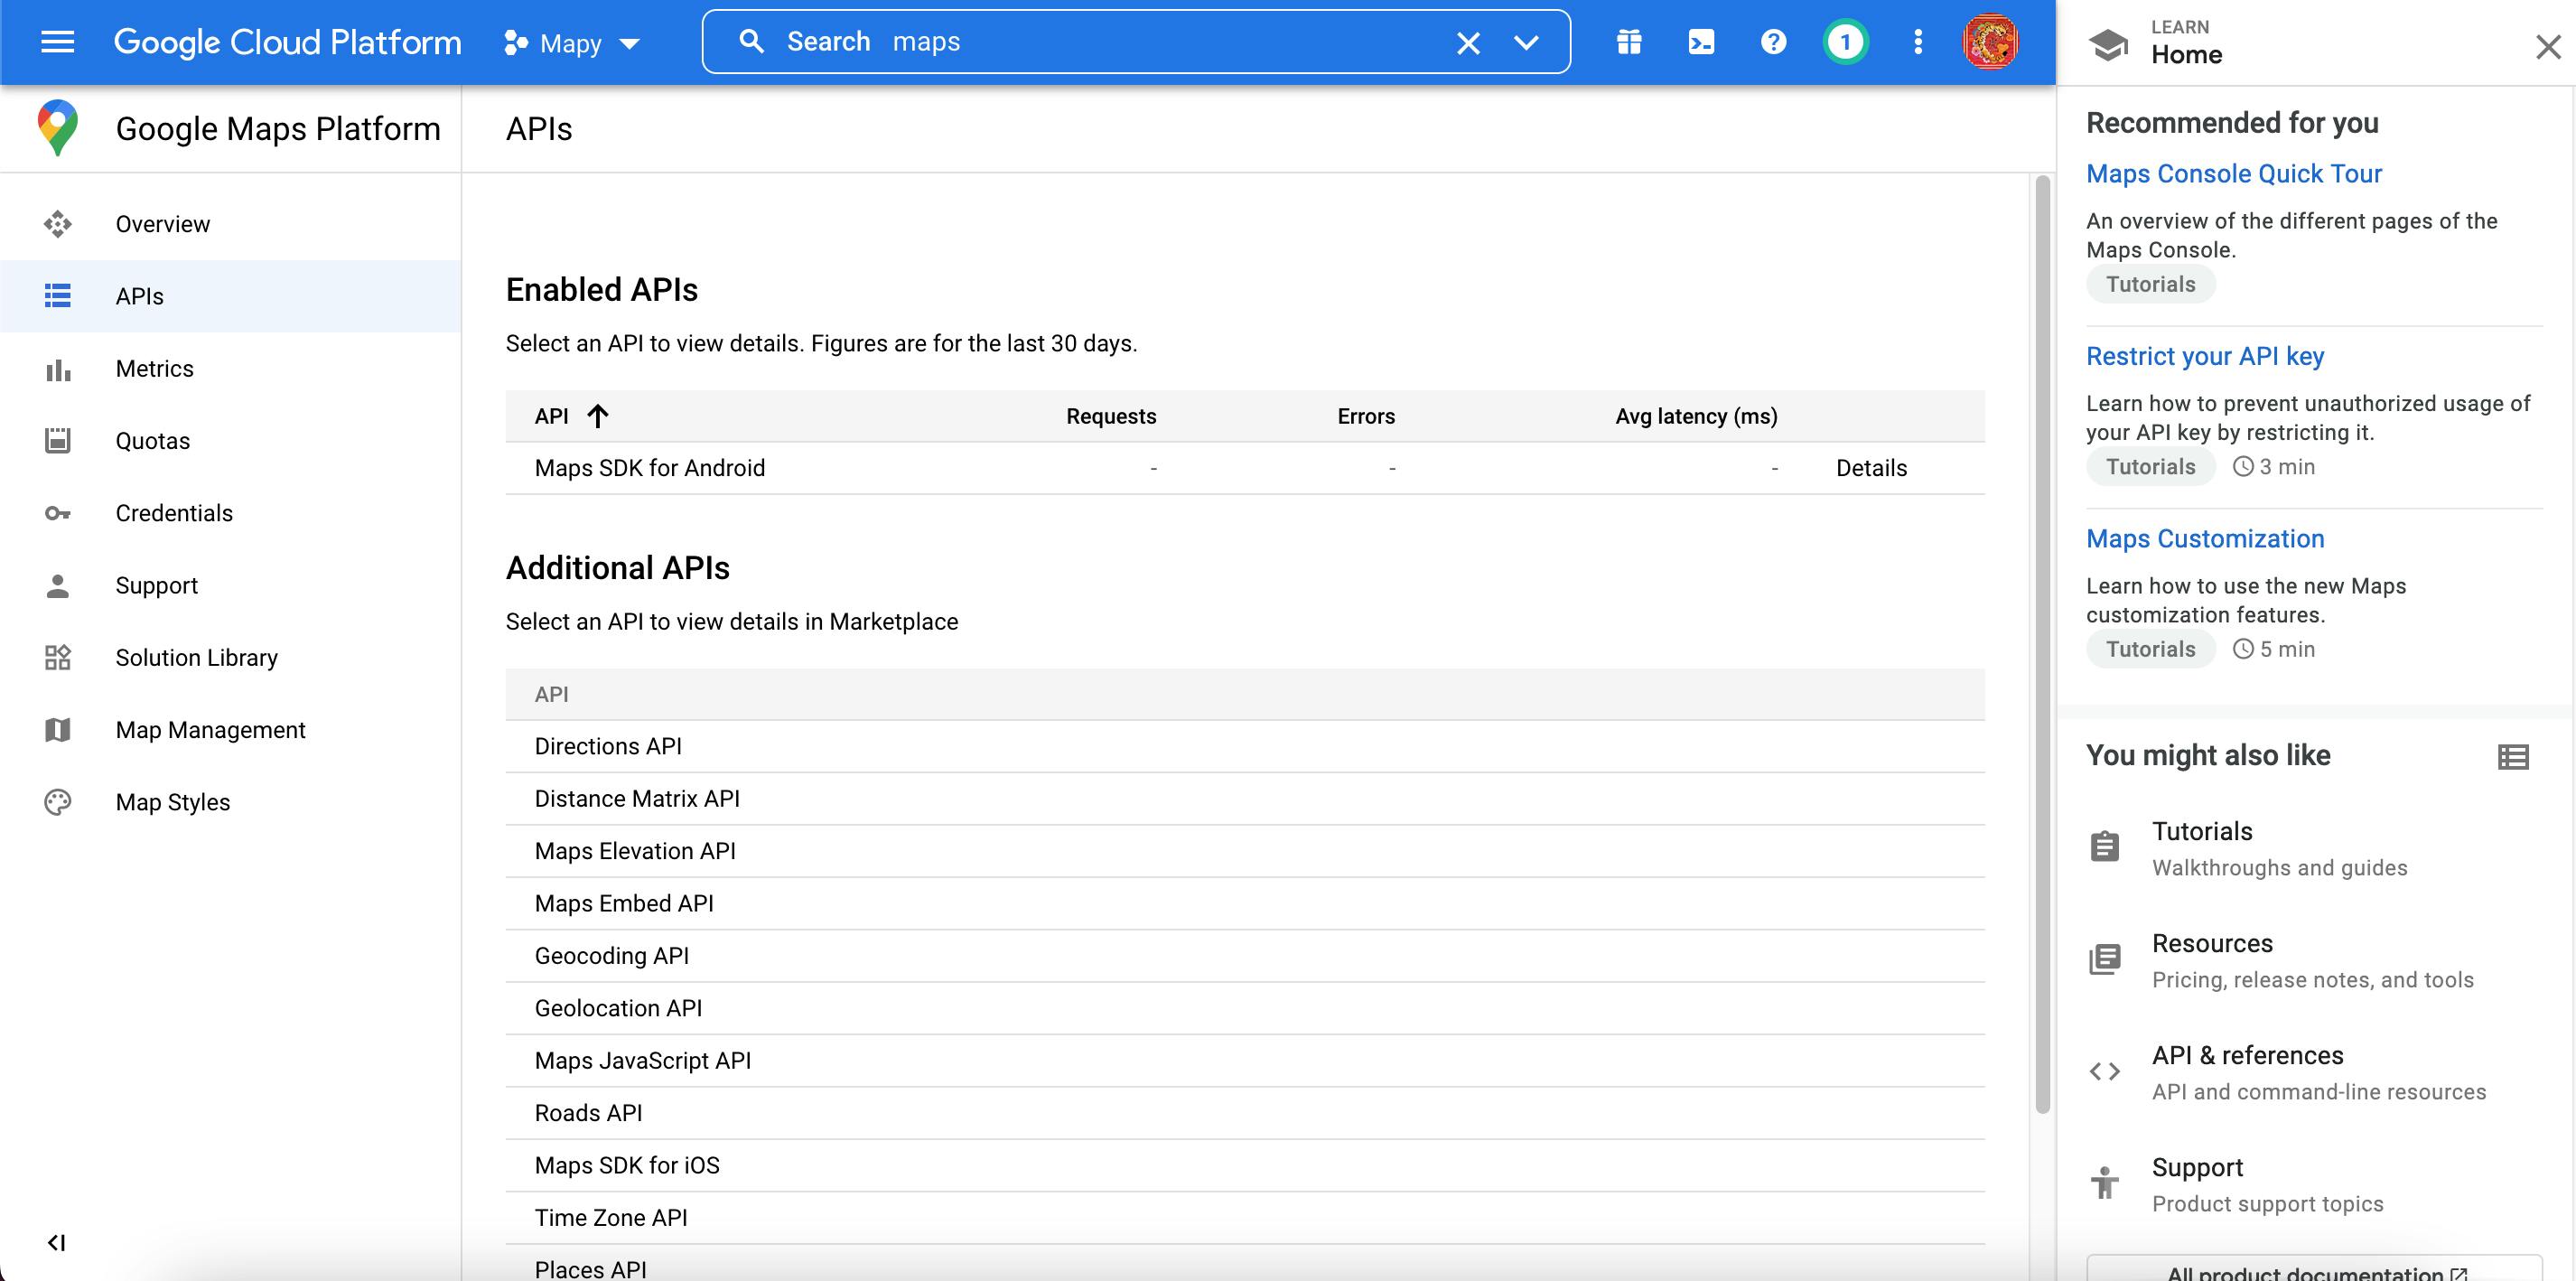
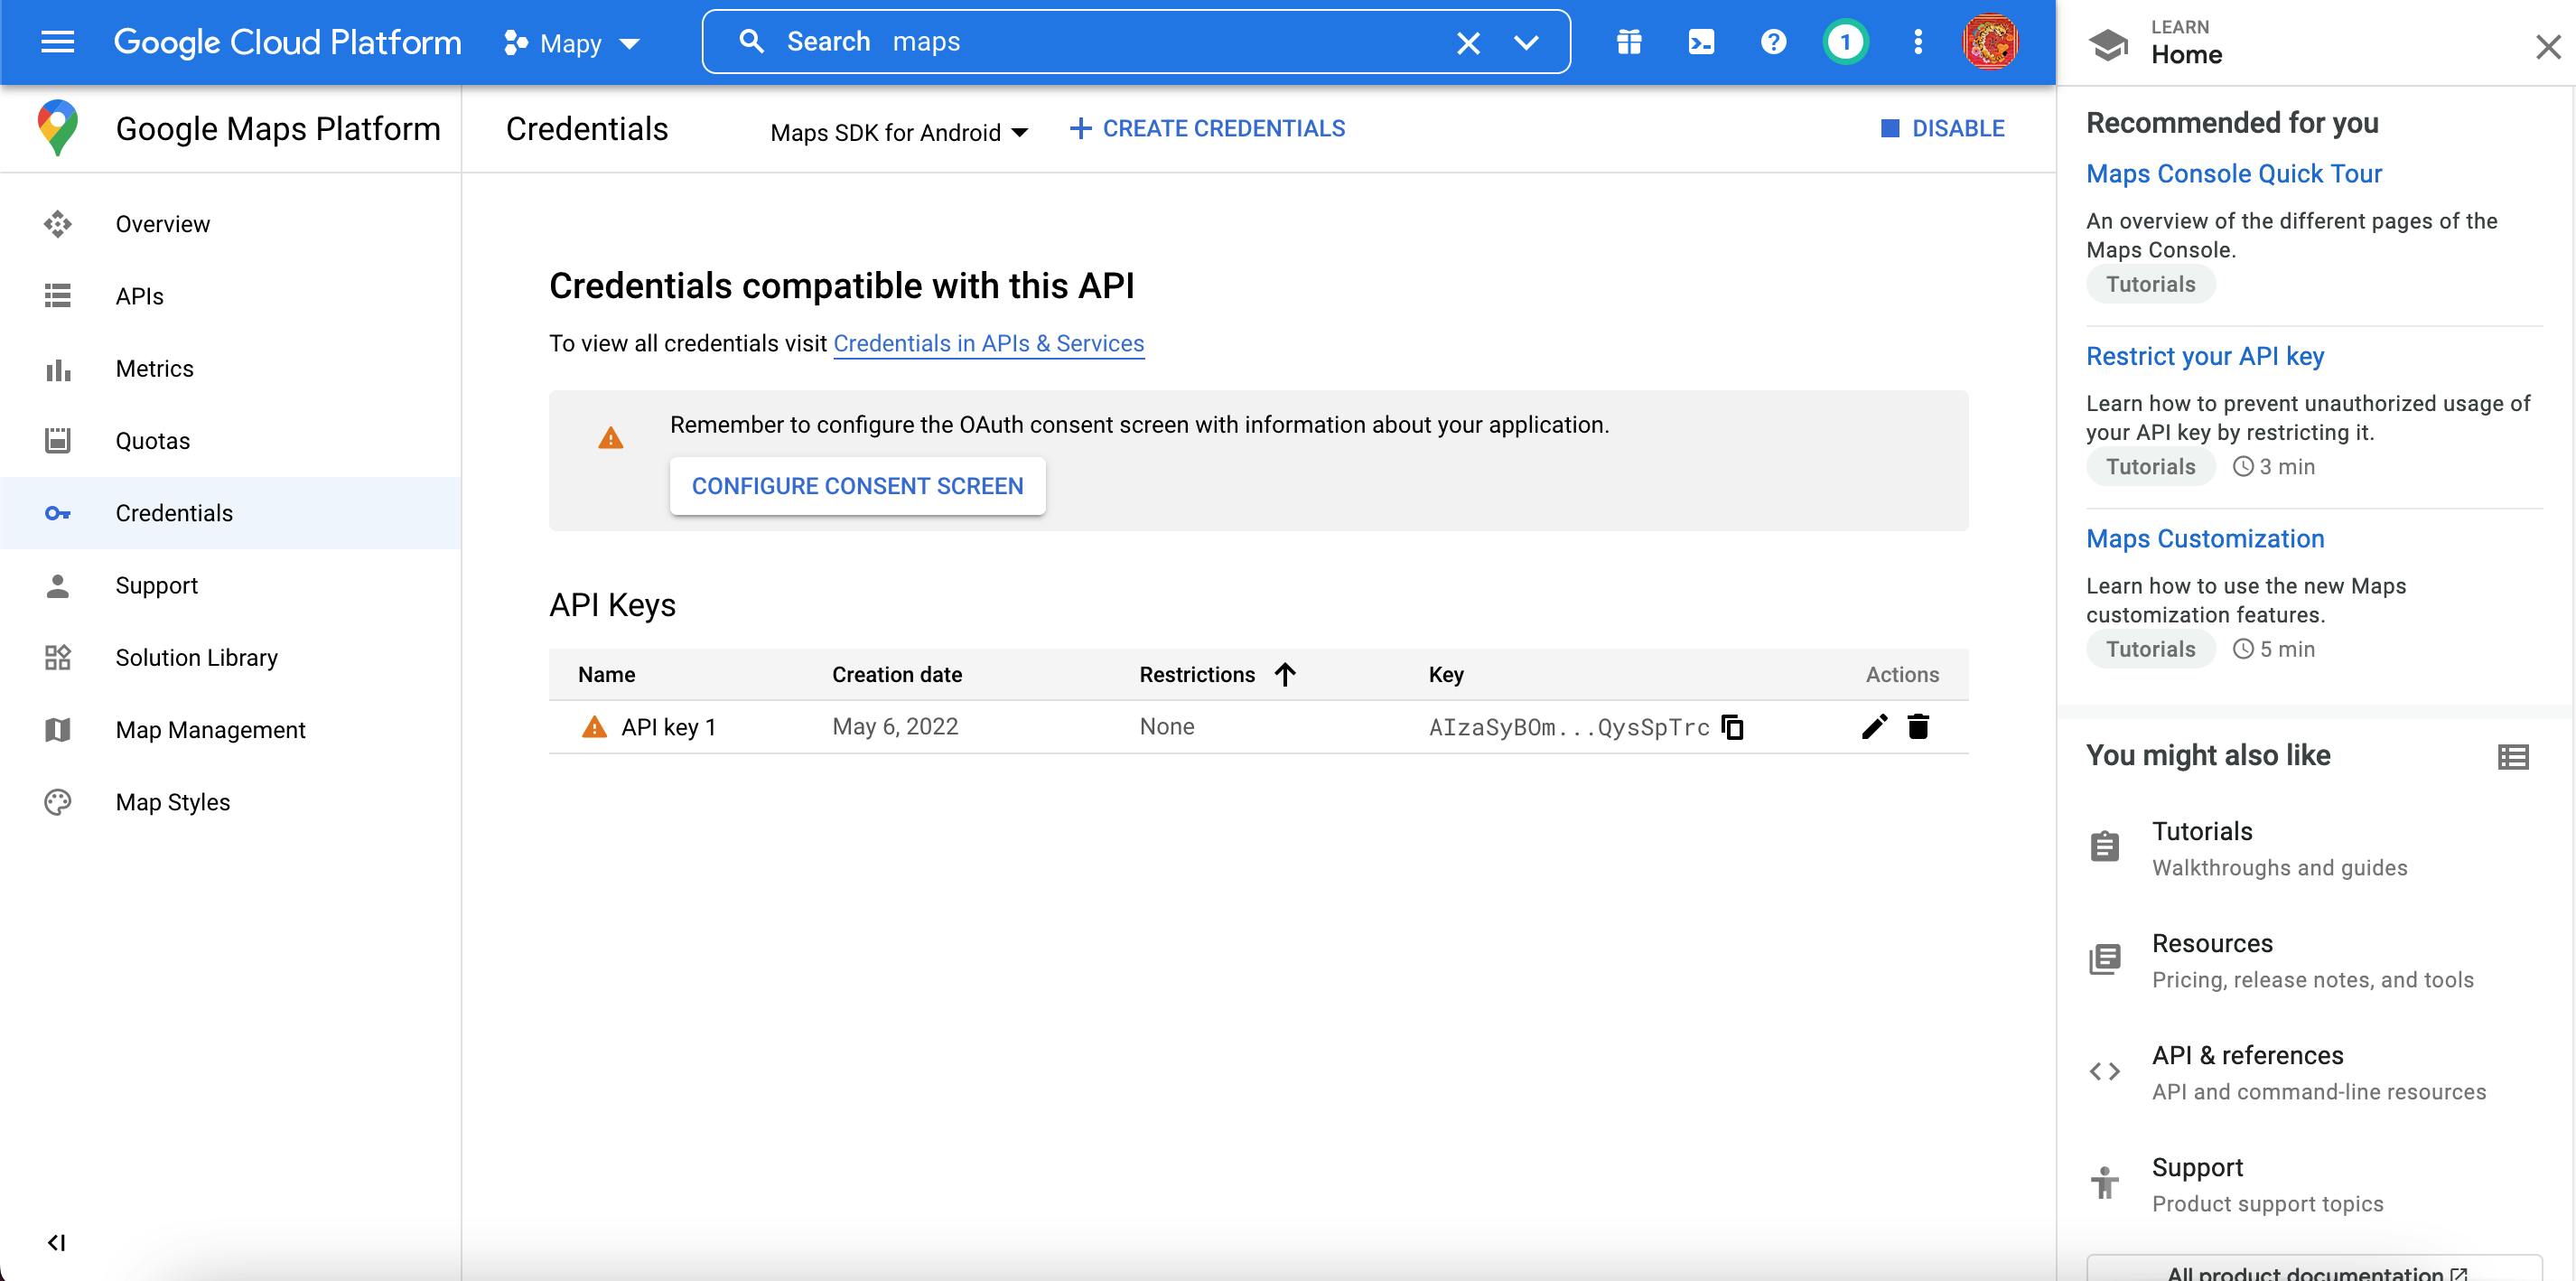
When the Maps SDK is enabled, the dashboard shows a list of enabled APIs. In the left panel search for "Credentials" and make a click.
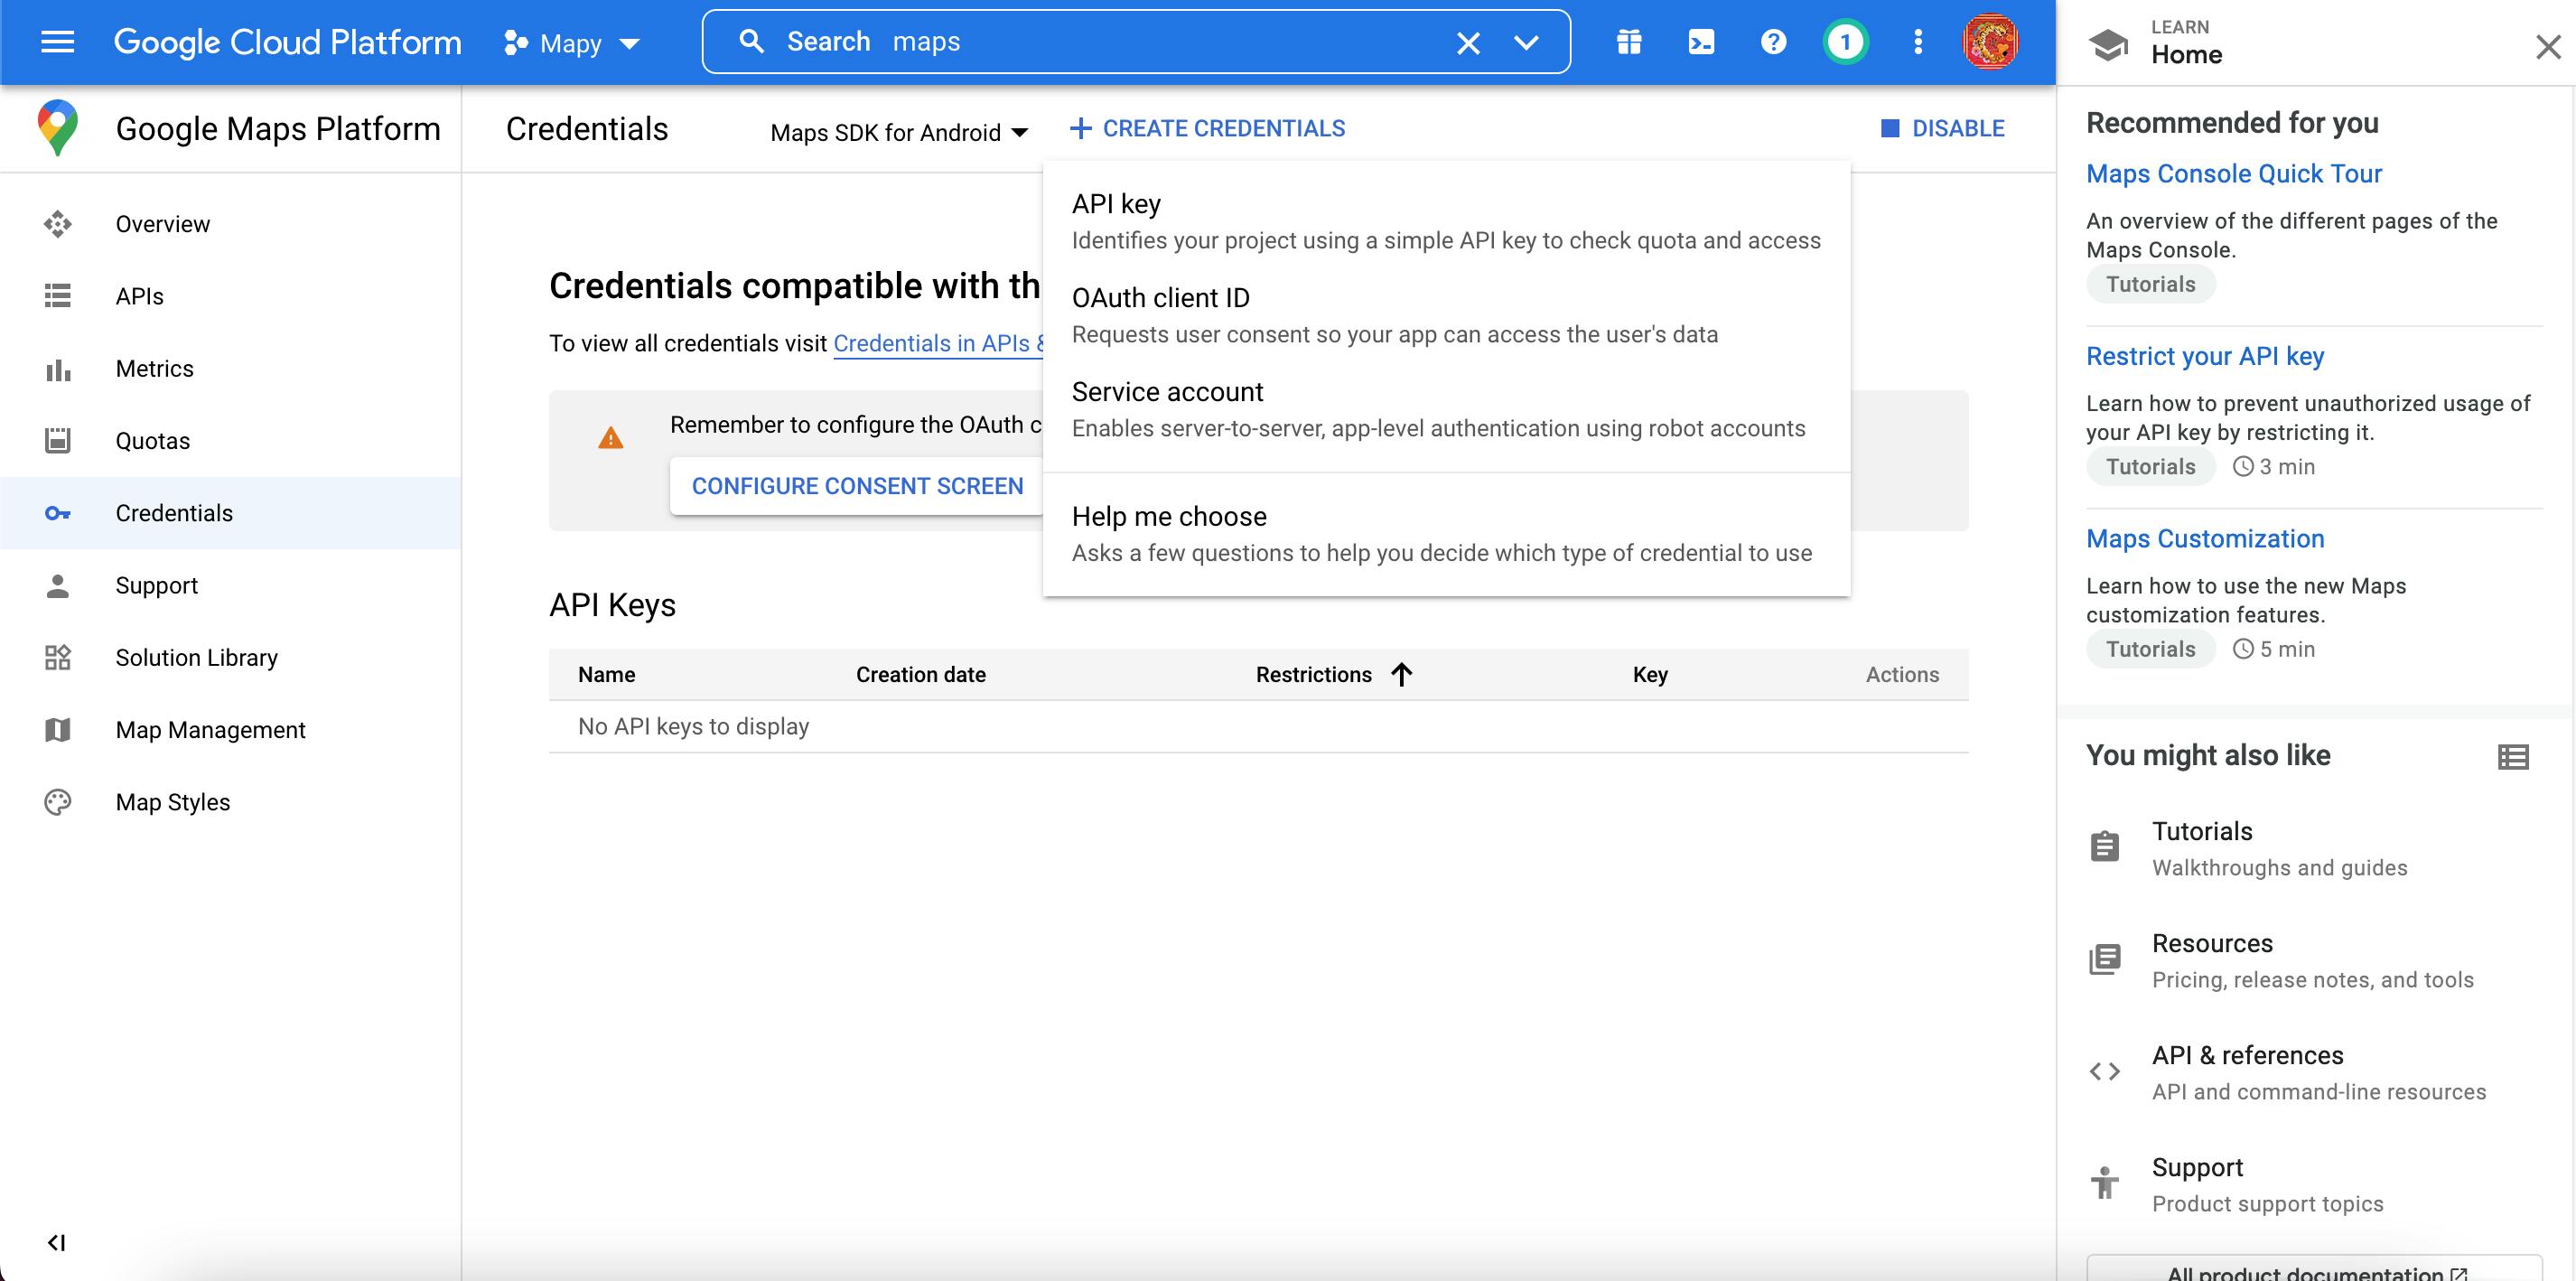
Click on the button "Create Credentials"
Wait for the API key creation and when it finishes, click on the copy button and save the API Key for later.
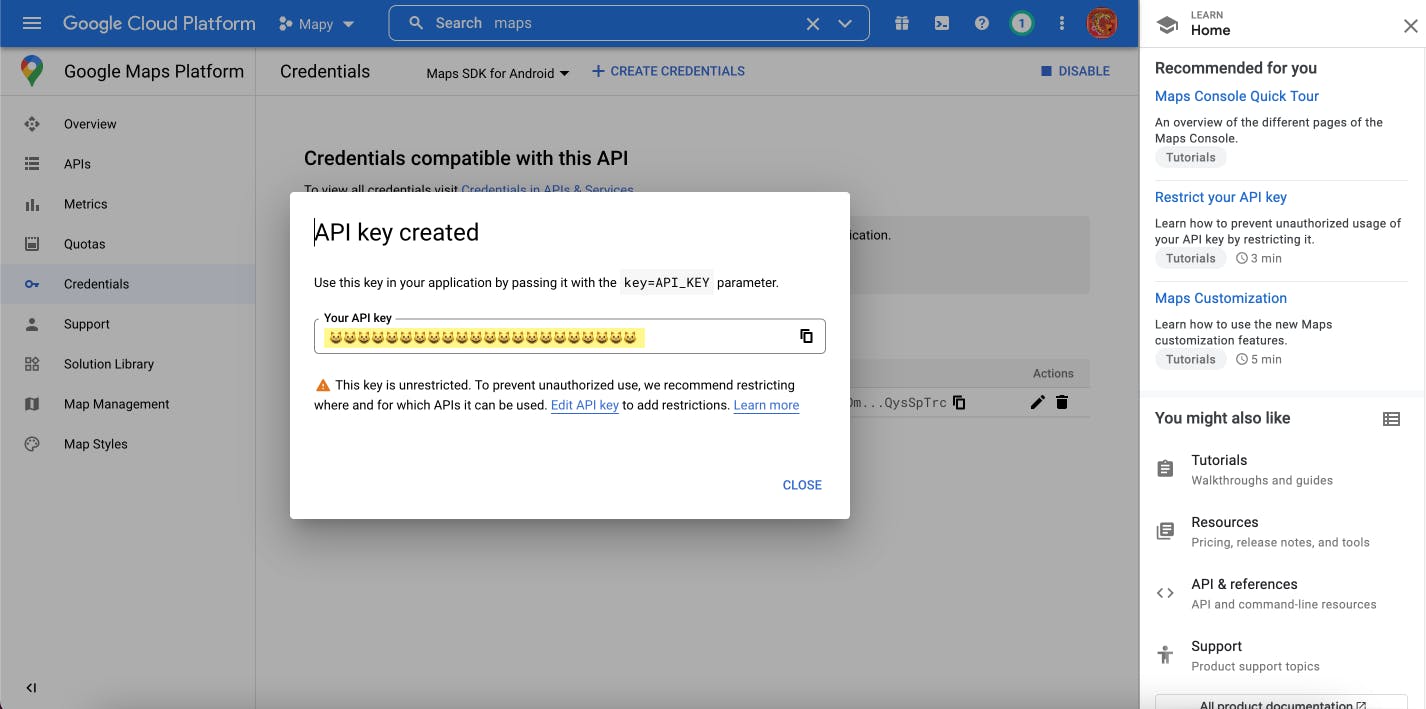
Make sure you have saved the API key in an accessible but safe place because later inside your Android Project, you will need it for configuration.
Now the new API Key is listed, click on it to configure.
Now add your configuration, for the purpose of this tutorial only setting Application restrictions to Android is enough.
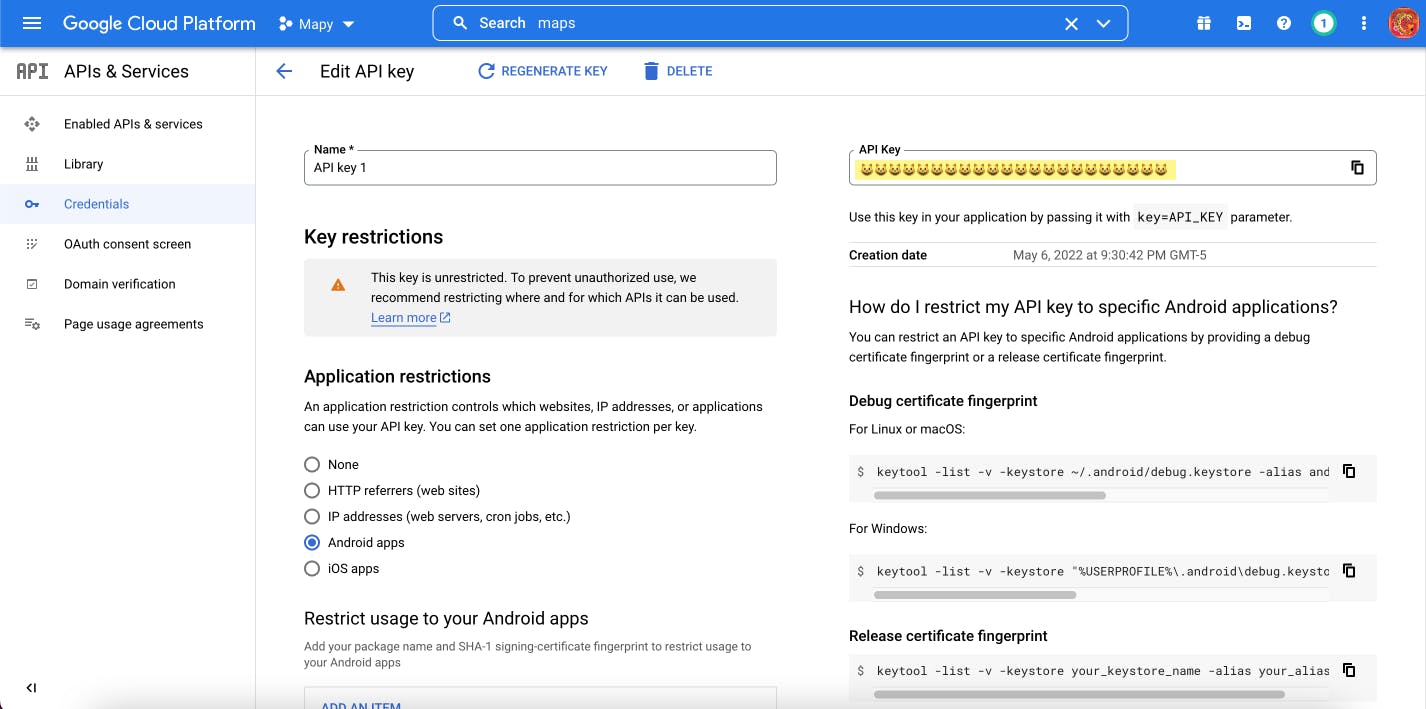
And that is all from the configuration.
⌨️ 4. Building the Android App
🔐 4.1 Creating the Certificate
This step is very important because it is a mandatory requirement to use Huawei's Kits. But if you already have one previously created you can skip to the next step.
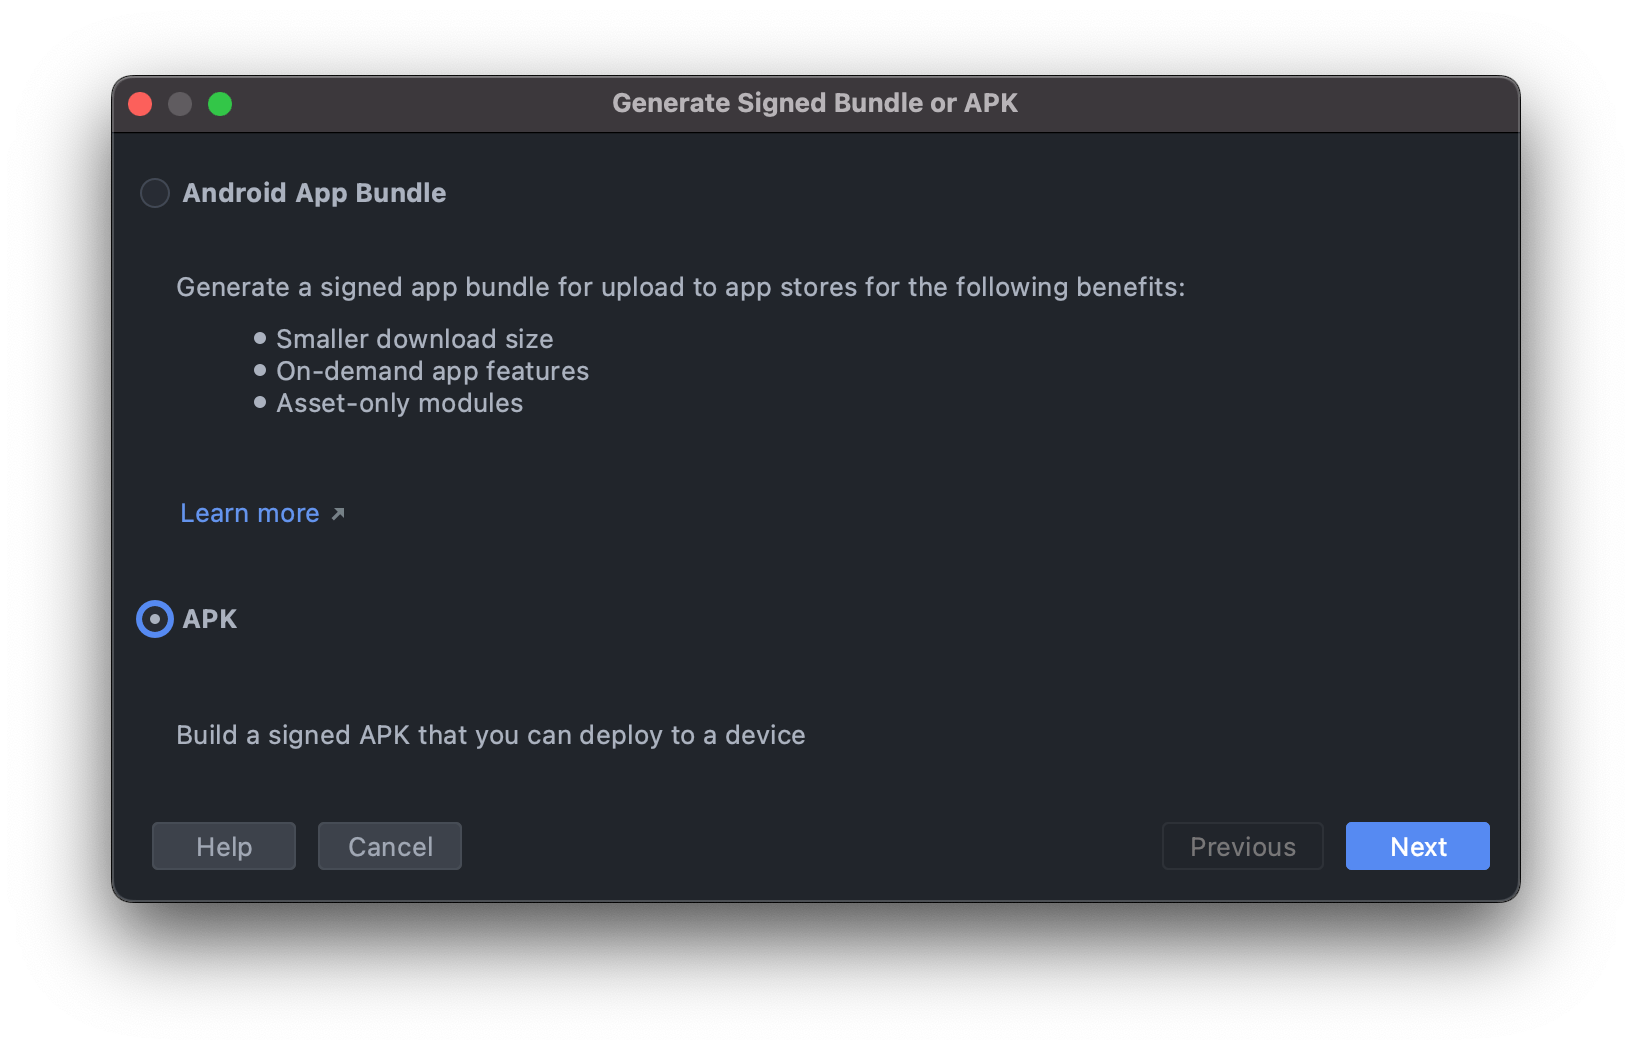
Go to Build > Generate Signed Bundle or APK, select the option APK, and click "Next".
Click on the button "Create new ...".
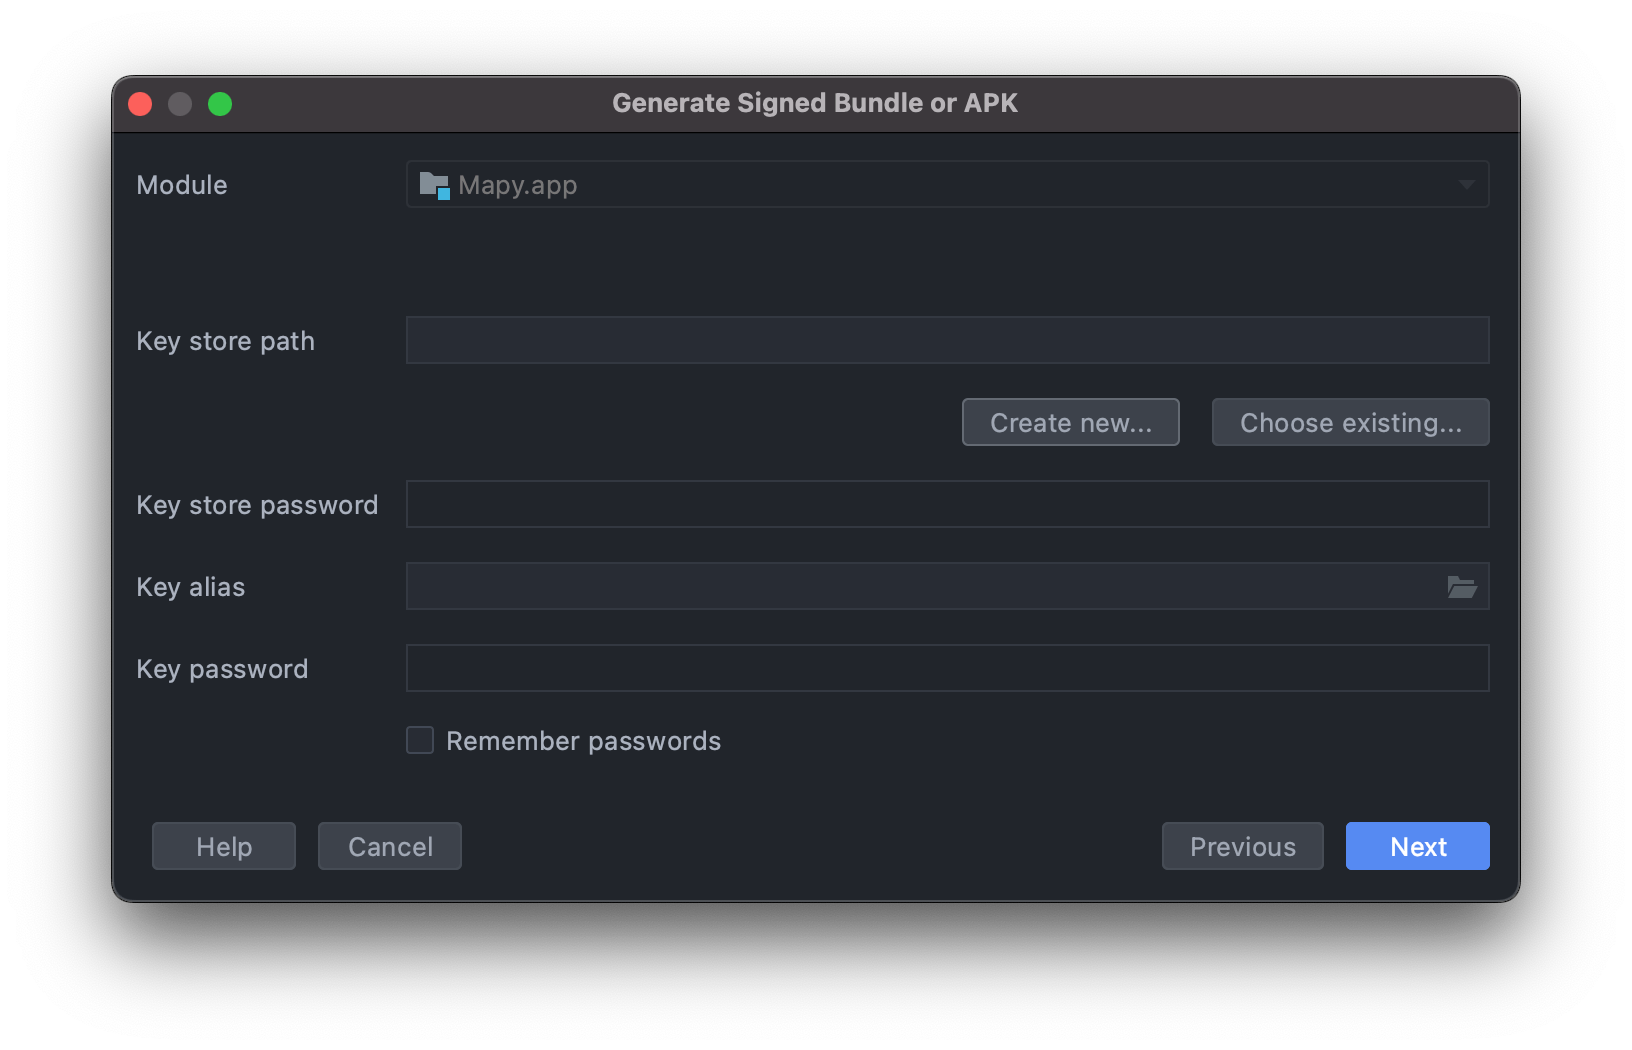
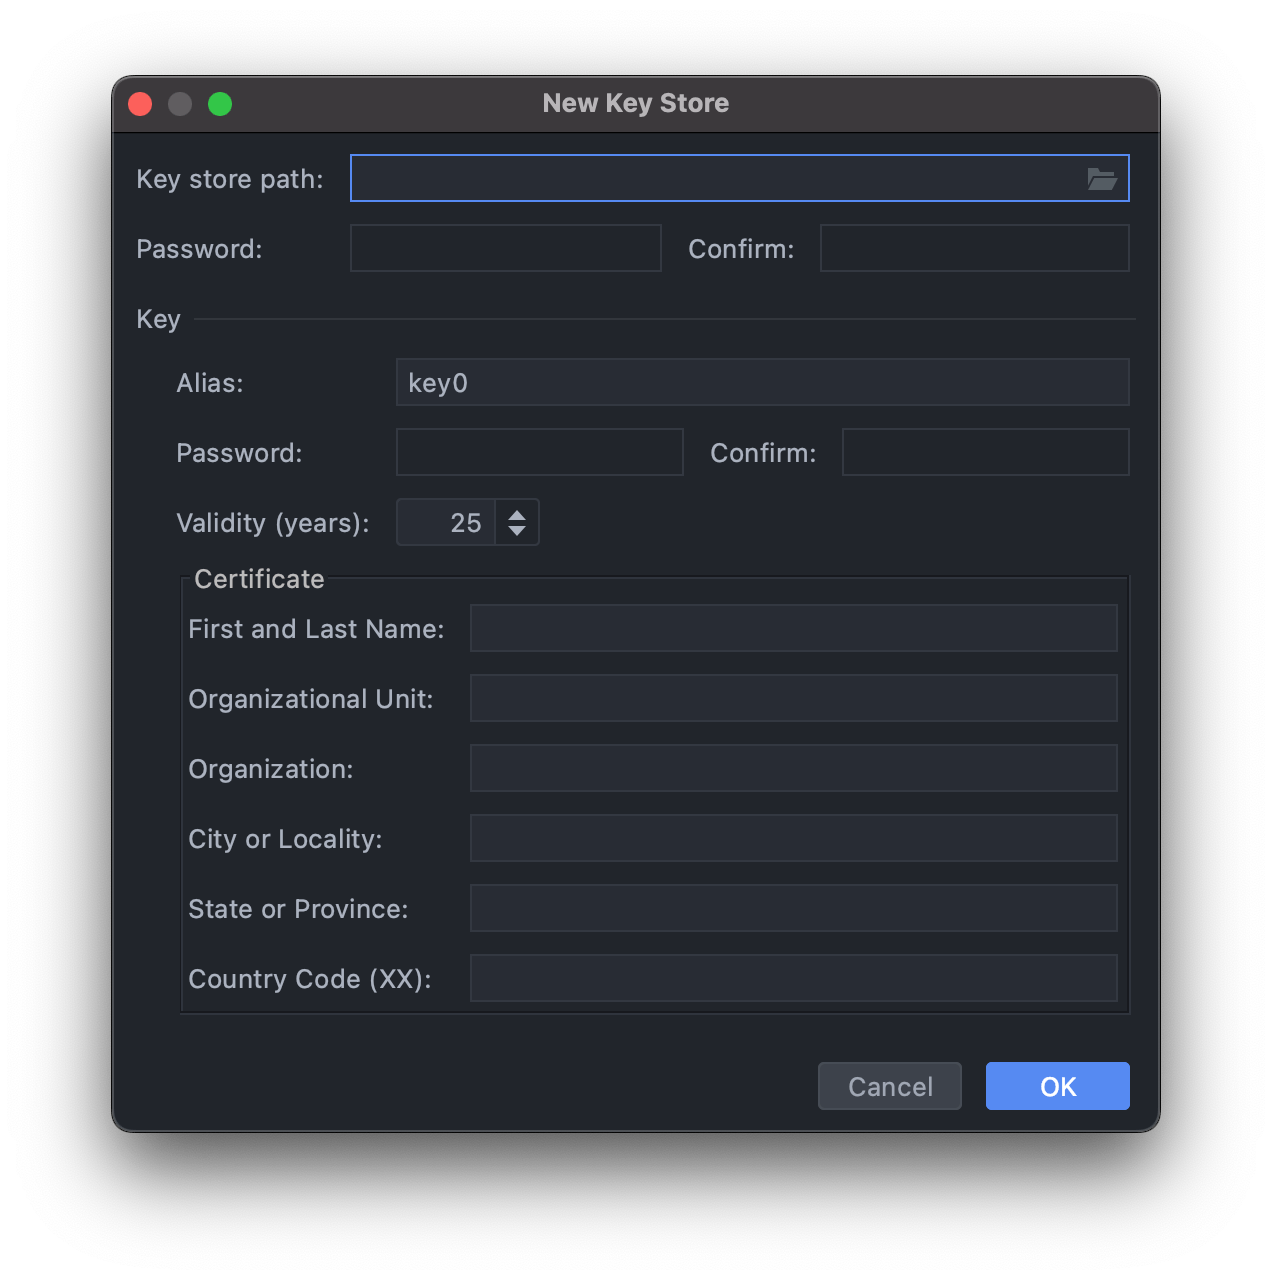
Fill at least all the next fields:
- Password
- Confirm
- Alias
- Password
- Confirm
- First and Last Name
Remember to save in a safe place your data used in this configuration.
Once your information is correct, click on "OK".
Back to the previous screen, some fields are going to be fulfilled from the recently Key Store that you just created.
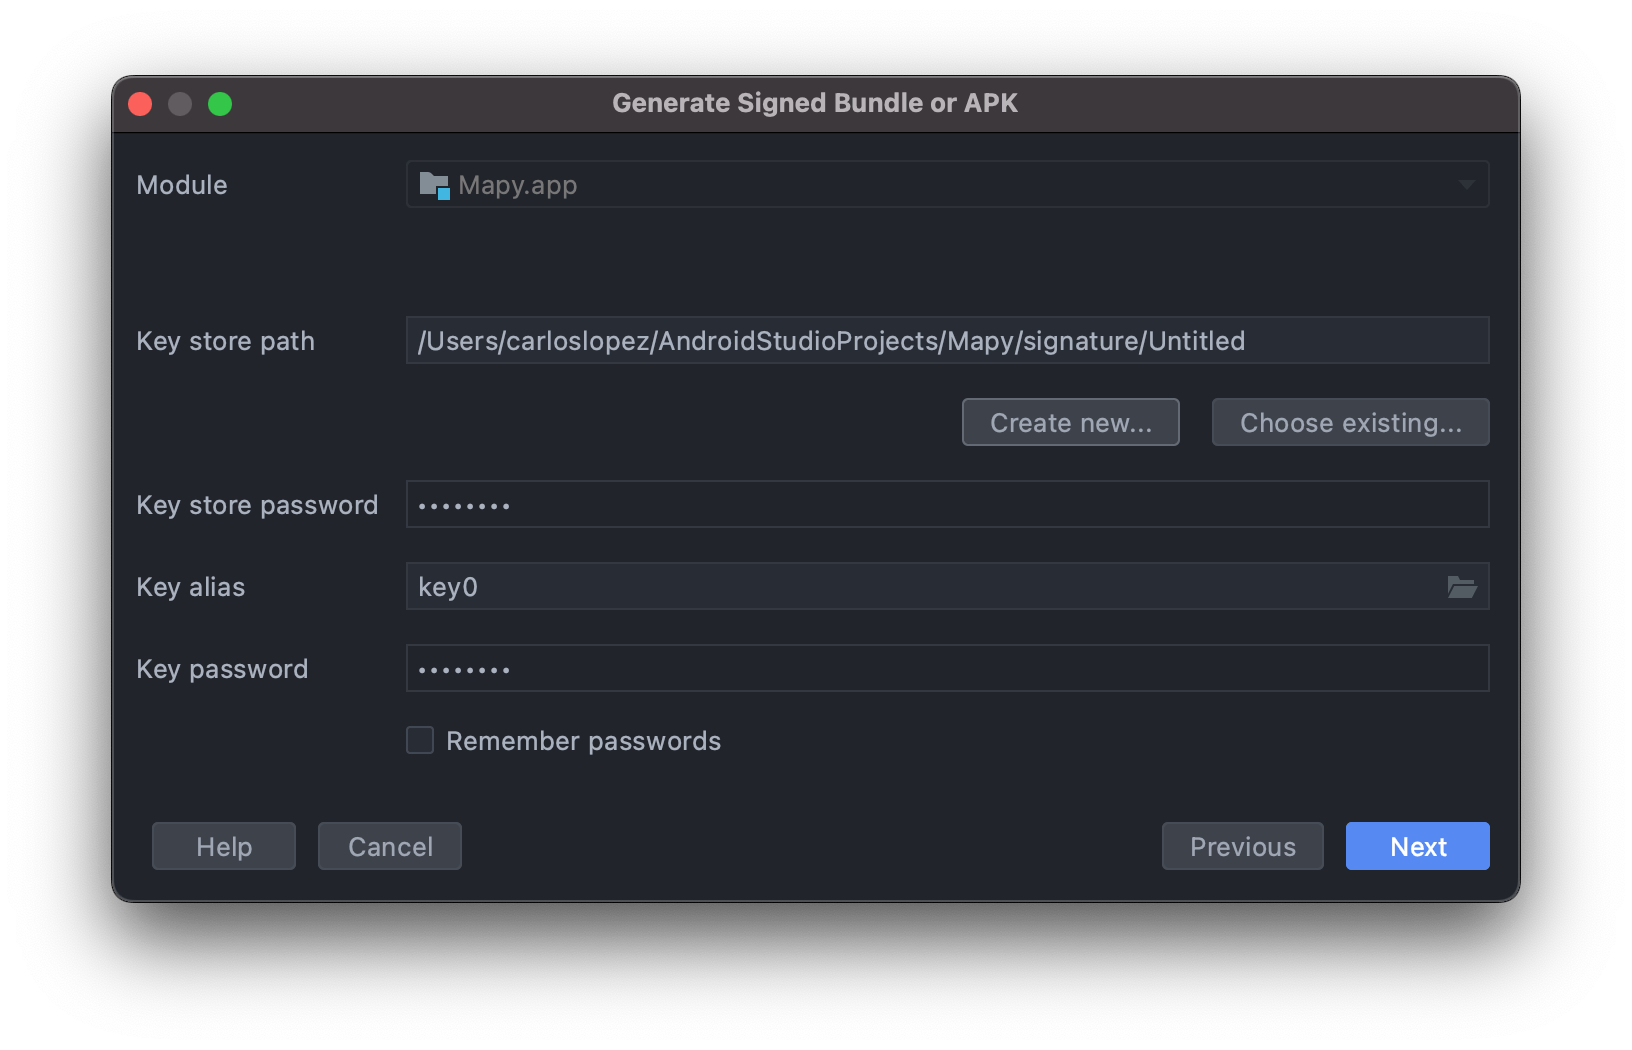
For now, we don't need to continue the process because for the moment we only needed the creation of the Certificate. You can click "Cancel".
🐘 4.2 Configuring Gradle
Open the build.gradle (Project level) and inside buildscript block, search for dependencies and add the next line:
classpath 'com.huawei.agconnect:agcp:1.6.0.300'
Also in the build.gradle (Project level), inside buildscript block, search for repositories block, and add the maven repository.
maven { url 'https://developer.huawei.com/repo/' }
Now search the settings.gradle file and add to the repositories block that is inside pluginManagement block the next line:
maven { url 'https://developer.huawei.com/repo/' }
Just like in the previous step, add to the repositories block that is inside dependencyResolutionManagement block the next line:
maven { url 'https://developer.huawei.com/repo/' }
Switch to the build.gradle (Module level) and add in the plugins block:
id 'com.huawei.agconnect'
In the same file, inside the android block add the signingConfig configuration:
signingConfigs {
    config {
        storeFile file('[PATH_TO_YOUR_KEY_FILE]')
        storePassword '[PASSWORD]'
        keyPassword '[PASSWORD]'
        keyAlias '[ALIAS]'
    }
}
Now it's time to create the flavors configuration. Below the SigningConfigs add:
flavorDimensions "provider"
productFlavors {
    huawei {
        dimension "provider"
        versionNameSuffix "HMS"
    }
    google {
        dimension "provider"
        versionNameSuffix "GMS"
    }
}
Modify your buildTypes block by adding the signingConfig like this:
buildTypes {
    debug {
        signingConfig signingConfigs.config // This
    }
    release {
        signingConfig signingConfigs.config // This
        minifyEnabled false
        proguardFiles getDefaultProguardFile('proguard-android-optimize.txt'), 'proguard-rules.pro'
    }
}
And now, search the dependencies block and add the Google maps and Huawei maps dependencies:
huaweiImplementation 'com.huawei.hms:maps:6.3.1.304'
googleImplementation 'com.google.android.gms:play-services-maps:18.0.2'
As you can see in the above code block, instead of using the common implementation method, we use huaweiImplementation and googleImplementation. This is because we defined the flavors and it allows us to use these dependencies only when one of those specific flavors is active.
📂 4.3 Creating folder structure
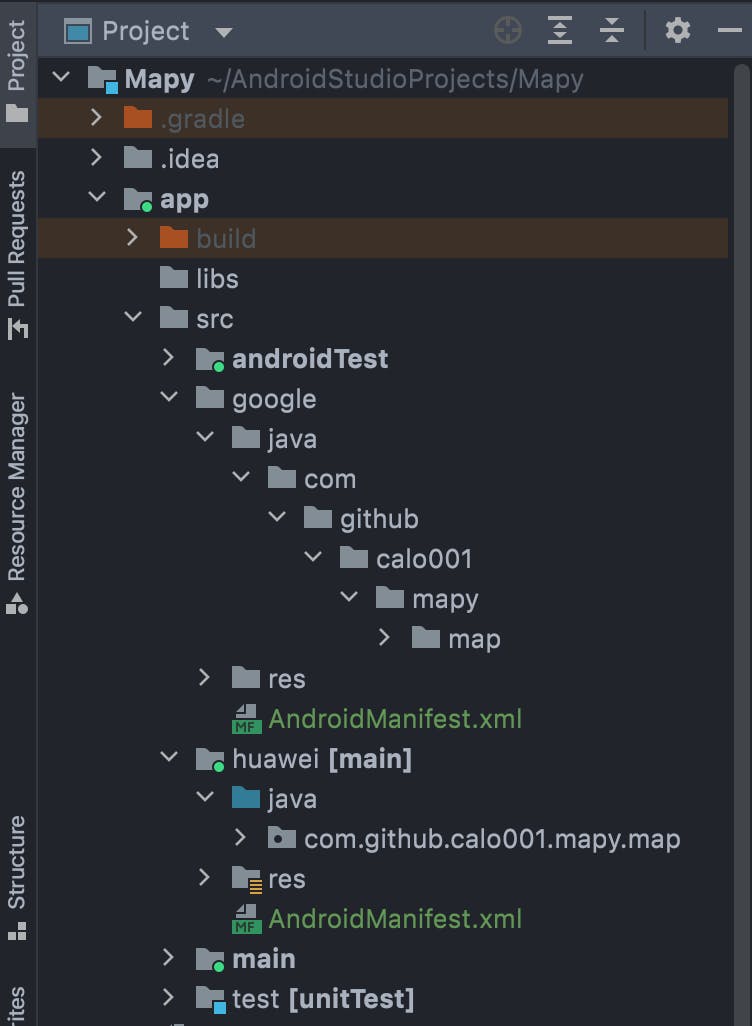
The project needs the following folder structure that you can see in the picture below, you can create it by using Android Studio or directly on a File explorer.
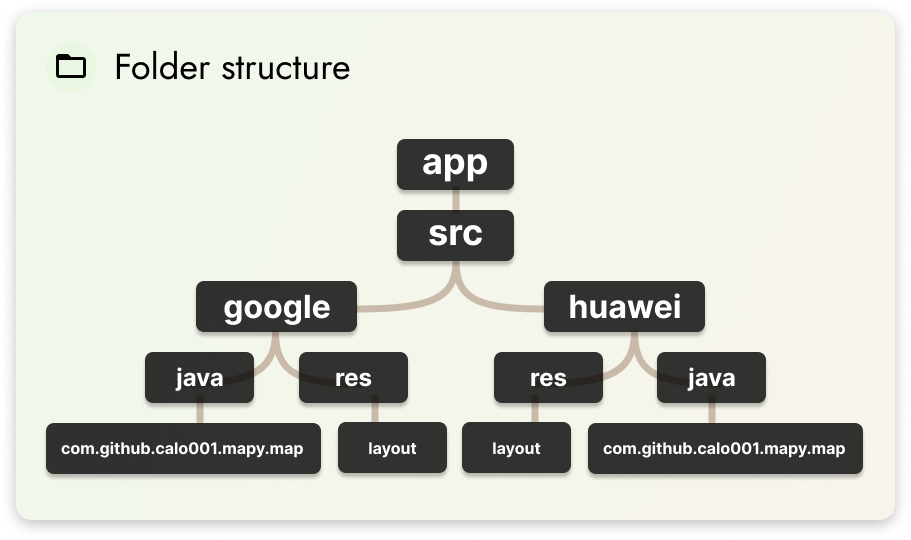
The directories "huawei" and "google" are interchangeable depending on the active flavor. Only the code and resources of the activated flavor will be used to compile and run.
Should look something like this:
🧬 4.4 Adding the common code
Go to your main source code location, where you can find your MainActivity class, and create an interface called MapManagerInterface with this content:
interface MapManagerInterface <M> {
    fun addMarker(map: M)
    fun moveCamera(map: M)
    fun loadMapAsync(supportFragmentManager: FragmentManager)
}
Like above, create a class called Coordinate with this code:
const val DEFAULT_ZOOM = 4f

data class Coordinate(
    val lat: Double,
    val long: Double,
    val title: String,
    val snippet: String,
)
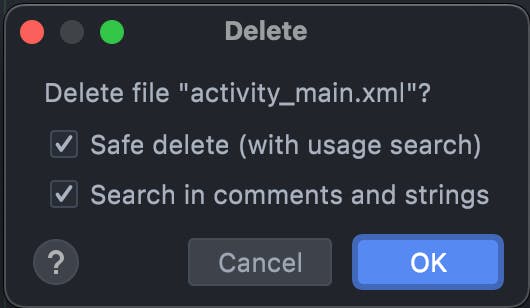
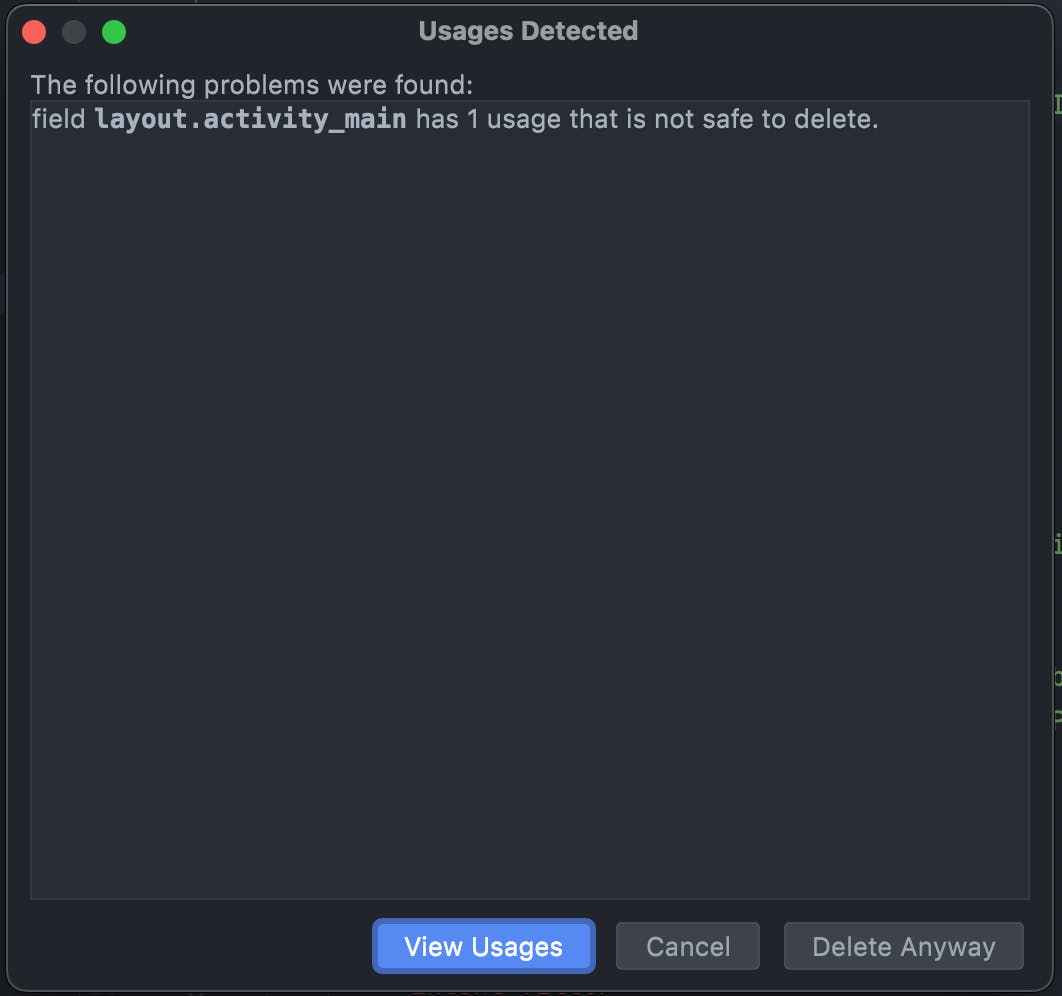
Also, we need to delete the activity_main.xml file. A warning of deleting that file will appear, make click on "Delete anyway".
📕 4.5 Adding code specific for Huawei
Make sure you are using the Huawei Build Variant by opening the Build Variants panel and selecting it.
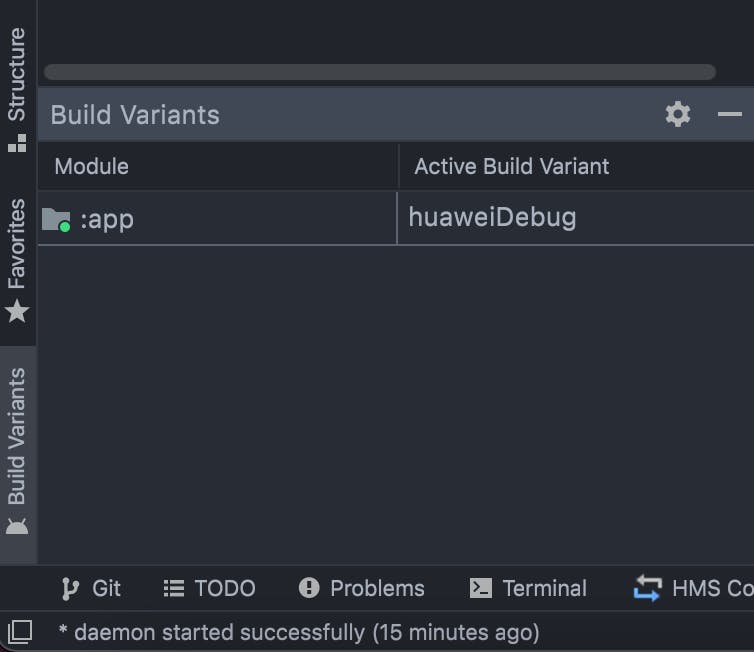
Search in your project structure for the content of the Huawei flavor.
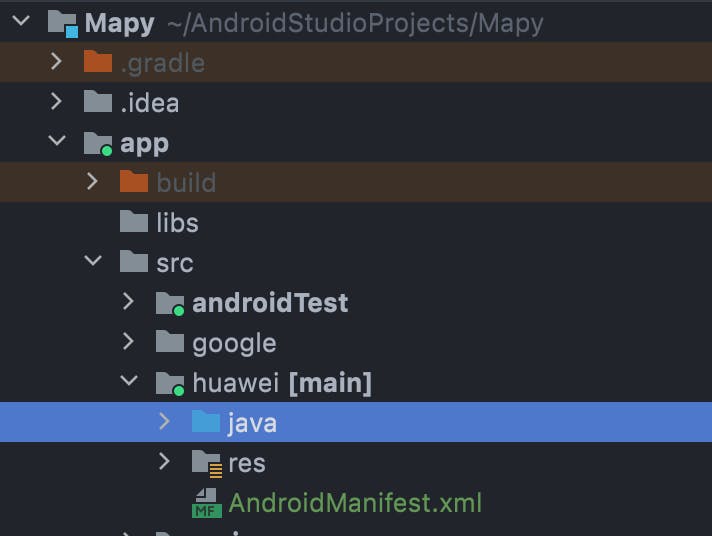
And Inside the map package create the next class:
class MapManager(
    private val fragment: Int,
    private val coordinate: Coordinate,
): MapManagerInterface<HuaweiMap>, OnMapReadyCallback {
    override fun onMapReady(map: HuaweiMap) {
        moveCamera(map)
        addMarker(map)
    }

    override fun addMarker(map: HuaweiMap) {
        val options = MarkerOptions()
            .position(LatLng(coordinate.lat, coordinate.long))
            .title(coordinate.title)
            .snippet(coordinate.snippet)

        map.addMarker(options)
    }

    override fun moveCamera(map: HuaweiMap) {
        map.moveCamera(
            CameraUpdateFactory.newLatLngZoom(
                LatLng(
                    coordinate.lat,
                    coordinate.long,
                ),
                DEFAULT_ZOOM
            )
        )
    }

    override fun loadMapAsync(supportFragmentManager: FragmentManager) {
        val mapFragment = supportFragmentManager.findFragmentById(fragment) as SupportMapFragment
        mapFragment.getMapAsync(this)
    }
}
And please check that you have these imports correctly:
import com.huawei.hms.maps.CameraUpdateFactory
import com.huawei.hms.maps.HuaweiMap
import com.huawei.hms.maps.OnMapReadyCallback
import com.huawei.hms.maps.SupportMapFragment
import com.huawei.hms.maps.model.LatLng
import com.huawei.hms.maps.model.MarkerOptions
Now go to your res folder that is inside your Huawei flavor and create the layout directory then create the file activity_main.xml with this content:
<?xml version="1.0" encoding="utf-8"?>
<LinearLayout
    xmlns:android="http://schemas.android.com/apk/res/android"
    xmlns:tools="http://schemas.android.com/tools"
    android:layout_width="match_parent"
    android:layout_height="match_parent"
    tools:context=".MainActivity">

    <fragment
        android:id="@+id/map"
        android:name="com.huawei.hms.maps.SupportMapFragment"
        android:layout_width="match_parent"
        android:layout_height="match_parent"
        />

</LinearLayout>
Inside your res directory of your Huawei flavor add a custom AndroidManifest.xml:
<?xml version="1.0" encoding="utf-8"?>
<manifest
    xmlns:android="http://schemas.android.com/apk/res/android"
    xmlns:tools="http://schemas.android.com/tools">

    <queries>
        <intent>
            <action android:name="com.huawei.hms.core.aidlservice" />
        </intent>
    </queries>

    <application tools:ignore="MissingApplicationIcon">
        <meta-data
            android:name="com.huawei.hms.client.channel.androidMarket"
            android:value="false" />
    </application>

</manifest>
Is recommended that don't forget to update your agconnect-services.json file after any change you made in the Project settings (in the Huawei Developer Console), like enabling a service, changing a value, etc. Visit your Project Settings sections and click on "agconnect-services.json" button located in the App information section, finally move that file to your project folder inside your app directory.
📘 4.6 Adding code specific for Google
Now we're going to do almost the same changes as the "Adding code specific for Huawei" step but in the flavor Google. So, change your Build Variant to GoogleDebug.
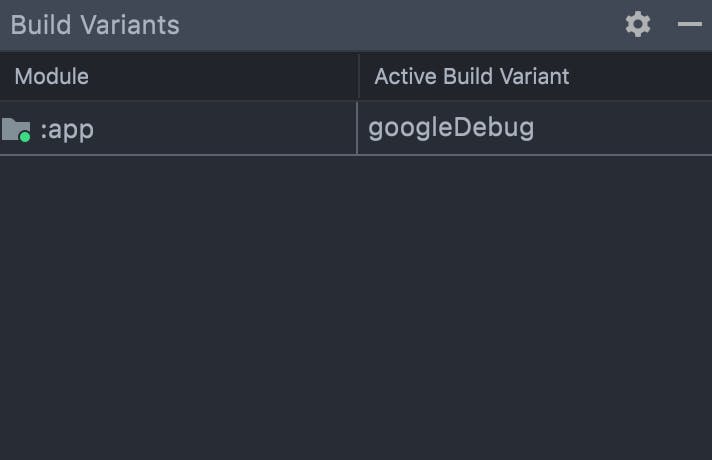
The first step is quite similar to Huawei's flavor, search in your project structure for the content for the Google flavor.
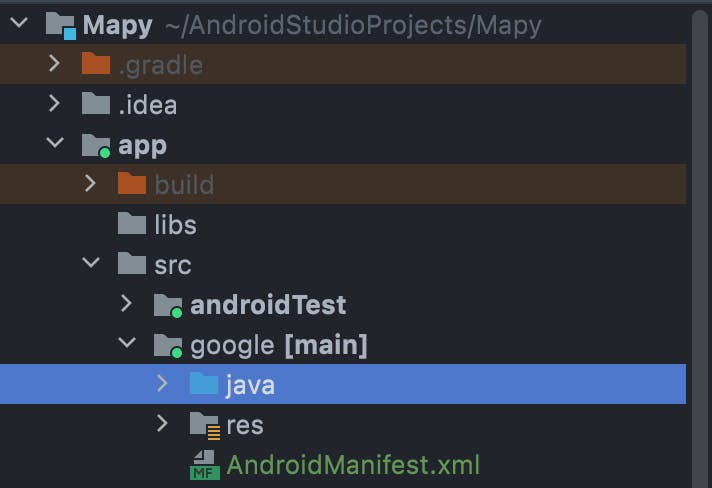
Inside the map package create the next class:
class MapManager(
    private val fragment: Int,
    private val coordinate: Coordinate,
): MapManagerInterface<GoogleMap> , OnMapReadyCallback {
    override fun onMapReady(map: GoogleMap) {
        moveCamera(map)
        addMarker(map)
    }

     override fun moveCamera(map: GoogleMap) {
        map.moveCamera(CameraUpdateFactory.newLatLngZoom(
            LatLng(
                coordinate.lat,
                coordinate.long,
            ),
            DEFAULT_ZOOM
        ))
    }

    override fun addMarker(map: GoogleMap) {
        val options = MarkerOptions()
            .position(LatLng(coordinate.lat, coordinate.long))
            .title(coordinate.title)
            .snippet(coordinate.snippet)

        map.addMarker(options)
    }

    override fun loadMapAsync(supportFragmentManager: FragmentManager) {
        val mapFragment = supportFragmentManager.findFragmentById(fragment) as SupportMapFragment
        mapFragment.getMapAsync(this)
    }
}
Check that your imports include the correct ones:
import com.google.android.gms.maps.CameraUpdateFactory
import com.google.android.gms.maps.GoogleMap
import com.google.android.gms.maps.OnMapReadyCallback
import com.google.android.gms.maps.SupportMapFragment
import com.google.android.gms.maps.model.LatLng
import com.google.android.gms.maps.model.MarkerOptions
Now go to your res folder inside your Google flavor and create the layout directory and inside of it create the file activity_main.xml with this content:
<?xml version="1.0" encoding="utf-8"?>
<LinearLayout
    xmlns:android="http://schemas.android.com/apk/res/android"
    xmlns:tools="http://schemas.android.com/tools"
    android:layout_width="match_parent"
    android:layout_height="match_parent"
    tools:context=".MainActivity">

    <fragment
        android:id="@+id/map"
        android:name="com.google.android.gms.maps.SupportMapFragment"
        android:layout_width="match_parent"
        android:layout_height="match_parent"
        />

</LinearLayout>
Also, inside your res directory that is in your Google flavor, add a custom AndroidManifest.xml:
<?xml version="1.0" encoding="utf-8"?>
<manifest
    xmlns:android="http://schemas.android.com/apk/res/android"
    xmlns:tools="http://schemas.android.com/tools">

    <application tools:ignore="MissingApplicationIcon">
        <meta-data
            android:name="com.google.android.geo.API_KEY"
            android:value="[YOUR_API_KEY]" />
    </application>
</manifest>
Change the [YOUR_API_KEY] wildcard to your API Key created on Google Cloud Console.
📱 4.7 Configure the MainActivity
Use the method loadMapAsync from an object of the class MapManager to call the code that will show the map in the activity.
class MainActivity : AppCompatActivity() {
    override fun onCreate(savedInstanceState: Bundle?) {
        super.onCreate(savedInstanceState)
        setContentView(R.layout.activity_main)

        MapManager(
            fragment = R.id.map,
            coordinate = Coordinate(
                title = "México",
                snippet = "Viva México!",
                lat = 23.5540767,
                long = -102.6205,),
        ).loadMapAsync(supportFragmentManager)
    }
}
And add the uses permissions to your AndroidManifest located in your main source folder.
<uses-permission android:name="android.permission.ACCESS_FINE_LOCATION" />
<uses-permission android:name="android.permission.ACCESS_BACKGROUND_LOCATION" />
<uses-permission android:name="android.permission.ACCESS_COARSE_LOCATION" />
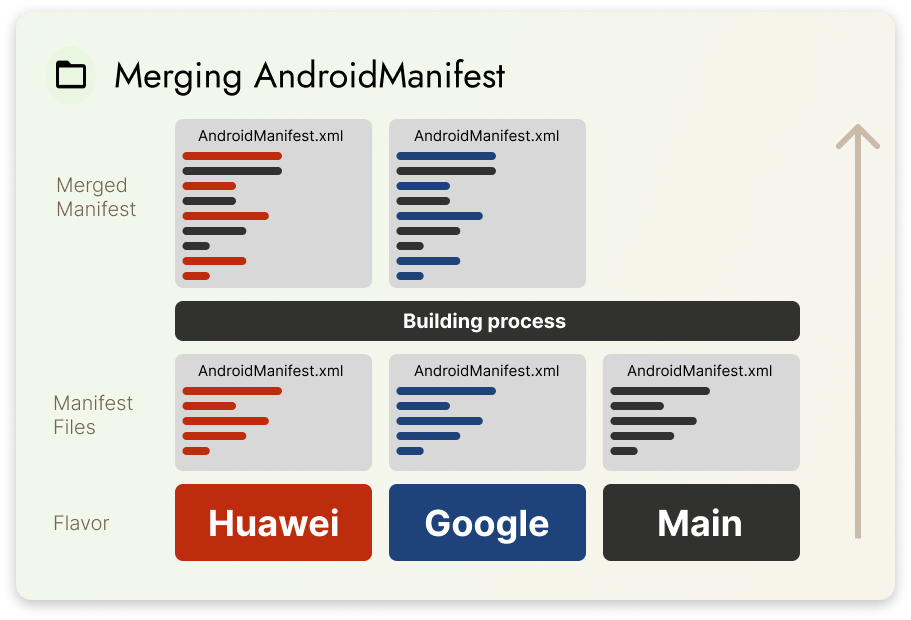
Why did we split the AndroidManifest file between flavors? When the app is built the AndroidManifest files are merged, but the priority is on the files that flavors have. Because the HMS requires setting some specific configuration to the AndroidManifest that the GMS doesn't need to have and vice versa, is better to end with three AndroidManifest files to avoid unused configuration on each build.
📲 5. Run the code
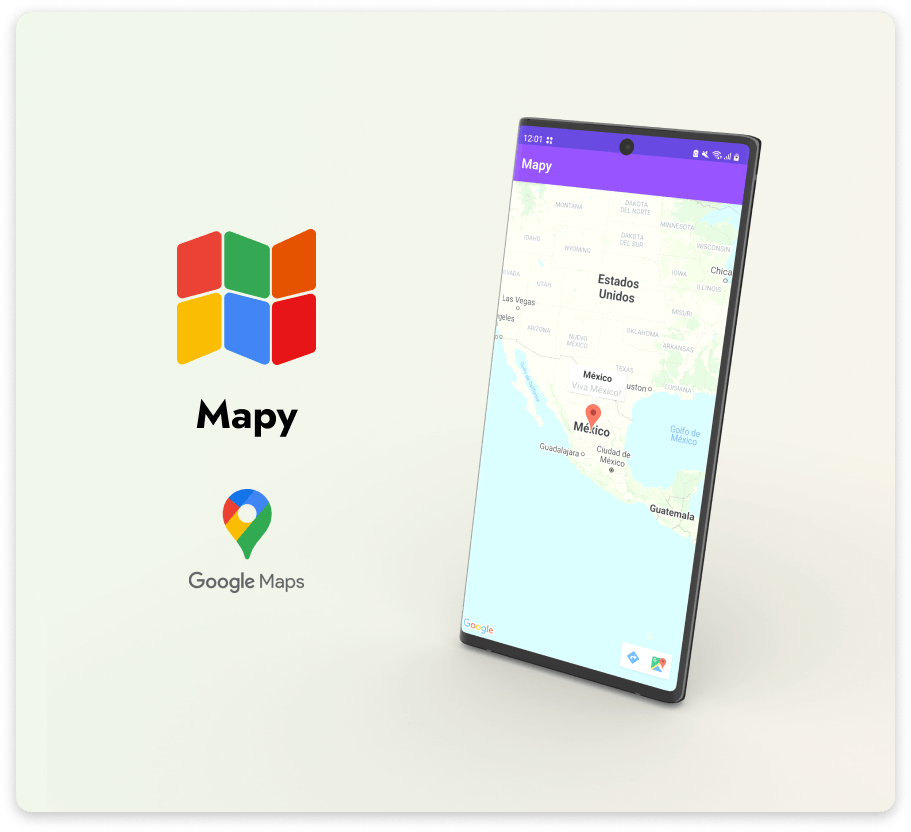
🟦 5.1 Running on a device with Google Mobile Services.
I'm running Mapy on a Galaxy S20 FE. What you need to do to run the app, is make sure that Android Studio is using the Google Build Variant, and then click on run!
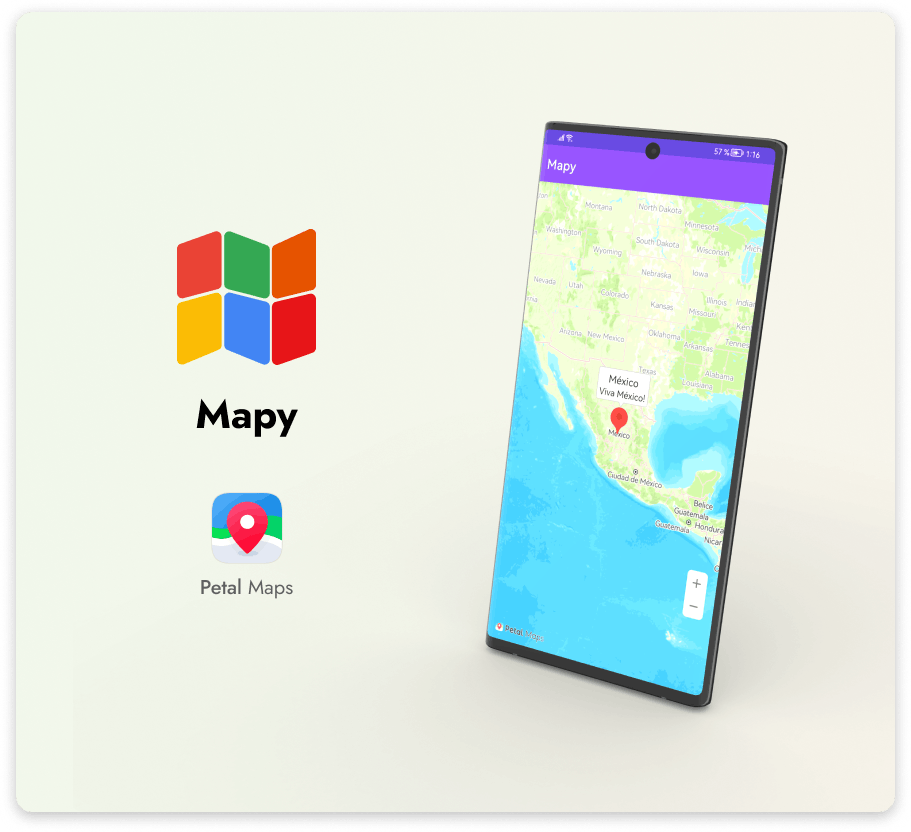
🟥 5.2 Running on a device with Huawei Mobile Services.
I'm running Mapy on a Huawei Mate 30 Pro. What you need to do to run the app, is make sure that Android Studio is using the Huawei Build Variant, and then click on run!
📃 Download source code
🧘🏻♂️ Final thoughts
The current situation of the development of fragmented devices is always an important topic when you want to distribute your App on a broad number of devices through App Stores, in this case, Google Play, and AppGallery.
Flavors are not a new or recent tool for development but it's a feature that helps to organize and structure your code when you have needs like supporting different platforms like this situation with Huawei. Fortunately using flavors is quite easy and practical.
The most difficult part of it is to think of a suitable way of separating responsibilities and dependencies between classes and try to not introduce very specific platform dependencies (like importing classes from HMS or GMS) in common classes like Activities, Services, etc. As developers, we have a variety of options like using Interfaces or implementing classes that work like composition in your common classes, or any other technique that helps to separate dependencies.
And finally, there are no excuses to not launch your App on a variety of platforms even in relatively new stores like AppGallery.
👋 See you next time!
